Woodworker's Journal 1994-18-1, страница 59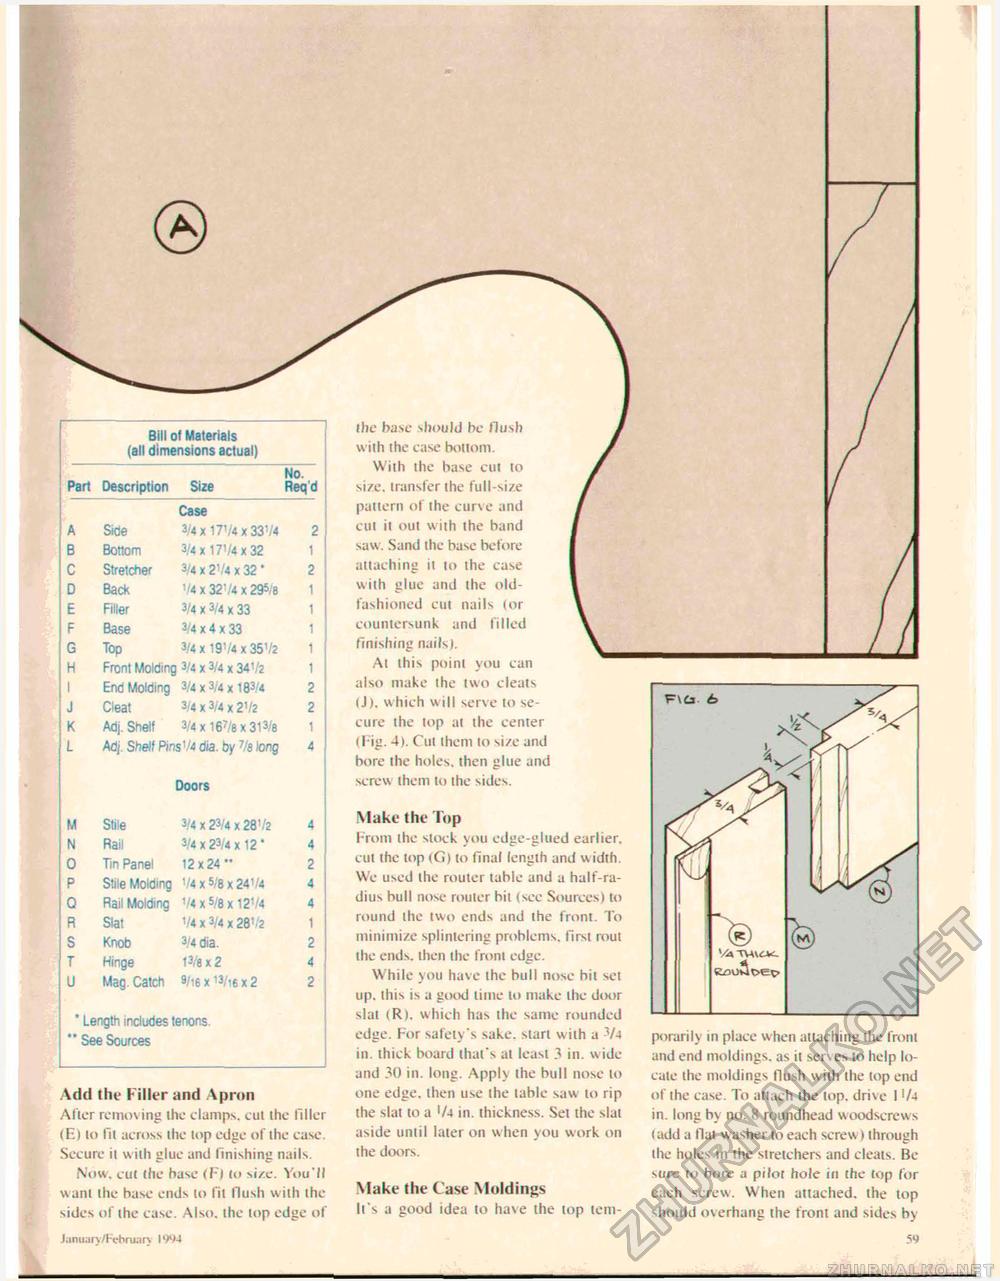
®
Add the Filler and Apron After removing the clamps, cut the filler (F) lo 111 across ihe lop edge of the case. Secure ii wilh glue and finishing nails. Now. cut the base (F) Co size. You'll wanl the base ends lo fit Hush with ihe sides of ihe case. Also, ihe lop edge of Januarv/Februarv I lW4 ihe base should be flush with ihe case bottom. With ihe base cut to size. transfer the full-size pattern of ihe curve and cut it oui wiih ihe band saw. Sand the base before attaching it lo ihe case with glue and the old-fashioned cut nails (or countersunk and filled finishing nails). Ai ihis poini you can also make ihe two cleats (J), which will serve to secure the top at the center (Fig. 4). Cut them to size and bore the holes, then glue and screw them to the sides. Make the Top From the stock you edge-glued earlier, cut the top(G) to final length and width. We used the router table and a half-radius bull nose router hit (see Sources) to round the two ends and the front. To minimize splintering problems, first rout the ends, then the front edge. While you have ihe bull nose bit set up. this is a goiuJ lime lo make ihe door slat (R). which has the same rounded edge. For safety's sake, start wilh a -V4 in. thick board that' s at least 3 in. wide and 30 in. long. Apply ihe bull nose to one edge, then use the table saw to rip the slat to a '/-* in. thickness. Set the slat aside until later on when you work on the doors. Make the Case Moldings It's a good idea to have the top tem porarily in place when attaching the front and end moldings, as it ser\es to help locate the moldings flush with the top end of the case. To attach the top. drive 1 '/4 in. long by no. 8 roundhead woodscrews (add a flat washer to each screw > through the holes in the stretchers and cleats. Be sure to bore a pilot hole in the top for each screw. When attached, the top should overhang the front and sides by 59 |
|||||||||||||||||||||||||||||||||||||||||||||||||||||||||||||||||||||||||||||||||||||||


