Woodworker's Journal 1994-18-2, страница 34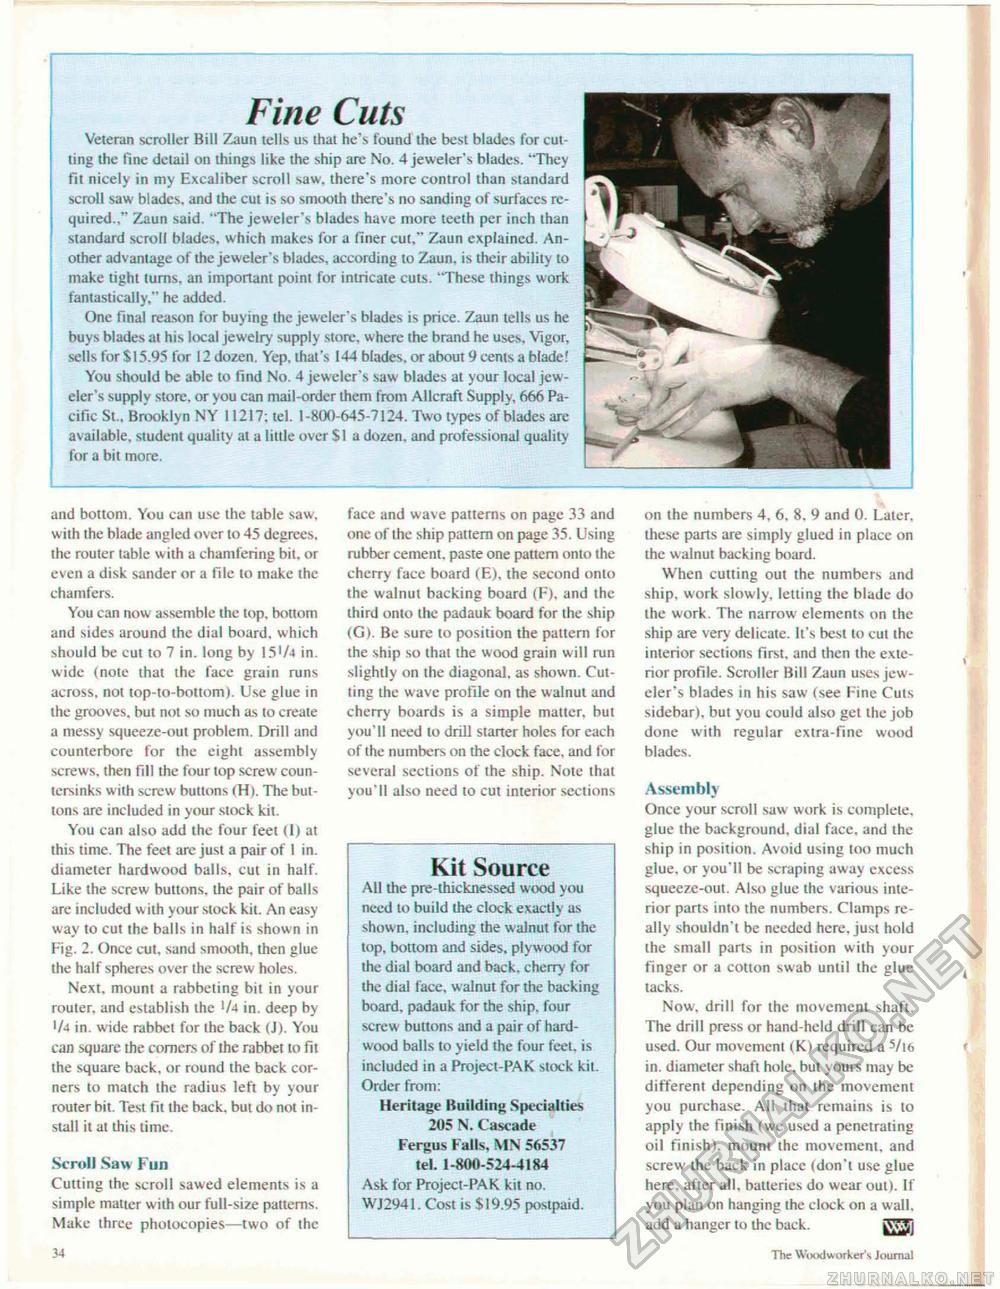
Fine Cuts Veteran scroller Bill Zaun tells us that he's found the best blades for cut ling the fine detail on things like the ship are No. 4 jeweler's blades. "They fit nicely in my Excaliber scroll saw. there's more control than standard scroll saw blades, and the cut is so smooth there's no sanding of surfaces required.," Zaun said. "The jeweler's blades have more teeth per inch than standard scroll blades, which makes for a finer cut," Zaun explained. Another advantage of the jeweler's blades, according to Zaun, is their ability to make tight turns, an important point for intricate cuts. "These things work fantastically," he added. One final reason for buying the jeweler's blades is price. Zaun tells us he buys blades at his local jewelry supply store, where the brand he uses. Vigor, sells for Si 5.95 for 12 dozen. Yep, that's 144 blades, or about 9 cents a blade! You should be able to find No. 4 jeweler's saw blades at your local jeweler's supply store, or you can mail-order them from Allcraft Supply, 666 Pacific St., Brooklyn NY 11217; tel. 1-800-645-7124. Two types of blades arc available, student quality al a little over SI a dozen, and professional quality for a bit more. and bottom. You can use the table saw. with the blade angled over to 45 degrees, the router table with a chamfering bit. or even a disk sander or a file lo make the chamfers. You can now assemble the top, bottom and sides around the dial board, which should be cut to 7 in. long by l5'/4 in. wide {note thai the face grain runs across, not top-to-botlom). Use glue in the grooves, but not so much as to create a messy squeeze-out problem. Drill and counterbore for the eight assembly screws, then fill the four top screw countersinks with screw buttons (H). The buttons are included in your stock kit. You can also add the four feet (I) at this time. The feet are just a pair of 1 in. diameter hardwood balls, cut in half. Like the screw buttons, the pair of balls are included with your stock kit. An easy way to cut the balls in half is shown in Fig. 2. Once cut, sand smooth, then glue the half spheres over the screw holes. Next, mount a rabheting bit in your router, and establish the '/a in. deep by J/4 in. wide rabbet for the back (J). You can square the comcrs of Ihe rabbet to fit the square back, or round the back corners to match the radius lefl by your router bit. Test fit the back, but do not install it at this time. Scroll Saw Fun Cutting the scroll sawed elements is a simple matter with our full-size patterns. Make three photocopies—two of the face and wave patterns on page 33 and one of the ship pattern on page 35. Using rubber cement, paste one pattern onto the cherry face board (E). the second onto the walnut backing board (F), and the third onto ihe padauk board for the ship (Gh Be sure to position the pattern for the ship so that the wood grain will run slightly on the diagonal, as shown. Cutting the wave profile on the walnut and cherry boards is a simple matter, but you'll need lo drill starter holes for each of the numbers oti the clock face, and for several sections of the ship. Note that you'll also need to cut interior sections Kit Source All the pre-thicknessed wood you need to build the clock exactly as shown, including the walnut for the top. bottom and sides, plywood for the dial board and back, cherry for the dial face, w alnut for the backing board, padauk for the ship, four screw buttons and a pair of hardwood balls to yield the four feet, is included in a Project-PAK stock kit. Order from: Heritage Building Specialties 205 N. Cascade Fergus Falls, MN 56537 tel. 1-800-524-4184 Ask for Project-PAK kit no. WJ2941. Cost is $19.95 postpaid. on the numbers 4, 6. 8. 9 and 0. Later, these parts are simply glued in place on the walnut backing board. When cutting out the numbers and ship, work slowly, letting the blade do the work. The narrow elements on the ship are very delicate. It's best to cut the interior sections first, and then the exterior profile. Scroller Bill Zaun uses jeweler's blades in his saw (see Fine Cuts sidebar), but you could also get the job done with regular extra-fine wood blades. Assembly Once your scroll saw work is complete, glue the background, dial face, and the ship in position. Avoid using tot) much glue, or you'll be scraping away excess squeeze-out. Also glue the various interior parts into the numbers. Clamps really shouldn't be needed here, just hold the small parts in position with your finger or a cotton swab until the glue tacks. Now. drill for the movement shaft. The drill press or hand-held drill can be used. Our movement (K) required a s/l6 in. diameter shaft hole, but yours may be different depending on the movement you purchase. All thai remains is to apply the finish (we used a penetrating oil finish), mount the movement, and screw the back in place (don't use glue here, after all, balteries do wear out). If you plan on hanging the clock on a wall, add a hanger to the back. gTJj 34 t he Woodworker's Journal |


