Woodworker's Journal 1994-18-3, страница 39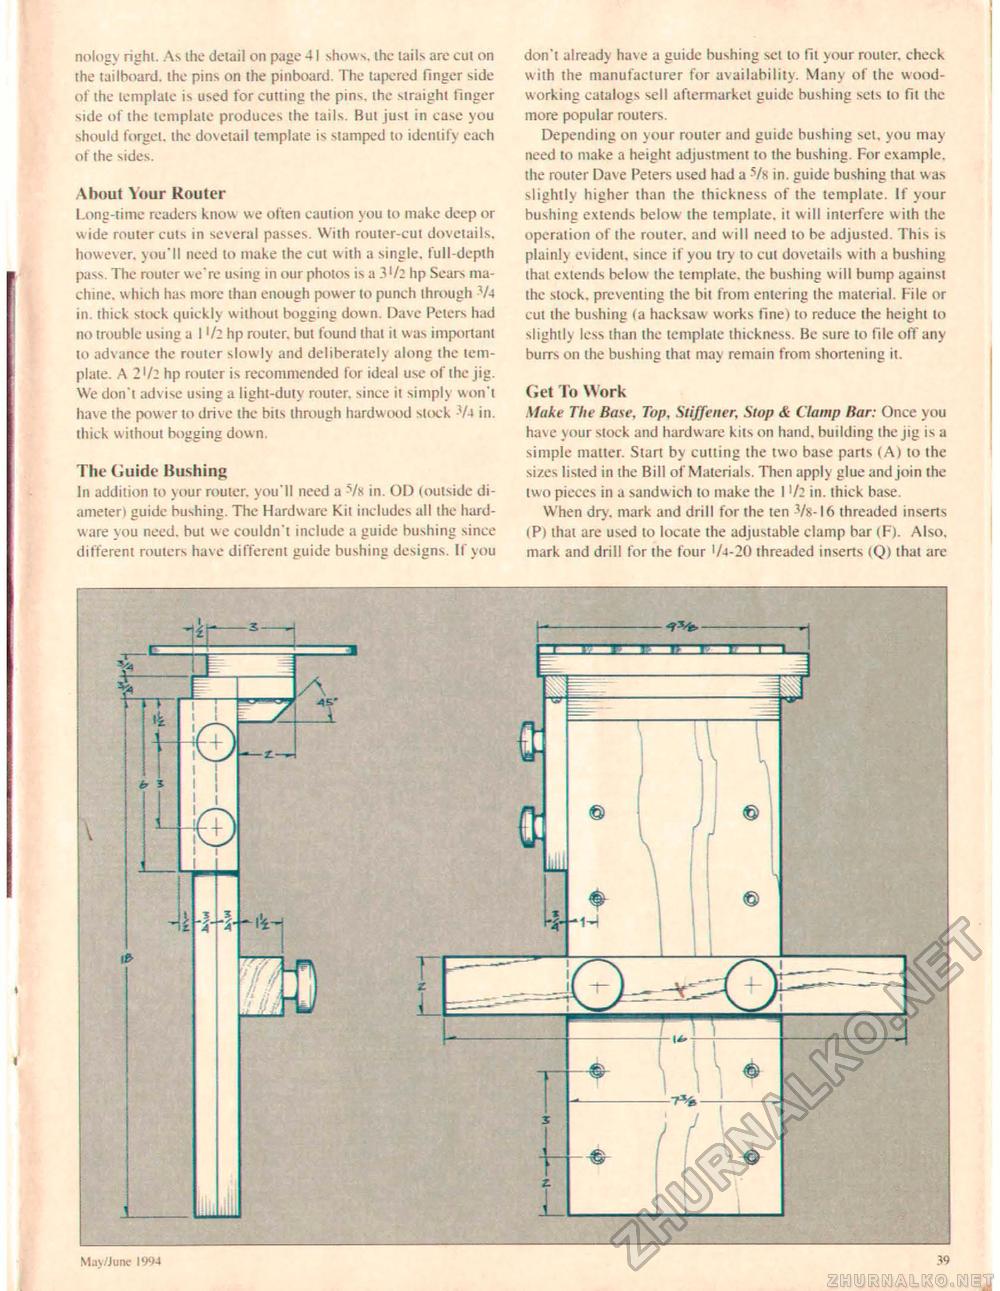
nology righl, As ihe detail on page 41 shows, ihe lails are cui on the tailboard, the pins on Ihe pinboard. The lapered finger side of the template is used for cutting the pins, the straight linger side of the template produces the lails. Bui just in case you should forget, ihe dovetail template is stamped to identify each of the sides. About Your Router Long-time readers know we often caution you lo make deep or wide router cuts in several passes. With router-cut dovetails, however, you'll need lo make the cut with a single, full-depth pass. The router we're using in our photos is a 3 l/z hp Sears machine. which has more than enough power to punch through 7-J in. thick stock quickly without bogging down. Dave Peters had no trouble using a I '/2 hp router, but found thai ii was important to advance the router slow ly and deliberately along the template. A 2 '/2 hp router is recommended for ideal use of the jig. We don't advise using a light-duiy router, since it simply won't have ihe power to drive ihe bits through hardwood slock V4 in. thick wilhout bogging down. The Guide Bushing In addilion to your router, you'll need a Vk in. OD (outside diameter) guide bushing. The Hardware Kit includes all ihe hardware you need, but we couldn't include a guide bushing since different routers have different guide bushing designs. If you don't already have a guide bushing sel to fit your rouler. check with the manufacturer for availability. Many of ihe woodworking catalogs sell aftermarket guide bushing sets lo fil ihe more popular routers. Depending on your router and guide bushing set, you may need lo make a height adjustment to the bushing. For example, the router Dave Peters used had a 5/s in. guide bushing lhat was slightly higher than the thickness of the template. If your bushing extends below the template, it will interfere wiih the operation of the router, and w ill need to be adjusted. This is plainl> evident, since if you iry to cul dovetails with a bushing that extends below the template, the bushing w ill bump against Ihe stock, preventing the bit from entering the material. File or cut the bushing (a hacksaw works fine) to reduce the height to slightly less than ihe template thickness. Be sure to file off any burrs on ihe bushing that may remain from shortening it. Get To Work Make The Base, Top, Stijfeiter, Stop & Clamp Har: Once you have your slock and hardware kils on hand, building Ihe jig is a simple matter. Start by cutting the two base parts (A) to the sizes listed in the Bill of Materials. Then apply glue and join the two pieces in a sandwich lo make ihe 1'/: in. thick base. When dry. mark and drill for ihe ten -78-16 threaded inserts IP) that are used lo locale the adjusiable clamp bar <F). Also, mark and drill for the four 1 /-t-20 threaded inserts <Q) that are May/June 1994 39 |


