Woodworker's Journal 1994-18-3, страница 42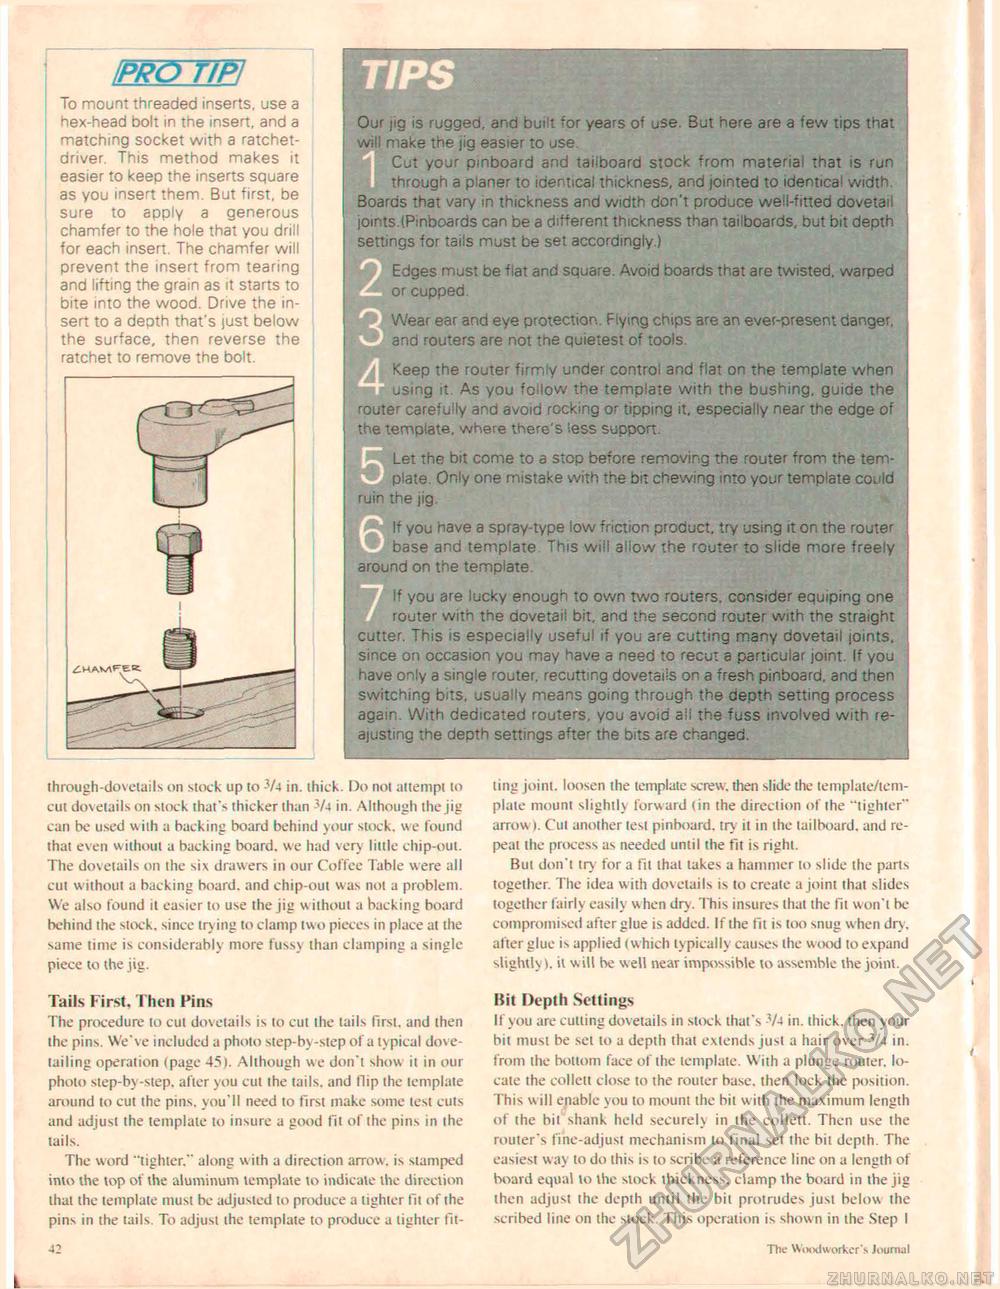
IPRO tIPl To mount threaded inserts, use a hex-head bolt in the insert, and a matching socket with a ratchet-driver. This method makes it easier to keep the inserts square as you insert them. But first, be sure to apply a generous chamfer to the hole that you drill for each insert. The chamfer will prevent the insert from tearing and lifting the grain as it starts to bite into the wood. Drive the insert to a depth that's iust below the surface, then reverse the ratchet to remove the bolt. Our jig is rugged, and built 'Or years of use But here are a few tips that will make the jig easier to use. Cut your pinboard and tailboard stock from material that is run through a planer to identical thickness, and jointed to identica1 width Boards that vary in thickness and width don't produce well-fitted dovetail joints.(Pinboards can be a different thickness than tailboards, but bit depth settings for tails must be set accordingly.) Edges must be flat and square. Avoid boards that are twisted, warped or cupped. Wear ear and eye protection. Flying chips are an ever-present danger, and routers are not the quietest of tools. Keep the router firmly under control and flat on the template when using it. As you follow the template with the bushing, guide the router carefully and avoid rocking or tipping it, especially near the edge of the template, where there's less support. Let the bit come to a stop before removing the router from the template. Only one mistake with the bit chewing into your template could ruin the jig. If you have a spray-type low friction product, try using it on the router base and template This will allow the router to slide more freely around on the template. If you are lucky enough to own two routers, consider equiping one router with the dovetail bit. and the second router with the straight cutter. This is especially useful if you are cutting many dovetail toints. since on occasion you may have a need to recut a particular joint. If you have only a single router, recutting dovetails on a fresh pinboard, and then switching bits, usually means going through the depth setting process again. With dedicated routers, you avoid ail the fuss involved with re-ajusting the depth settings after the bits are changed. through-doveiails on stock up to -7-t in. thick. Do not attempt to cut dovetails on stock that's thicker than -V-i in. Although the jig can be used with a backing board behind your stock, we found that even without a backing board, we had very little chip-out. The dovetails on the six drawers in our Coffee Table were all cut without a backing board, and chip-out was not a problem. We also found it easier to use the jig w ithout a backing board behind the stock, since trying to clamp two pieces in place at the same time is considerably more fuss) than clamping a single piece to the jig. Tails First. Then Fins The procedure to cut dovetails is to cut the tails first, and then the pins. We've included a photo step-by-step of atypical dovetailing operation (page 45). Although we don't show it in our photo step-by-step, after you cut the tails, and Hip the template around to cut the pins, you'll need to first make some lest cuts and adjust the template to insure a good fit of the pins in the tails. The word "tighter." along with a direction arrow, is stamped into the top of the aluminum template to indicate the direction that the template must be adjusted to produce a tighter fit of the pins in the tails. To adjust the template to produce a lighter fit- 23 ling joint, loosen ihe template screw, then slide the template/template mount slightly forward (in the direction of the "tighter" arrow ). Cut another lest pinboard, try il in the tailboard, and repeal the process as needed until the fit is right. But don't try for a fit thai takes a hammer to slide the parts together. The idea with dovetails is to create a joint that slides together fairly easily w hen dry. This insures that the fit won't be compromised after glue is added. If the lit is too snug when dry, after glue is applied (which typically causes the wood to expand slightly). it w ill be well near impossible to assemble the joint. Bit Depth Settings If you are culling dovetails in slock that's -74 in. thick, then your bit must be set to a depth that extends just a hair over V-i in. from the bottom face of the template. With a plunge router. locate the colleu close to the router base, then lock the position. This w ill enable you to mount the bit with the maximum length of the bil shank held securely in the collett. Then use the router's fine-adjust mechanism lo final set the bit depth. The easiest way to do this is to scribe a reference line on a length of board equal lo the stock thickness, clamp the board in the jig then adjust the depth until the bit protrudes just below the scribed line on the stock. This operation is shown in the Step I The Woodw orker's Journal |


