Woodworker's Journal 1994-18-5, страница 19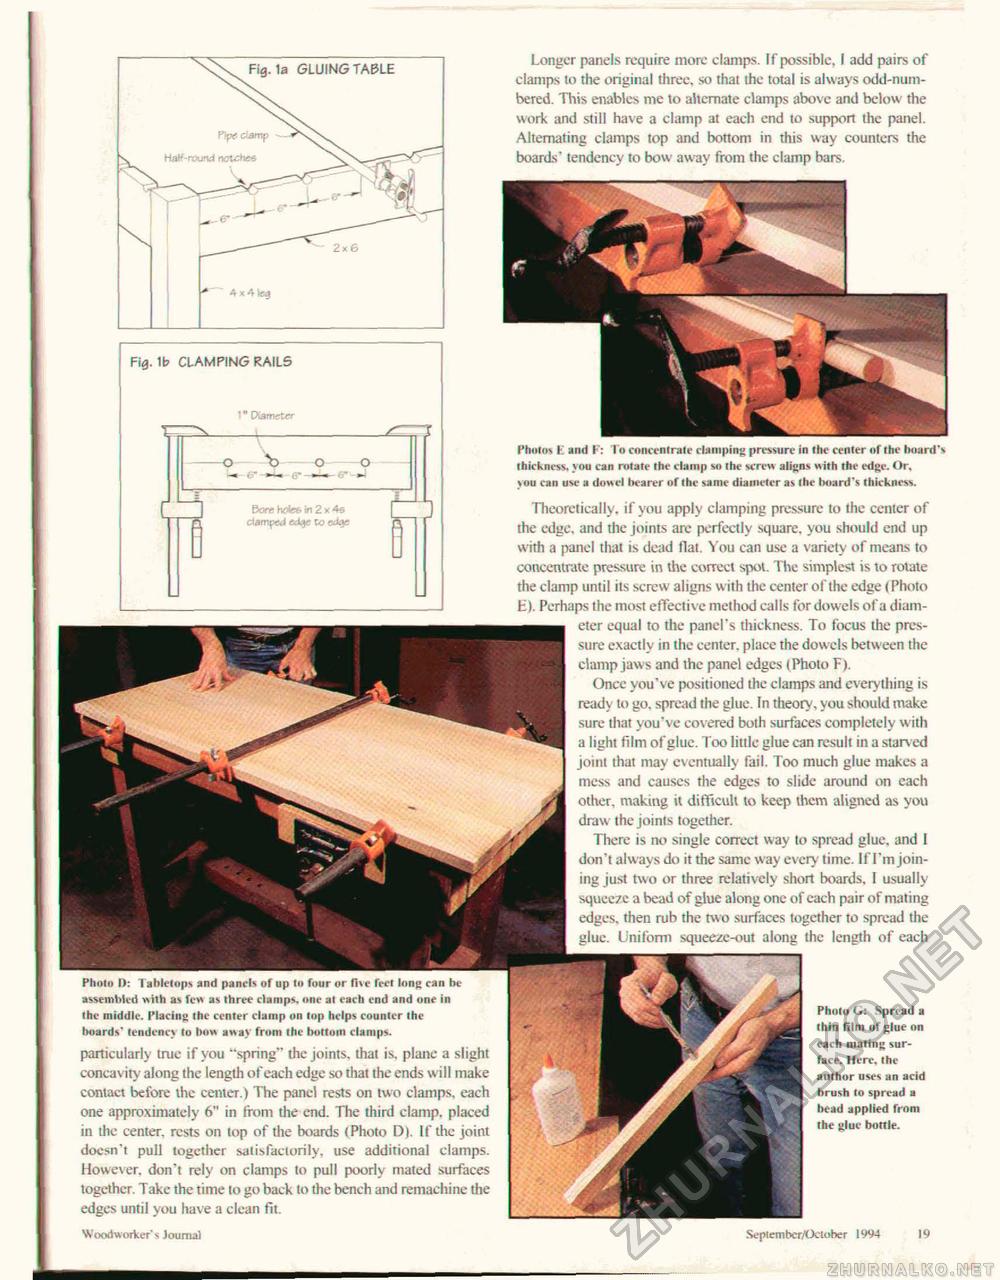
Longer panels require more clamps. If possible, I add pairs of clamps to the original three, so that the total is always odd-numbered. This enables me to alternate clamps above and below the work and still have a clamp at each end to support the panel. Alternating clamps top and bottom in this way counters the boards' tendency to bow away from the clamp bars. Pholos I and F: To concentrate clamping pressure in the center of the board's thickness, you can rotate the clamp so the screw aligns with the edge. Or, sou can use a dowel bearer of the same diameter as the board's thickness. Bore boie& in 2 x 4s clamped edkje to aiafs ■ rjm Photo I): I ablelops and panels of up In four or fise feet long can be assembled with as few as three clamps, one at each end and one in the middle. Placing the center clamp on top helps counter the boards* tendency to bow away from (he bottom clamps. particularly true if you "spring" the joints, that is. plane a slight concavity along the length of each edge so that the ends will make contact before the center.) The panel rests on two clamps, each one approximately 6" in from the end. The third clamp, placed in the center, rests on lop of the boards (Photo D). If the joint doesn't pull together satisfactorily, use additional clamps. However, don't rely on clamps to pull poorly mated surfaces together. Take the time lo go back to the bench and remaehine the edges until you have a clean fit, Theoretically, if you apply clamping pressure to the center of the edge, and the joints are perfectly square, you should end up with a panel that is dead flat. You can use a variety of means to concentrate pressure in the coned spot. The simplest is to rotate the clamp unlit its screw aligns with the center of the edge (Photo E I. Perhaps the most effective method calls for dowels of a diameter equal to die panel's thickness. To focus the pressure exactly in the center, place the dowels between the clamp jaws and the panel edges (Photo F). Once you've positioned the clamps and everything is ready to go. spread the glue. In theory, you should make sure that you've cov ered both surfaces completely with a light film of glue. Too little glue can result in a starved joint that may eventually fail. Too much glue makes a mess and causes the edges to slide around on each other, making it difficult lo keep them aligned as you draw the joints together. There is no single correct way to spread glue, and 1 don't always do it the same way every time. If I'm joining just two or three relatively short boards, I usually squeeze a bead of glue along one of each pair of mating edges, then rub the tw o surfaces together to spread the glue. Unilorm squeeze-out along the length of each Photo G: Spread a thin film of glue on each mating surface. Here, the author uses an acid brush to spread a bead applied from the glue bottle. Fi3. la GLUING TABLE Fi0, lb CLAMPING RAILS 2x6 1" Diameter Woodworker's loumal Seplemt>er/OcH>her 1994 19 |


