Woodworker's Journal 1994-18-6, страница 54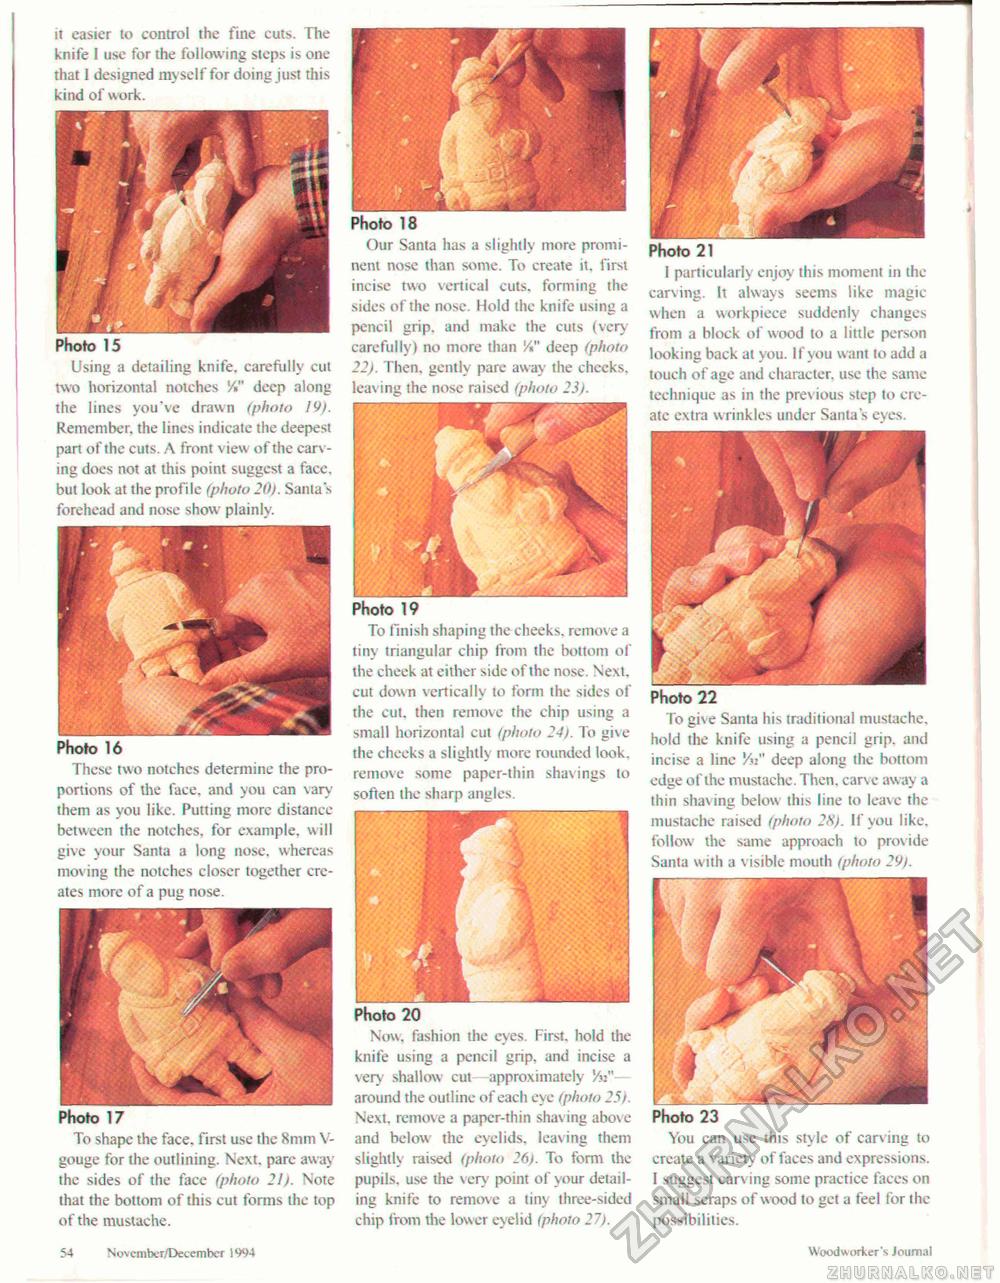
Photo 21 1 particularly enjoy this moment in the carving. It always seems like magic when a workpiece suddenly changes from a bloek of wood to a little person looking back at you. If you want to add a touch of age and character, use the same technique as in the previous step to create extra wrinkles under Santa's eyes. Photo 22 To give Santa his traditional mustache, hold the knife using a pencil grip, and incise a line '/«" deep along the bottom edge of the mustache. Then, carve away a thin shaving below this line to leave the mustache raised (photo 28). If you like, follow the same approach to provide Santa with a visible mouth (photo 29). it easier to control the fine cuts. The knife I use for the following steps is one that 1 designed myself for doing just this kind of work. Photo 18 Our Santa has a slightly more prominent nose than some. To create it, first incise two vertical cuts, forming the sides of the nose. Hold the knife using a pencil grip, and make the cuts (very carefully) no more than '/»" deep (photo 22). Then, gently pare away the chccks, leaving the nose raised (photo 23). Photo 19 To finish shaping the cheeks, remov e a tiny triangular chip from the bottom of the cheek at either side of the nose. Next, cut down vertically to form the sides of the cut. then remove the chip using a small horizontal cut (photo 24). To give the cheeks a slightly more rounded look, remove some paper-thin shavings to soften the sharp angles. Photo 15 Using a detailing knife, carefully cut two horizontal notches '/»" deep along the lines you've drawn (photo 19). Remember, the lines indicate the deepest part of the cuts. A front view of the carv ing does not at this point suggest a face, but look at the profile (photo 20). Santa's forehead and nose show plainly. Photo 16 These two notches determine the proportions of the face, and you can vary them as you like. Putting more distance between the notches, for example, will give your Santa a long nose, whereas moving the notches closer together creates more of a pug nose. Photo 23 You can use this style of carving to create a variety of faces and expressions. 1 suggest carv ing some practice faces on small scraps of w ood to get a feel for the possibilities. Photo 17 To shape the face, first use the 8mm V-gouge for the outlining. Next, pare away the sides of the face (photo 21). Note that the bottom of this cut forms the top of the mustache. Photo 20 Now, fashion the eyes. First, hold the knife using a pencil grip, and incise a very shallow cut—approximately Vn"— around the outline of each eye (photo 25). Next, remove a paper-thin shav ing above and below the eyelids, leaving them slightly raised (photo 26). To form the pupils, use the very point ol" your detailing knife to remove a tiny three-sided chip from the lower eyelid (photo 27). 54 Novemher/December 1994 Wixxiworkcr's Journal |


