Woodworker's Journal 2001-25-1, страница 30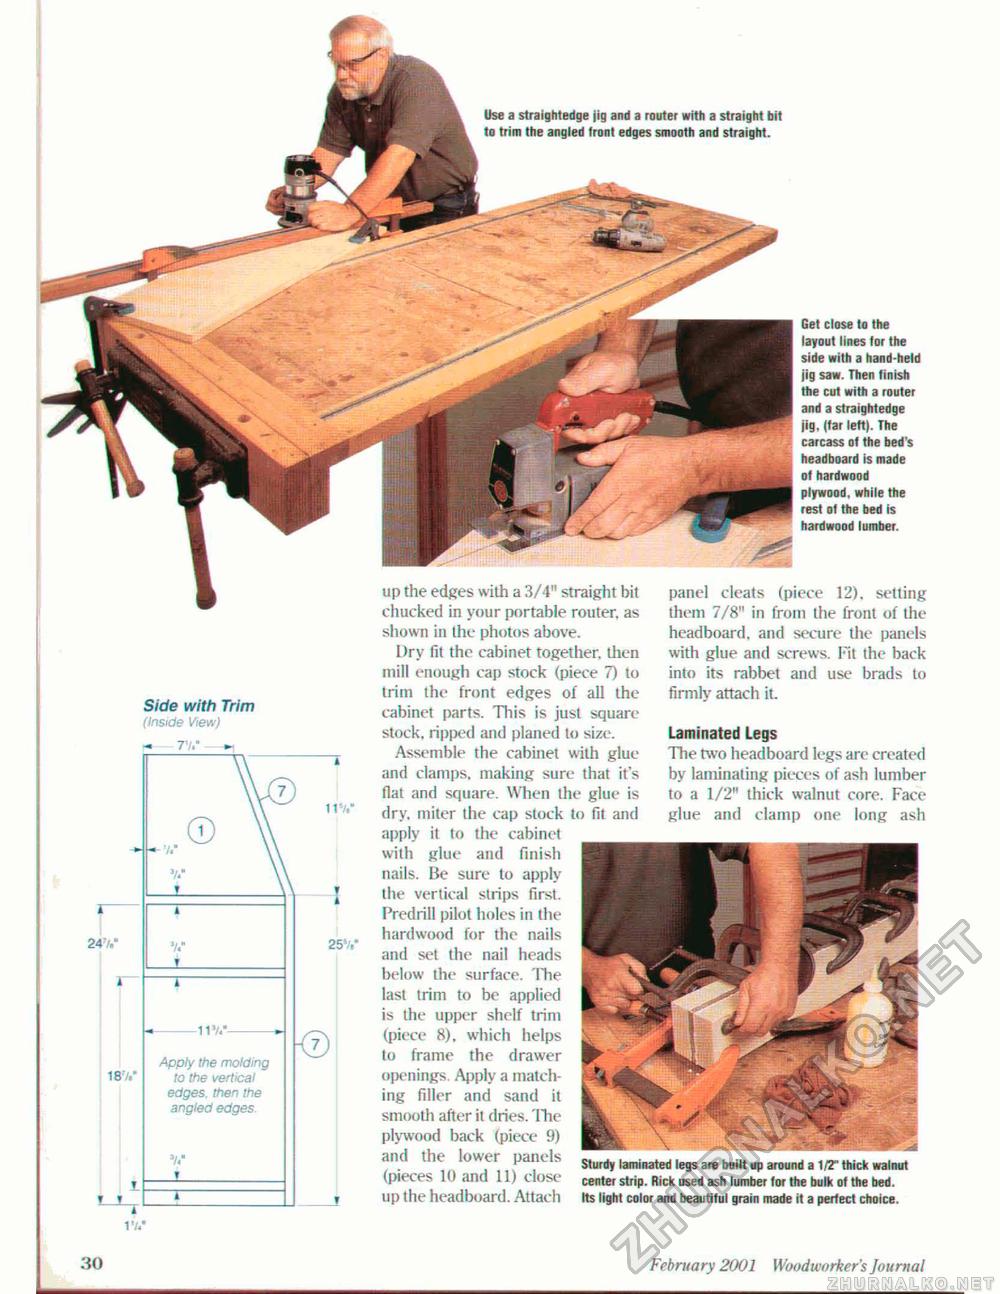
Use a straightedge jig and a router with a straight bit to trim the angled front edges smooth and straight. Get close to the layout lines for the side with a hand held jig saw. Then finish the cut with a router and a straightedge jig, (far left). The carcass of the bed's headboard is made of hardwood plywood, while the rest of the bed is hardwood lumber. up the edges with a 3/4" straight bit chucked in your portable router, as shown in the photos above. Dry fit the cabinet together, then mill enough cap stock (piece 7) to trim the front edges of all the cabinet parts. This is just square stock, ripped and planed to size. Assemble the cabinet with glue and clamps, making sure that it's fiat and square. When the glue is dry, miter the cap stock to fit and apply it to the cabinet with glue and finish nails. Be sure to apply the vertical strips first. Predrill pilot holes in the hardwood for the nails and set the nai! heads below the surface. The last trim to be applied is the upper shelf trim {piece 8), which helps to frame the drawer openings Apply a matching filler and sand it smooth after it dries. 'Hie plywood back (piece 9) and the lower panels (pieces 10 and 11) close up the headboard. Attach panel cleats (piece 12), setting them 7/8" in from the front of the headboard, and secure the panels with glue and screws. Fit the back into its rabbet and use brads to firmly attach it Laminated Legs The two headboard legs are created by laminating pieces of ash lumber to a 1/2" thick walnut core. Face glue and clamp one long ash Sturdy laminated legs are built up around a 1/2" thick walnut center strip. Rick used ash lumber for the bulk of the bed. Its light color and beautiful grain made it a perfect choice. Side with Trim (Inside View) 30 February 2001 Wood wo rker's Jo u mat |


