Woodworker's Journal 2001-25-1, страница 33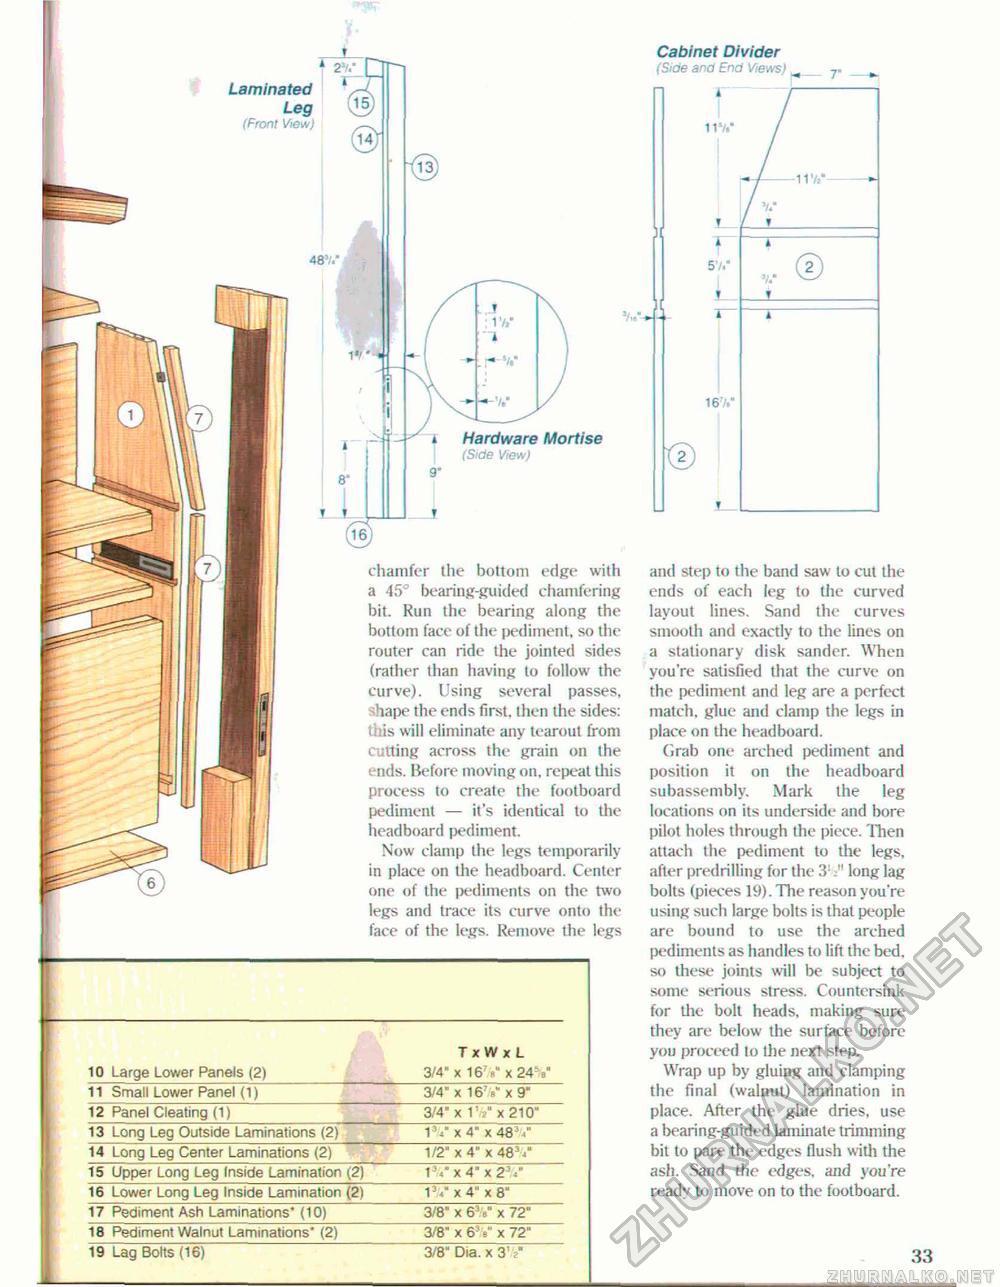
Laminated Leg (15 (Front View/ 48/.' Cabinet Divider (Side and End Views) - 7" - nv —11 ■/»•— i Hardware Mortise (Side View) chamfer the bottom edge with a 45° bearing-guided chamfering bit. Run the bearing along the bottom face of the pediment, so the router can ride the jointed sides (rather than having to follow the curve). Using several passes, shape the ends first, then the sides: l. is wiil eliminate any tearout from cutting across the grain on the uds. Before moving on, repeat this process to create the footboard pediment — it's identical to the headboard pediment. Now clamp the legs temporarily in place on the headboard. Center one of the pediments on the two legs and trace its curve onto the face of the legs. Remove the legs 1
r 57.' L 16 V © © _!_ anil step to the band saw lo cut the ends of each ieg to ihe curved layout lines. Sand the curves smooth and exactly to the lines on a stationary disk sander. When you're satisfied that the curve on the pediment and leg are a perfect match, glue and clamp the legs in place on the headboard. Grab one arched pediment and position it on the headboard subassembly, Mark the leg locations on its underside and bore pilot holes through the piece. Then attach the pediment to the legs, afler predrilling for the 31long lag bolts (pieces 19). The reason you're using such large bolts is that people are bound to use the arched pediments as handles to lift the bed, so these joints will be subject to some serious stress. Countersink for the bolt heads, making sure they are below ihe surface before you proceed lo the next step. Wrap up by gluing and clamping the final (walnut) lamination in place. After the glue dries, use a bearing-guided laminate trimming bit to pare the edges flush with the ash. Sand the edges, and you're readv to move on to the footboard. 33 |
|||||||||||||||||||||||||||||||||


