Woodworker's Journal 2001-25-1, страница 53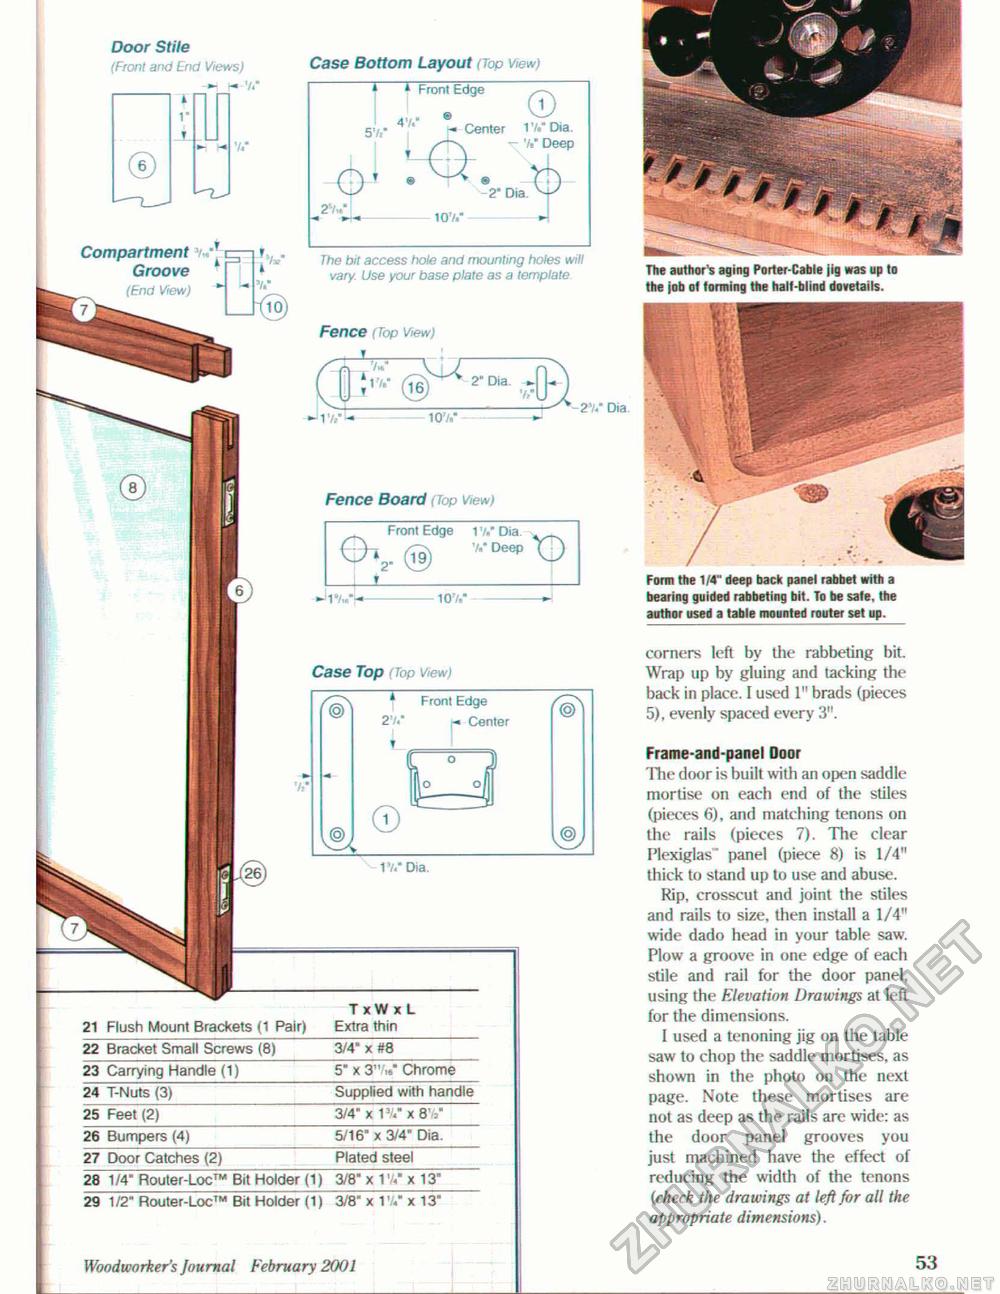
25 FeeU2) 3/4" x VU" x 8 V 26 Bumpers (4) 5/16" x 3/4' Dia. 27 Door Catches (2) Plated steel 28 1/4- Router-Loc™ Bit Holder (1) 3/8' x 1V/ x 13" 29 1/2" Router-Loc™ Bit Holder (1) 3/8" x 1 V x 13" Woodworker's Journal February 2001 ii_ Front Edge Center TxWxL Extra thin 3/4" x #8 5" x 3"'.<" Chrome Supplied with handle Case Top (Top View) 1V.- Dia. 21 Flush Mount Brackets (1 Pair) 22 Bracket Small Screws (8) 23 Carrying Handle (1) 24 T-Nuts (3) Door Stile (Front and End Views) -M h» V i r r Case Bottom Layout <Top View) The bit access hole and mounting holes will vary. Use your base plate as a template Fence (Top View) El. »JlVW-10V." 3 Compartment -1/. Groove (End View) Fence Board Top View) 1 '/•" Dia. 7«* Deep corners left by the rabbeting bit Wrap up by gluing and tacking the back in place, I used 1" brads (pieces 5), evenly spaced every 3". Frame-and-panel Door The door is built with an open saddle mortise on each end of the stiles (pieces (5), and matching tenons on the rails (pieces 7). The clear Plexiglas" panel (piece 8) is 1/4" thick to stand up to use and abuse. Rip, crosscut and joint the sdles and rails to size, then install a 1/4" wide dado head in your table saw. Plow a groove in one edge of each stile and rail for the door panel, using the Elevation Drawings at left for the dimensions. 1 used a tenoning jig on the table saw to chop the saddle mortises, as shown in the photo on the next page. Note these mortises are not as deep as the rails are wide: as the door panel grooves you just machined have the effect of reducing the width of the tenons (check the drawings at left for all the appropriate dimensions). The author's aging Porter-Cable jig was up to the job of forming the halt-blind dovetails. Form the 1/4" deep back panel rabbet with a bearing guided rabbeting bit. To be sale, the author used a table mounted router set up. |


