Woodworker's Journal 2001-25-1, страница 55
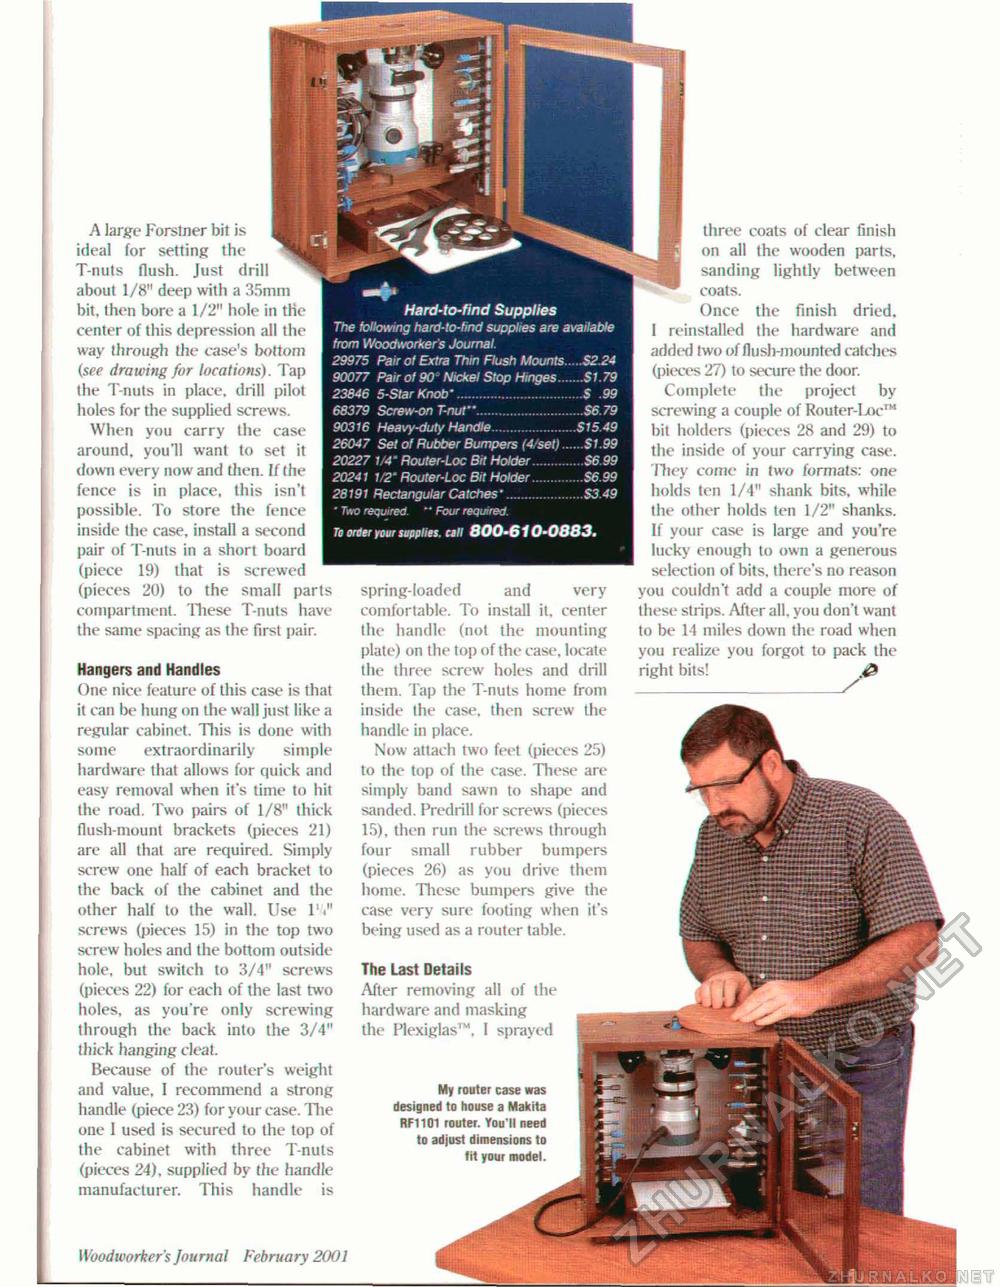
A large Forstner bit is ideal for setting the T-nuts flush. Just drill about 1/8" deep with a 35mm bit. then bore a 1/2" hole in the center of this depression all the way through the case's bottom (see drawing for locations). Tap the T-nuts in place, drill pilot holes for the supplied screws. When you carry the case around, you'll want to set it down every now and then. If the fence is in place, this isn't possible. To store the fence inside the case, install a second pair of T-nuts in a short board (piece 19) that is screwed (pieces 20) to the small parts compartment. These T-nuts have the same spacing as the first pair. Hangers and Handles One nice feature of this case is that it can be hung on the wall just like a regular cabinet. This is done with some extraordinarily simple hardware that allows for quick and easy removal when it's time to hit the road. Two pairs of 1/8" thick flush-mount brackets (pieces 21) are all that are required. Simply screw one half of each bracket to the back of the cabinet and the other half to the wall. Use l'V screws (pieces 15) in the top two screw holes and the bottom outside hole, but switch to 3/4" screws (pieces 22) for each of the last two holes, as you're only screwing through the back into the 3/4" I hick hanging cleat. Because of the router's weight and value. 1 recommend a strong handle (piece 23) for your case. The one 1 used is secured to the top of the cabinet with three T-nuts (pieces 24), supplied by the handle manufacturer. This handle is Hard-to-find Supplies The following hard-to-fmd supplies are available from Woodworkers Journal. 29975 Pair of Extra Thin Flush Mounts.....S2.24 90077 Pair of 90' Nickel Stop Hinges.......St .79 23846 5-StarKnob'..................................$ .99 68379 Screw-on T-nut".............................$6.79 90316 Heavy-duty Handle.......................S15.49 26047 Set of Rubber Bumpers (4,'set)......Si.99 20227 1/4" Router-Loc Bit Holder..............$6 99 20241 1/2' Router-Loc Bit Holder..............S6.99 28191 Rectangular Catches'.....................S3.49 * Two required. " Four required. To order your supplies, cell 800-610-0883. spring-loaded and very comfortable. To install it, center the handle (not the mounting plate) on the top of the case, locate the three screw holes and drill them. Tap the T-nuts home from inside the case, then screw the handle in place. Now attach two feet (pieces 25) to the top of the case. These are simply band sawn to shape and sanded. Predrill for screws (pieces 15), then run the screws through four small rubber bumpers (pieces 26) as you drive them home. These bumpers give the case very sure footing when it's being used as a router table. The Last Details After removing all of the hardware and masking the Plexiglas™, I sprayed My router case was designed to house a Makita RF1101 router. You'll need to adjust dimensions to tit your model. three coats of clear finish on all the wooden parts, sanding lightly between ^^ coats. Once the finish dried, I reinstalled the hardware and added two of flush-mounted catches (pieces 27) to secure the door. Complete the project by screwing a couple of Router-Ijk-™ bit holders (pieces 28 and 29) to the inside of your carrying case. Jliey come in two formats: one holds ten 1/4" shank bits, while the other holds ten 1/2" shanks. If your case is large and you're lucky enough to own a generous selection of bits, there's no reason you couldn't add a couple more of these strips. After all, you don't want to be 14 miies down the road when you realize you forgot to pack the right bits! Woodworker's Journal February 2001 55 |


