Woodworker's Journal 2001-25-1, страница 54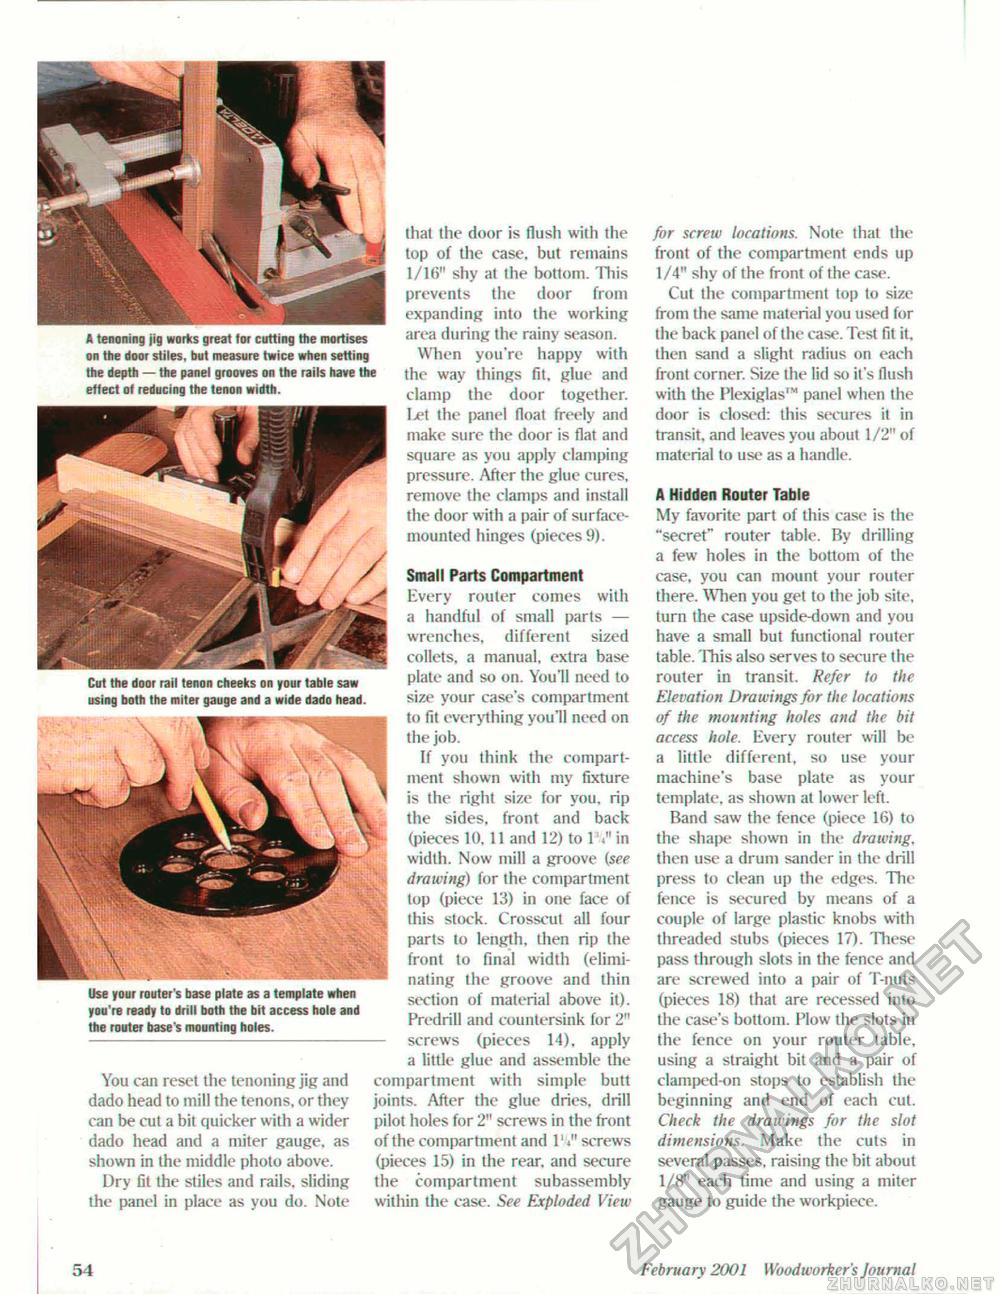
A tenoning jig works great for cutting the mortises on the door stiles, but measure twice when setting the depth — the panel grooves on the rails have the effect of reducing the tenon width. for screw locations. Note that the front of the compartment ends up 1/4" shy of the front of the case. Cut lite compartment top to size from the same material you used for the back panel of the case. Test fit it, then santl a slight radius on each front corner. Size the lid so it's flush with the Plexiglas'"1 panel when the door is closed: this secures il in transit, and leaves you about 1/2" of material to use as a handle. A Hidden Router Table My favorite part of this case is the "secret" router table. By drilling a few holes in the bottom of the case, you can mount your router there. When you get to the job site, turn the case upside-down and you have a small but functional router table. This aiso serves to secure ihe router in transit. Refer to the Elevation Drawings for the locations of the mounting holes and the bit access hole. livery router will be a little different, so use your machine's base plate as your template, as shown at lower left. Band saw the fence (piece 16) to the shape shown in the drawing. then use a drum sander in the drill press to clean up the edges. The fence is secured by means of a couple of large plastic knobs with threaded stubs (pieces 17). These pass through siots in the fence and are screwed into a pair of T-nuts (pieces 18) that are recessed into the case's bottom. Plow Ihe siots in the fence on your router lable. using a straight bit and a pair of clamped-on stops to establish the beginning and end of each cut. Check the drawings for the slot dimensions. Make the cuts in several passes, raising the bit about 1/8" each time and using a miter gauge to guide the workpiece. that the door is flush with the lop of the case, bul remains 1/16" shy at the bottom. This prevents the door from expanding into the working area during the rainy season- When you're happy with the way things fit, glue and clamp the door together. I jet the panel float freely and make sure the door is flat and square as you apply clamping pressure. After the glue cures, remove the clamps and install the door with a pair of surface-mounted hinges (pieces 9). Cut the door rail tenon cheeks on your table saw using both the miter gauge and a wide dado head Use your router's base plate as a template when you're ready to drill both the bit access hole and the router base's mounting holes. You can reset the tenoning jig and dado head to mill the tenons, or they can be cut a bit quicker with a wider dado head and a miter gauge, as shown in the middle photo above. Dry fit the stiles and rails, sliding the panel in place as you do. Note Small Parts Compartment Every rouler comes with a handful of small parts — wrenches, different sized collets, a manual, extra base plate and so on. You'll need lo size your case's compartment to fit everything you'll need on the job. If you think the compartment shown with my fixture is the right size for you, rip the sides, front and back (pieces 10,11 and 12) to 1%" in width. Now mill a groove (sec drawing) for Ihe compartment lop (piece 13) in one face of this stock. Crosscut all four parts to length, then rip the front to final width (eliminating ihe groove and thin section of material above it). Predrill and countersink for 2" — screws (pieces 14). apply a little glue and assemble the compartment with simple butt joints. After the glue dries, drill pilot holes for 2" screws in the front of the compartment and IV screws (pieces 15) in the rear, and secure the compartment subassembly within the case. See Exploded View 54 February 2001 Wood wo rker's Jo u mat |


