Woodworker's Journal 2001-25-2, страница 46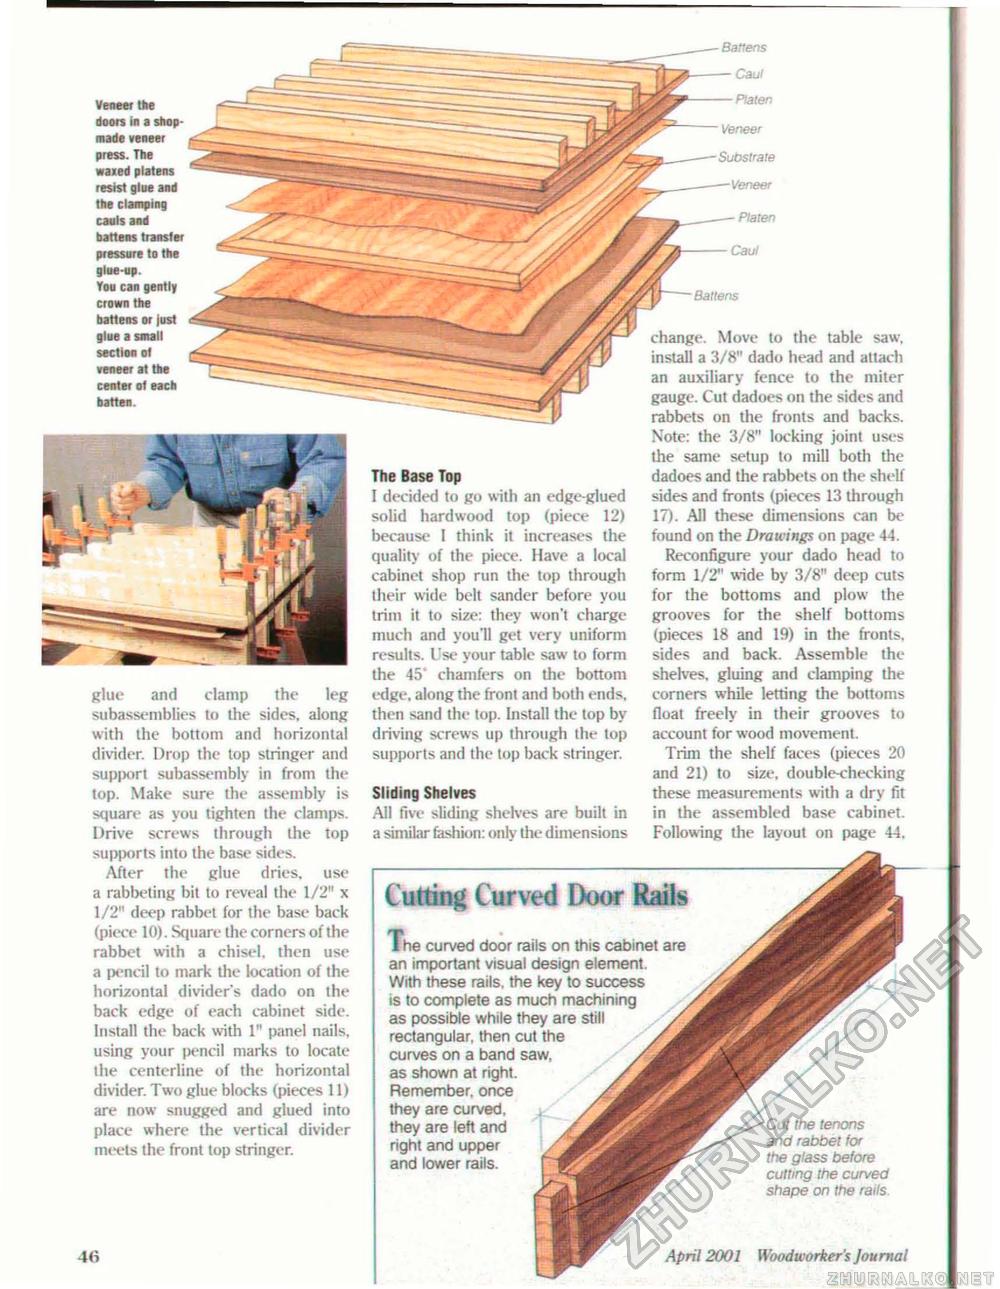
The Base Top I decided to go with an edge-glued solid hardwood top (piece 12) because I think it increases the quality of the piece. Have a local cabinet shop run the top through their wide belt sandcr before you trim it to size: they won't charge much and you'll get very uniform results. l:se your table saw to form the 45' chamfers on the bottom edge, along the front and both ends, then sand the top. Install the top by driving screws up through the top supports and the top back stringer. Sliding Shelves All five sliding shelves are built in a similar fashion: only the dimensions Veneer the doors in a shop-made veneer press. The waied platens resist glue and the clamping cauls and battens transfer pressure to the glue-up. You can gently crown the battens or just glue a smalt section of veneer at the center of each batten. Battens Caul Platen Veneer Substrate Veneer Platen Battens change. Move to the table saw, install a 3/8" dado head and attach an auxiliary fence to the miter gauge. Cut dadoes on the sides and rabbets on the fronts and backs. Note: the 3/8" locking joint uses the same setup to mill both the dadoes and the rabbets on the shelf sides and fronts (pieces 13 through 17). All these dimensions can be found on the Drawings on page 44. Reconfigure your dado head to form 1/2" wide by 3/8" deep cuts for the bottoms and plow the grooves for the shelf bottoms (pieces 18 and 19) in the fronts, sides and back. Assemble the shelves, gluing and clamping the corners while letting the bottoms float freely in their grooves to account for wood movement. Trim the shelf faces (pieces 20 and 21) to size, double-checking these measurements with a dry fit in the assembled base cabinet. Following the layout on page 44, glue and clamp the leg subassemblies to the sides, along with the bottom and horizontal divider. Drop the lop stringer and support subassembly in from the top. Make sure the assembly is square as you tighten the clamps. Drive screws through the top sup|)orts into the base sides. After the glue dries, use a rabbeting bit to reveal the 1/2" x 1/2" deep rabbet for the base back (piece 10). Square the corners of the rabbet with a chisel, then use a pencil to mark the location of the horizontal divider's dado on the back edge of each cabinet side. Install the back with 1" panel nails, using your pencil marks to locate the centerline of the horizontal divider. Two glue blocks (pieces 11) are now snugged and glued into place where the vertical divider meets the front top stringer. 46 Cutting Curved Door Rails April 2001 Woodworker's Journal I he curved door rails on this cabinet are an important visual design element. With these rails, the key to success is to complete as much machining as possible while they are still rectangular, then cut the curves on a band saw, as shown at right. Remember, once they are curved, they are left and right and upper and lower rails. Cut the tenons and rabbet for the glass before cutting the curved shape on the rails |


