Woodworker's Journal 2004-Winter, страница 63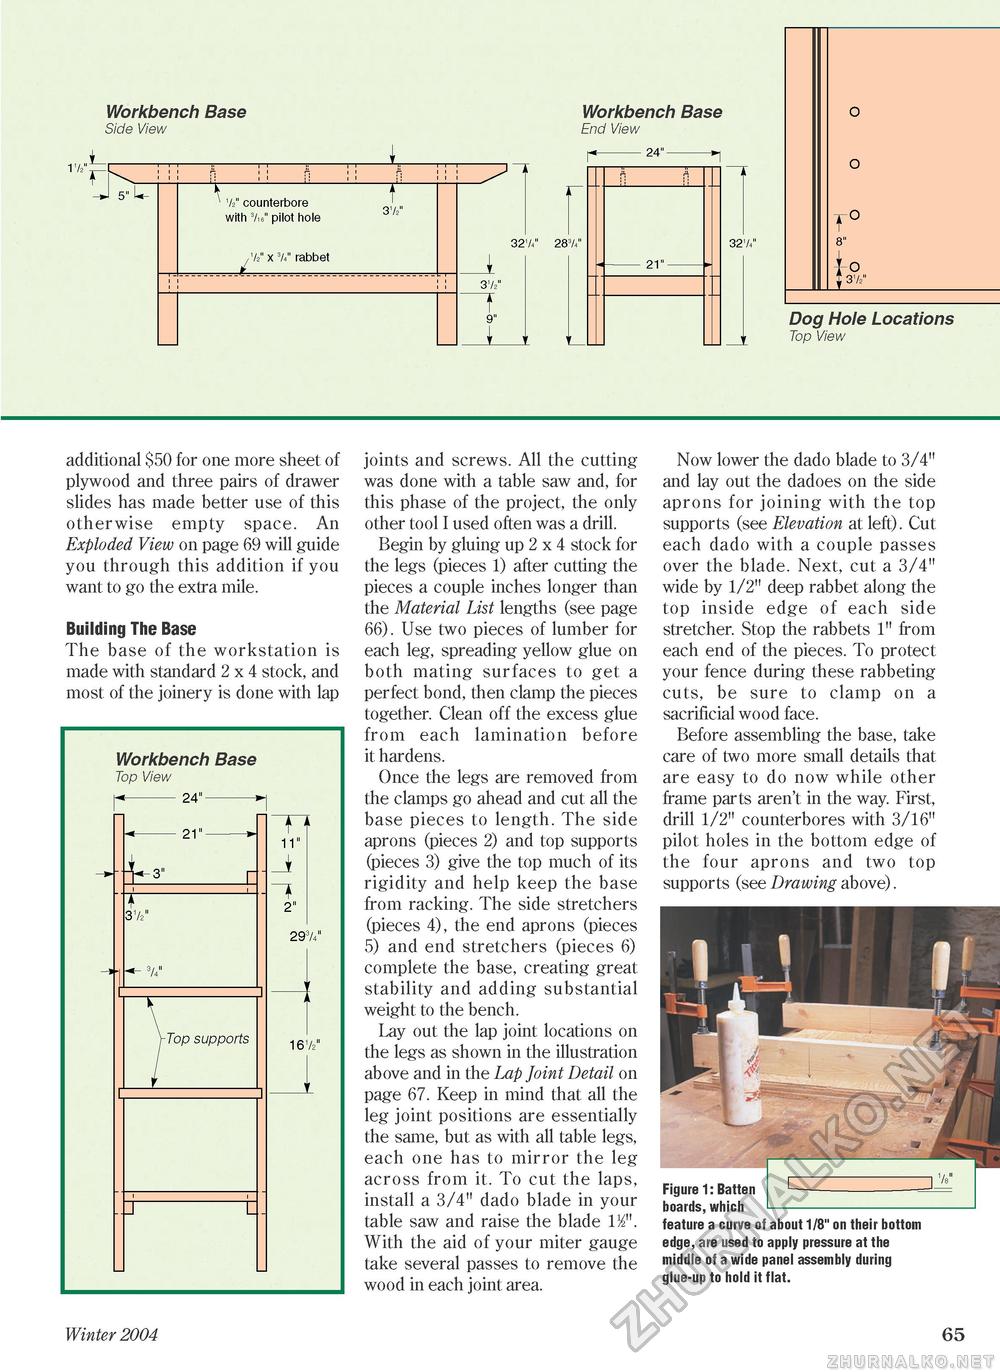
Workbench Base Side View 172" 'J 'L- ' 1/2" counterbore with 3/n" pilot hole ;/2 x 3/4" rabbet 31/2" Workbench Base End View 24" 321/4" 283/4" 31/2" 21" 321/4" -o $ 372" Dog Hole Locations Top View additional $50 for one more sheet of plywood and three pairs of drawer slides has made better use of this otherwise empty space. An Exploded View on page 69 will guide you through this addition if you want to go the extra mile. Building The Base The base of the workstation is made with standard 2 x 4 stock, and most of the joinery is done with lap joints and screws. All the cutting was done with a table saw and, for this phase of the project, the only other tool I used often was a drill. Begin by gluing up 2 x 4 stock for the legs (pieces 1) after cutting the pieces a couple inches longer than the Material List lengths (see page 66). Use two pieces of lumber for each leg, spreading yellow glue on both mating surfaces to get a perfect bond, then clamp the pieces together. Clean off the excess glue from each lamination before it hardens. Once the legs are removed from the clamps go ahead and cut all the base pieces to length. The side aprons (pieces 2) and top supports (pieces 3) give the top much of its rigidity and help keep the base from racking. The side stretchers (pieces 4), the end aprons (pieces 5) and end stretchers (pieces 6) complete the base, creating great stability and adding substantial weight to the bench. Lay out the lap joint locations on the legs as shown in the illustration above and in the Lap Joint Detail on page 67. Keep in mind that all the leg joint positions are essentially the same, but as with all table legs, each one has to mirror the leg across from it. To cut the laps, install a 3/4" dado blade in your table saw and raise the blade 1/2". With the aid of your miter gauge take several passes to remove the wood in each joint area. Now lower the dado blade to 3/4" and lay out the dadoes on the side aprons for joining with the top supports (see Elevation at left). Cut each dado with a couple passes over the blade. Next, cut a 3/4" wide by 1/2" deep rabbet along the top inside edge of each side stretcher. Stop the rabbets 1" from each end of the pieces. To protect your fence during these rabbeting cuts, be sure to clamp on a sacrificial wood face. Before assembling the base, take care of two more small details that are easy to do now while other frame parts aren't in the way. First, drill 1/2" counterbores with 3/16" pilot holes in the bottom edge of the four aprons and two top supports (see Drawing above). Figure 1: Batten boards, which feature a curve of about 1/8" on their bottom edge, are used to apply pressure at the middle of a wide panel assembly during glue-up to hold it flat. Winter 2004 65 |


