Woodworker's Journal 2004-Winter, страница 66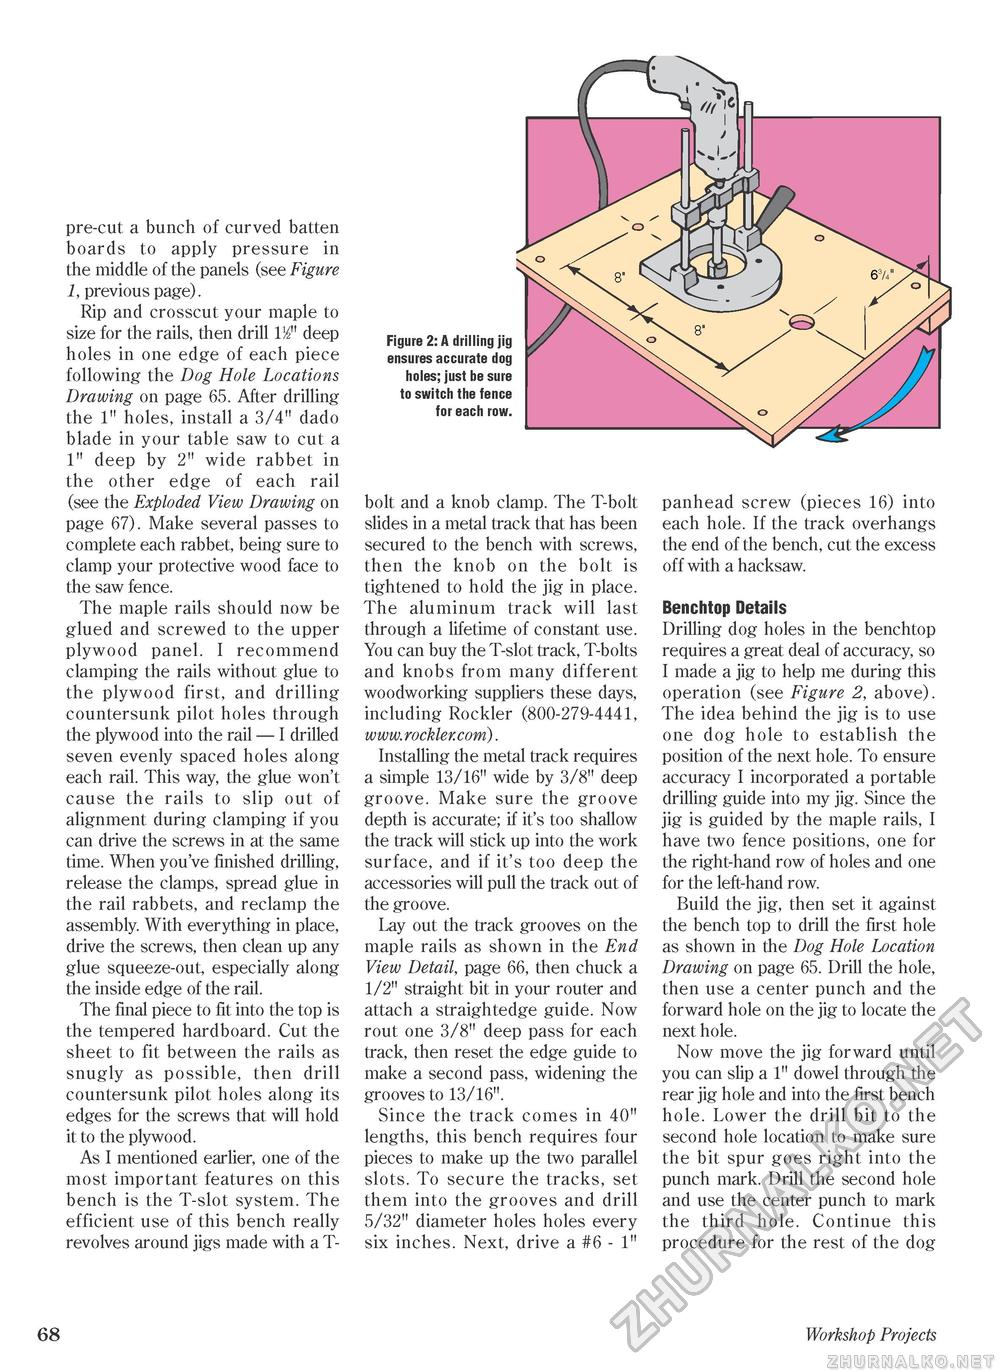
pre-cut a bunch of curved batten boards to apply pressure in the middle of the panels (see Figure 1, previous page). Rip and crosscut your maple to size for the rails, then drill 1/2" deep holes in one edge of each piece following the Dog Hole Locations Drawing on page 65. After drilling the 1" holes, install a 3/4" dado blade in your table saw to cut a 1" deep by 2" wide rabbet in the other edge of each rail (see the Exploded View Drawing on page 67). Make several passes to complete each rabbet, being sure to clamp your protective wood face to the saw fence. The maple rails should now be glued and screwed to the upper plywood panel. I recommend clamping the rails without glue to the plywood first, and drilling countersunk pilot holes through the plywood into the rail — I drilled seven evenly spaced holes along each rail. This way, the glue won't cause the rails to slip out of alignment during clamping if you can drive the screws in at the same time. When you've finished drilling, release the clamps, spread glue in the rail rabbets, and reclamp the assembly. With everything in place, drive the screws, then clean up any glue squeeze-out, especially along the inside edge of the rail. The final piece to fit into the top is the tempered hardboard. Cut the sheet to fit between the rails as snugly as possible, then drill countersunk pilot holes along its edges for the screws that will hold it to the plywood. As I mentioned earlier, one of the most important features on this bench is the T-slot system. The efficient use of this bench really revolves around jigs made with a T- bolt and a knob clamp. The T-bolt slides in a metal track that has been secured to the bench with screws, then the knob on the bolt is tightened to hold the jig in place. The aluminum track will last through a lifetime of constant use. You can buy the T-slot track, T-bolts and knobs from many different woodworking suppliers these days, including Rockler (800-279-4441, www.rockler.com). Installing the metal track requires a simple 13/16" wide by 3/8" deep groove. Make sure the groove depth is accurate; if it's too shallow the track will stick up into the work surface, and if it's too deep the accessories will pull the track out of the groove. Lay out the track grooves on the maple rails as shown in the End View Detail, page 66, then chuck a 1/2" straight bit in your router and attach a straightedge guide. Now rout one 3/8" deep pass for each track, then reset the edge guide to make a second pass, widening the grooves to 13/16". Since the track comes in 40" lengths, this bench requires four pieces to make up the two parallel slots. To secure the tracks, set them into the grooves and drill 5/32" diameter holes holes every six inches. Next, drive a #6 - 1" panhead screw (pieces 16) into each hole. If the track overhangs the end of the bench, cut the excess off with a hacksaw. Benchtop Details Drilling dog holes in the benchtop requires a great deal of accuracy, so I made a jig to help me during this operation (see Figure 2, above). The idea behind the jig is to use one dog hole to establish the position of the next hole. To ensure accuracy I incorporated a portable drilling guide into my jig. Since the jig is guided by the maple rails, I have two fence positions, one for the right-hand row of holes and one for the left-hand row. Build the jig, then set it against the bench top to drill the first hole as shown in the Dog Hole Location Drawing on page 65. Drill the hole, then use a center punch and the forward hole on the jig to locate the next hole. Now move the jig forward until you can slip a 1" dowel through the rear jig hole and into the first bench hole. Lower the drill bit to the second hole location to make sure the bit spur goes right into the punch mark. Drill the second hole and use the center punch to mark the third hole. Continue this procedure for the rest of the dog 68 * Workshop Projects |


