Woodworker's Journal 2004-Winter, страница 67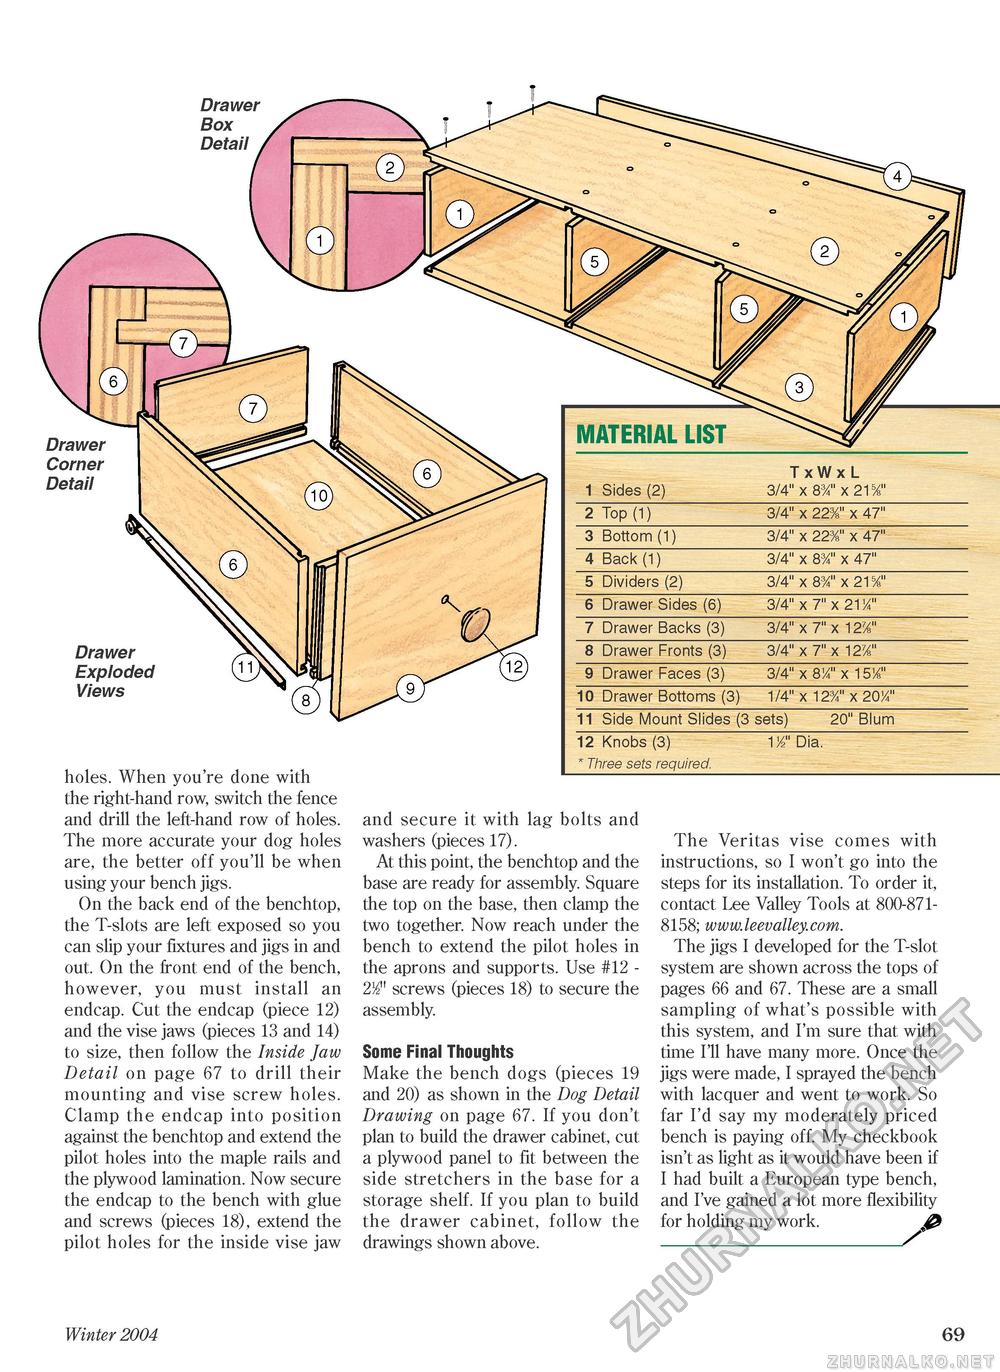
Drawer Box Detail Drawer Corner Detail Drawer Exploded Views holes. When you're done with the right-hand row, switch the fence and drill the left-hand row of holes. The more accurate your dog holes are, the better off you'll be when using your bench jigs. On the back end of the benchtop, the T-slots are left exposed so you can slip your fixtures and jigs in and out. On the front end of the bench, however, you must install an endcap. Cut the endcap (piece 12) and the vise jaws (pieces 13 and 14) to size, then follow the Inside Jaw Detail on page 67 to drill their mounting and vise screw holes. Clamp the endcap into position against the benchtop and extend the pilot holes into the maple rails and the plywood lamination. Now secure the endcap to the bench with glue and screws (pieces 18), extend the pilot holes for the inside vise jaw
and secure it with lag bolts and washers (pieces 17). At this point, the benchtop and the base are ready for assembly. Square the top on the base, then clamp the two together. Now reach under the bench to extend the pilot holes in the aprons and supports. Use #12 -2/2" screws (pieces 18) to secure the assembly. Some Final Thoughts Make the bench dogs (pieces 19 and 20) as shown in the Dog Detail Drawing on page 67. If you don't plan to build the drawer cabinet, cut a plywood panel to fit between the side stretchers in the base for a storage shelf. If you plan to build the drawer cabinet, follow the drawings shown above. The Veritas vise comes with instructions, so I won't go into the steps for its installation. To order it, contact Lee Valley Tools at 800-8718158; www.leevalley.com. The jigs I developed for the T-slot system are shown across the tops of pages 66 and 67. These are a small sampling of what's possible with this system, and I'm sure that with time I'll have many more. Once the jigs were made, I sprayed the bench with lacquer and went to work. So far I'd say my moderately priced bench is paying off. My checkbook isn't as light as it would have been if I had built a European type bench, and I've gained a lot more flexibility for holding my work._ @ Winter 2004 69 |
||||||||||||||||||||||||||||


