Woodworker's Journal 2004-Winter, страница 64
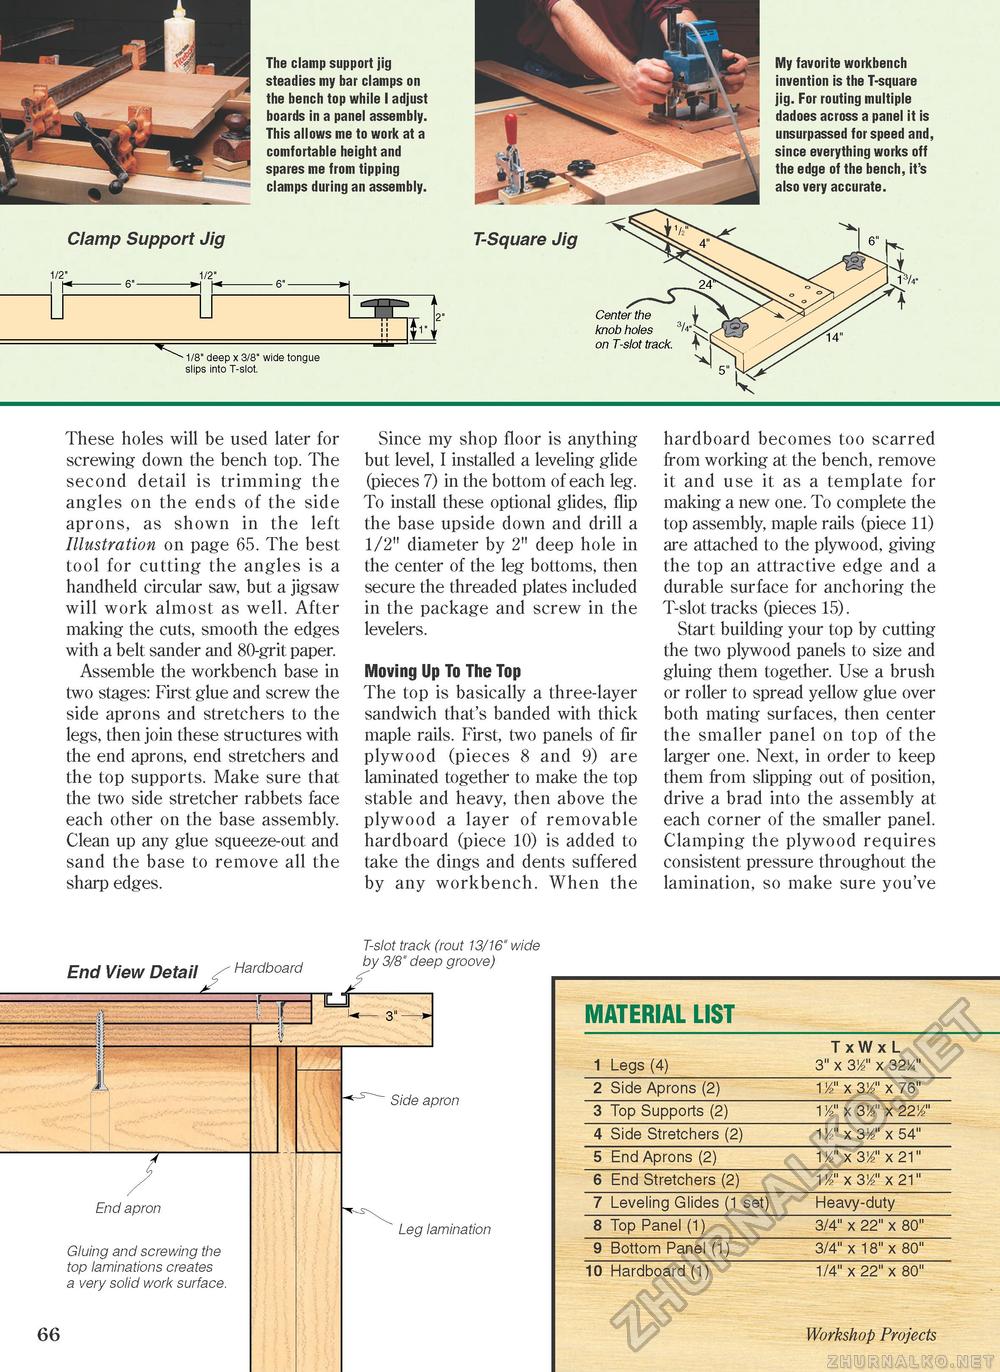
The clamp support jig steadies my bar clamps on the bench top while I adjust boards in a panel assembly. This allows me to work at a comfortable height and spares me from tipping clamps during an assembly. The clamp support jig steadies my bar clamps on the bench top while I adjust boards in a panel assembly. This allows me to work at a comfortable height and spares me from tipping clamps during an assembly. Clamp Support Jig " 1/8" deep x 3/8" wide tongue slips into T-slot. My favorite workbench invention is the T-square jig. For routing multiple dadoes across a panel it is unsurpassed for speed and, since everything works off the edge of the bench, it's also very accurate. T-Square Jig Center the knob holes ^"'jo, on T-slot track. 4 r N These holes will be used later for screwing down the bench top. The second detail is trimming the angles on the ends of the side aprons, as shown in the left Illustration on page 65. The best tool for cutting the angles is a handheld circular saw, but a jigsaw will work almost as well. After making the cuts, smooth the edges with a belt sander and 80-grit paper. Assemble the workbench base in two stages: First glue and screw the side aprons and stretchers to the legs, then join these structures with the end aprons, end stretchers and the top supports. Make sure that the two side stretcher rabbets face each other on the base assembly. Clean up any glue squeeze-out and sand the base to remove all the sharp edges. Since my shop floor is anything but level, I installed a leveling glide (pieces 7) in the bottom of each leg. To install these optional glides, flip the base upside down and drill a 1/2" diameter by 2" deep hole in the center of the leg bottoms, then secure the threaded plates included in the package and screw in the levelers. Moving Up To The Top The top is basically a three-layer sandwich that's banded with thick maple rails. First, two panels of fir plywood (pieces 8 and 9) are laminated together to make the top stable and heavy, then above the plywood a layer of removable hardboard (piece 10) is added to take the dings and dents suffered by any workbench. When the hardboard becomes too scarred from working at the bench, remove it and use it as a template for making a new one. To complete the top assembly, maple rails (piece 11) are attached to the plywood, giving the top an attractive edge and a durable surface for anchoring the T-slot tracks (pieces 15). Start building your top by cutting the two plywood panels to size and gluing them together. Use a brush or roller to spread yellow glue over both mating surfaces, then center the smaller panel on top of the larger one. Next, in order to keep them from slipping out of position, drive a brad into the assembly at each corner of the smaller panel. Clamping the plywood requires consistent pressure throughout the lamination, so make sure you've End View Detail Hardboard T-slot track (rout 13/16" wide by 3/8" deep groove) End apron Gluing and screwing the top laminations creates a very solid work surface. 66 TLJ" 3"- Side apron Leg lamination MATERIAL LIST
|
||||||||||||||||||||||||||||||||||||||||||||


