Woodworker's Journal 2004-Winter, страница 69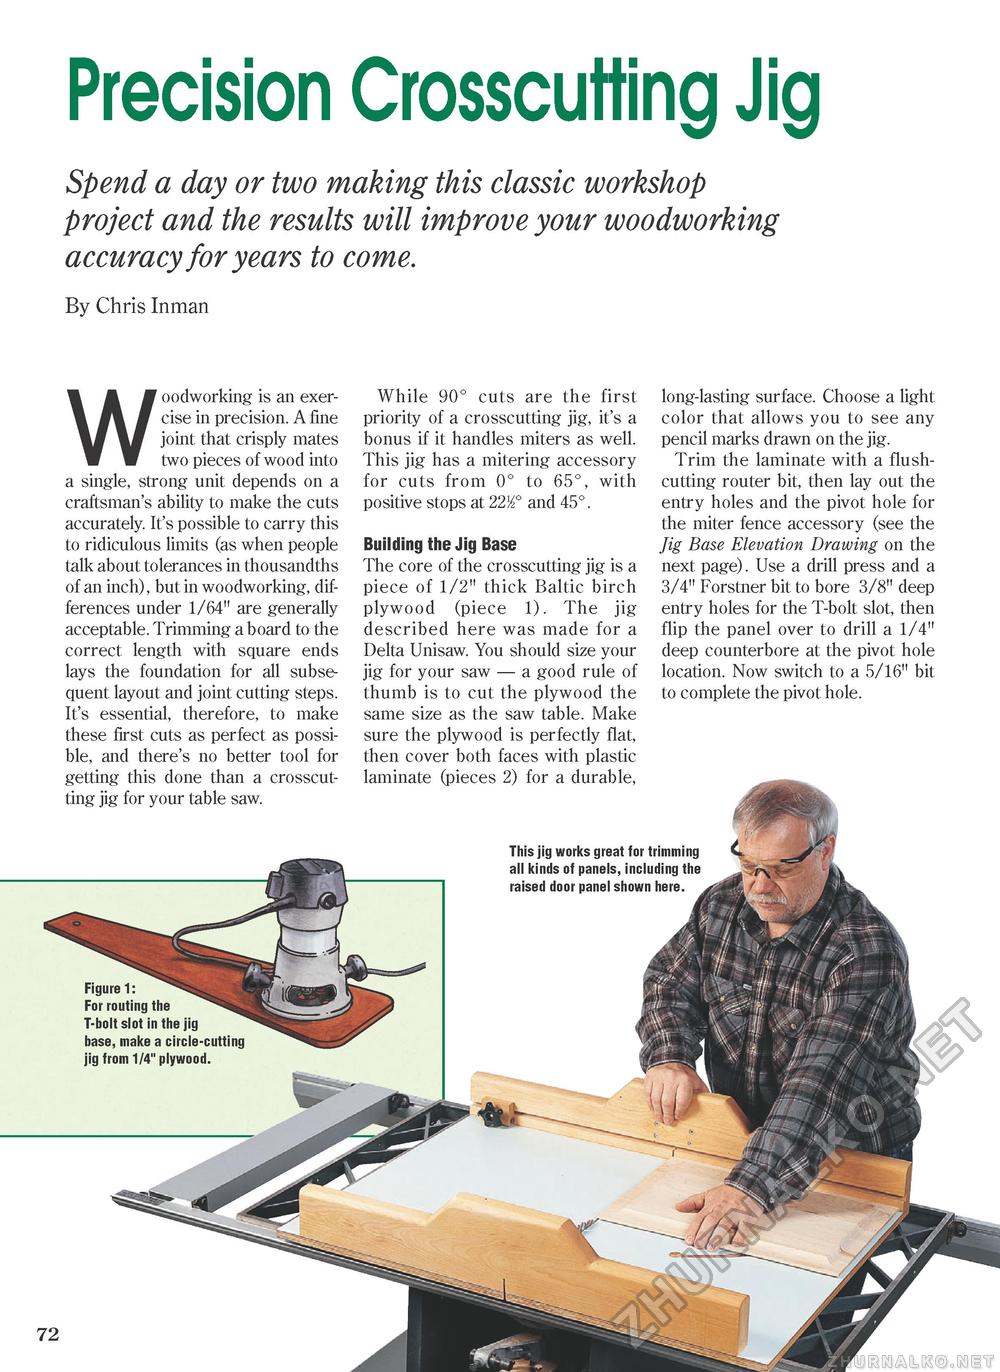
Precision Crosscutting JigSpend a day or two making this classic workshop project and the results will improve your woodworking accuracy for years to come.By Chris Inman Woodworking is an exercise in precision. A fine joint that crisply mates two pieces of wood into a single, strong unit depends on a craftsman's ability to make the cuts accurately. It's possible to carry this to ridiculous limits (as when people talk about tolerances in thousandths of an inch), but in woodworking, differences under 1/64" are generally acceptable. Trimming a board to the correct length with square ends lays the foundation for all subsequent layout and joint cutting steps. It's essential, therefore, to make these first cuts as perfect as possible, and there's no better tool for getting this done than a crosscut-ting jig for your table saw. While 90° cuts are the first priority of a crosscutting jig, it's a bonus if it handles miters as well. This jig has a mitering accessory for cuts from 0° to 65°, with positive stops at 22/2° and 45°. Building the Jig Base The core of the crosscutting jig is a piece of 1/2" thick Baltic birch plywood (piece 1). The jig described here was made for a Delta Unisaw. You should size your jig for your saw — a good rule of thumb is to cut the plywood the same size as the saw table. Make sure the plywood is perfectly flat, then cover both faces with plastic laminate (pieces 2) for a durable, long-lasting surface. Choose a light color that allows you to see any pencil marks drawn on the jig. Trim the laminate with a flush-cutting router bit, then lay out the entry holes and the pivot hole for the miter fence accessory (see the Jig Base Elevation Drawing on the next page). Use a drill press and a 3/4" Forstner bit to bore 3/8" deep entry holes for the T-bolt slot, then flip the panel over to drill a 1/4" deep counterbore at the pivot hole location. Now switch to a 5/16" bit to complete the pivot hole. |


