Woodworker's Journal 2004-Winter, страница 72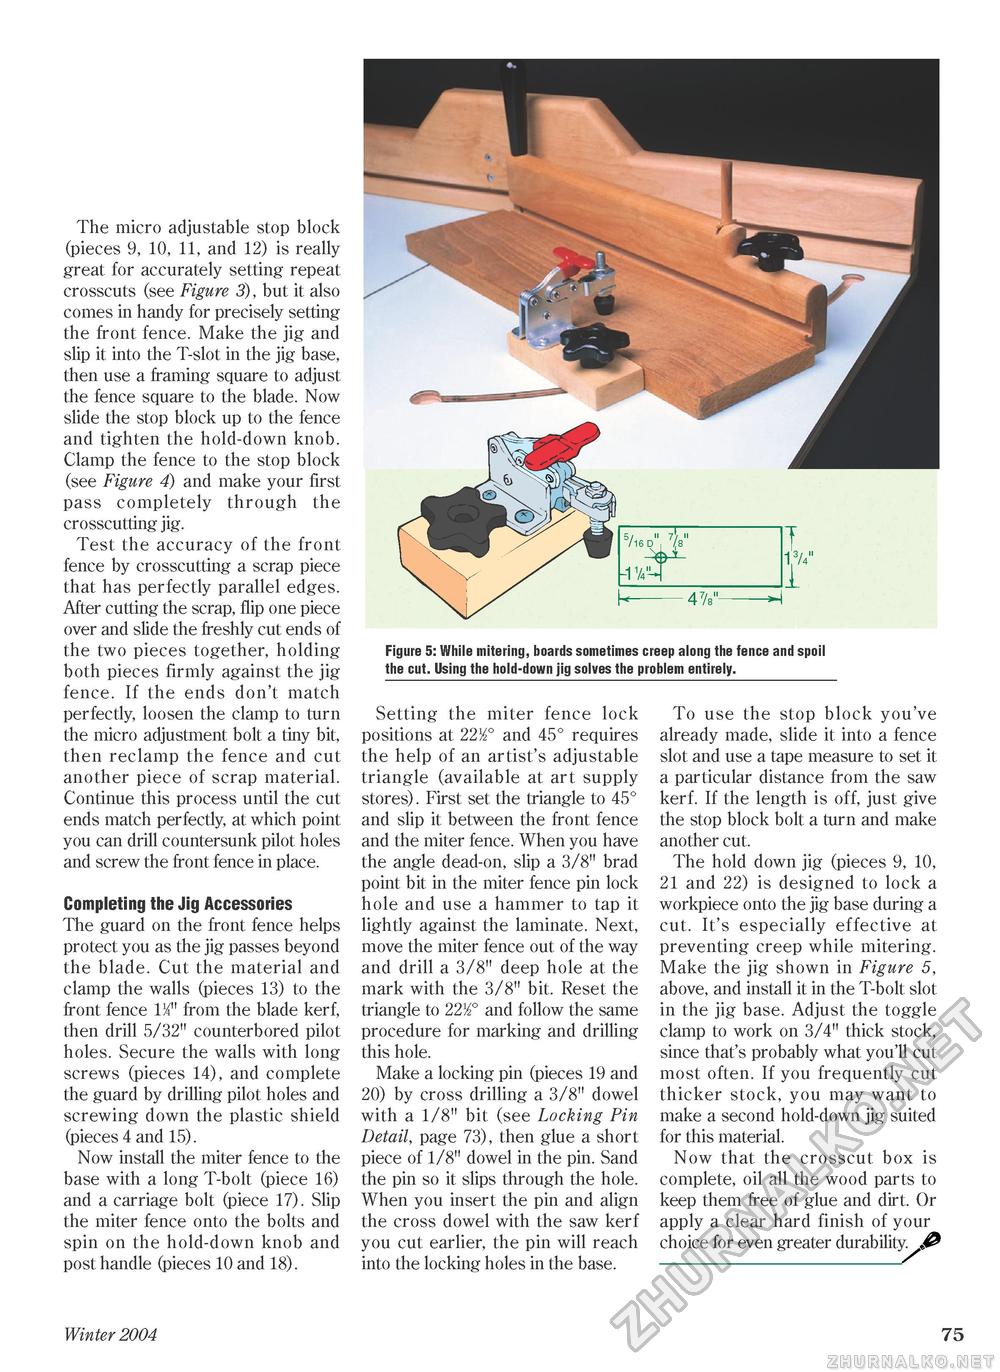
The micro adjustable stop block (pieces 9, 10, 11, and 12) is really great for accurately setting repeat crosscuts (see Figure 3), but it also comes in handy for precisely setting the front fence. Make the jig and slip it into the T-slot in the jig base, then use a framing square to adjust the fence square to the blade. Now slide the stop block up to the fence and tighten the hold-down knob. Clamp the fence to the stop block (see Figure 4) and make your first pass completely through the crosscutting jig. Test the accuracy of the front fence by crosscutting a scrap piece that has perfectly parallel edges. After cutting the scrap, flip one piece over and slide the freshly cut ends of the two pieces together, holding both pieces firmly against the jig fence. If the ends don't match perfectly, loosen the clamp to turn the micro adjustment bolt a tiny bit, then reclamp the fence and cut another piece of scrap material. Continue this process until the cut ends match perfectly, at which point you can drill countersunk pilot holes and screw the front fence in place. Completing the Jig Accessories The guard on the front fence helps protect you as the jig passes beyond the blade. Cut the material and clamp the walls (pieces 13) to the front fence 11/' from the blade kerf, then drill 5/32" counterbored pilot holes. Secure the walls with long screws (pieces 14), and complete the guard by drilling pilot holes and screwing down the plastic shield (pieces 4 and 15). Now install the miter fence to the base with a long T-bolt (piece 16) and a carriage bolt (piece 17). Slip the miter fence onto the bolts and spin on the hold-down knob and post handle (pieces 10 and 18). Figure 5: While mitering, boards sometimes creep along the fence and spoil the cut. Using the hold-down jig solves the problem entirely. Setting the miter fence lock positions at 22/2° and 45° requires the help of an artist's adjustable triangle (available at art supply stores). First set the triangle to 45° and slip it between the front fence and the miter fence. When you have the angle dead-on, slip a 3/8" brad point bit in the miter fence pin lock hole and use a hammer to tap it lightly against the laminate. Next, move the miter fence out of the way and drill a 3/8" deep hole at the mark with the 3/8" bit. Reset the triangle to 22/2° and follow the same procedure for marking and drilling this hole. Make a locking pin (pieces 19 and 20) by cross drilling a 3/8" dowel with a 1/8" bit (see Locking Pin Detail, page 73), then glue a short piece of 1/8" dowel in the pin. Sand the pin so it slips through the hole. When you insert the pin and align the cross dowel with the saw kerf you cut earlier, the pin will reach into the locking holes in the base. To use the stop block you've already made, slide it into a fence slot and use a tape measure to set it a particular distance from the saw kerf. If the length is off, just give the stop block bolt a turn and make another cut. The hold down jig (pieces 9, 10, 21 and 22) is designed to lock a workpiece onto the jig base during a cut. It's especially effective at preventing creep while mitering. Make the jig shown in Figure 5, above, and install it in the T-bolt slot in the jig base. Adjust the toggle clamp to work on 3/4" thick stock, since that's probably what you'll cut most often. If you frequently cut thicker stock, you may want to make a second hold-down jig suited for this material. Now that the crosscut box is complete, oil all the wood parts to keep them free of glue and dirt. Or apply a clear hard finish of your choice for even greater durability. J& Winter 2004 75 |


