Woodworker's Journal 2004-Winter, страница 77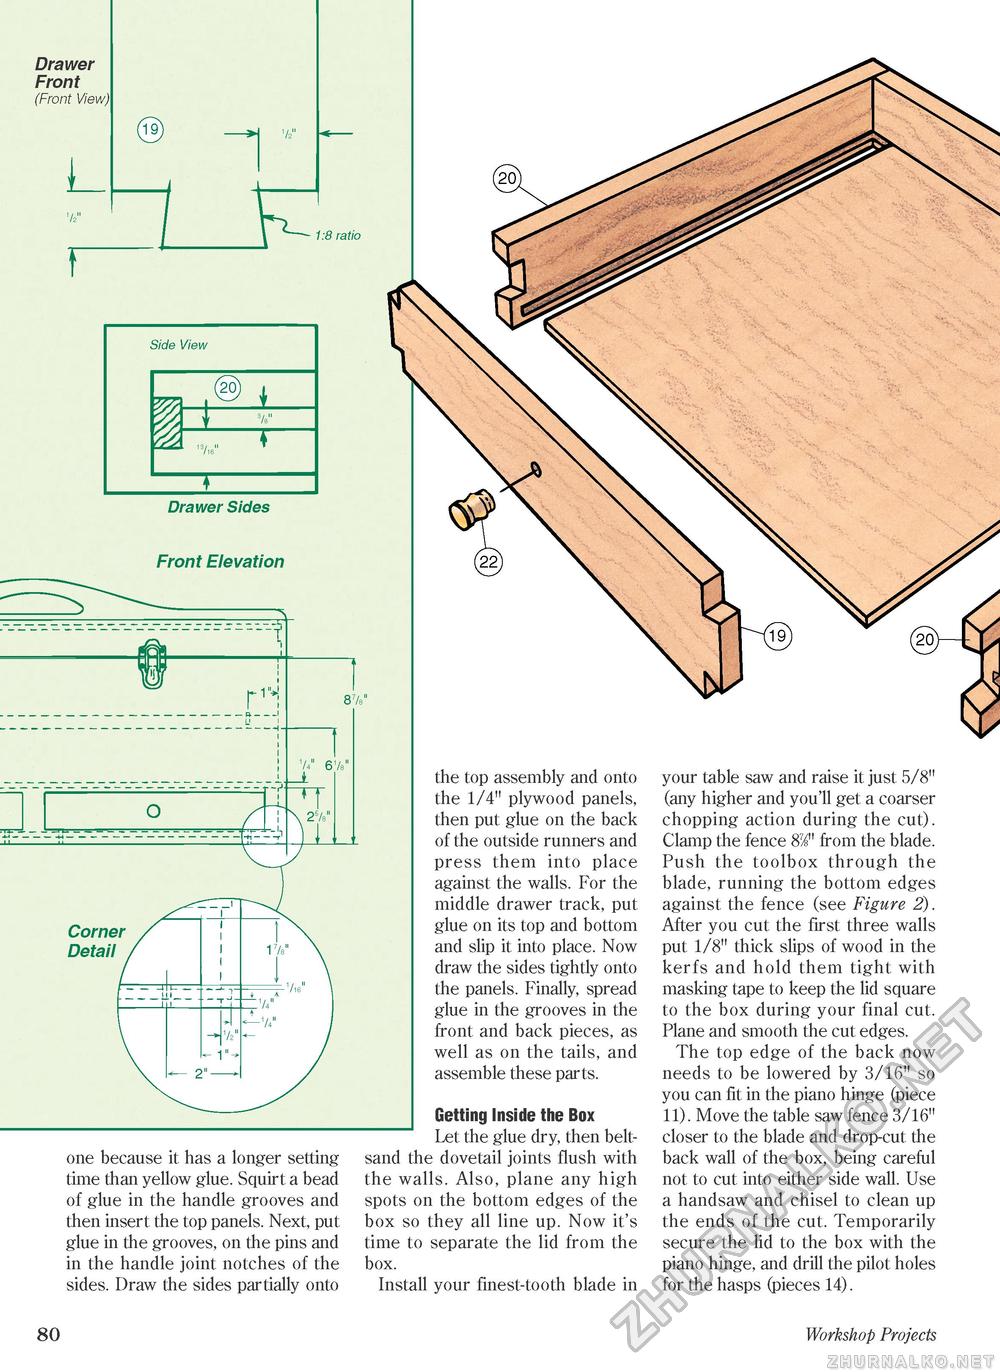
Drawer Front (Front View) 1:8 ratio
Drawer Sides Drawer Sides Front Elevation one because it has a longer setting time than yellow glue. Squirt a bead of glue in the handle grooves and then insert the top panels. Next, put glue in the grooves, on the pins and in the handle joint notches of the sides. Draw the sides partially onto the top assembly and onto the 1/4" plywood panels, then put glue on the back of the outside runners and press them into place against the walls. For the middle drawer track, put glue on its top and bottom and slip it into place. Now draw the sides tightly onto the panels. Finally, spread glue in the grooves in the front and back pieces, as well as on the tails, and assemble these parts. Getting Inside the Box Let the glue dry, then belt-sand the dovetail joints flush with the walls. Also, plane any high spots on the bottom edges of the box so they all line up. Now it's time to separate the lid from the box. Install your finest-tooth blade in your table saw and raise it just 5/8" (any higher and you'll get a coarser chopping action during the cut). Clamp the fence 8/8" from the blade. Push the toolbox through the blade, running the bottom edges against the fence (see Figure 2). After you cut the first three walls put 1/8" thick slips of wood in the kerfs and hold them tight with masking tape to keep the lid square to the box during your final cut. Plane and smooth the cut edges. The top edge of the back now needs to be lowered by 3/16" so you can fit in the piano hinge (piece 11). Move the table saw fence 3/16" closer to the blade and drop-cut the back wall of the box, being careful not to cut into either side wall. Use a handsaw and chisel to clean up the ends of the cut. Temporarily secure the lid to the box with the piano hinge, and drill the pilot holes for the hasps (pieces 14). 80 * Workshop Projects |
||||||||||||||


