Woodworker's Journal 2004-Winter, страница 78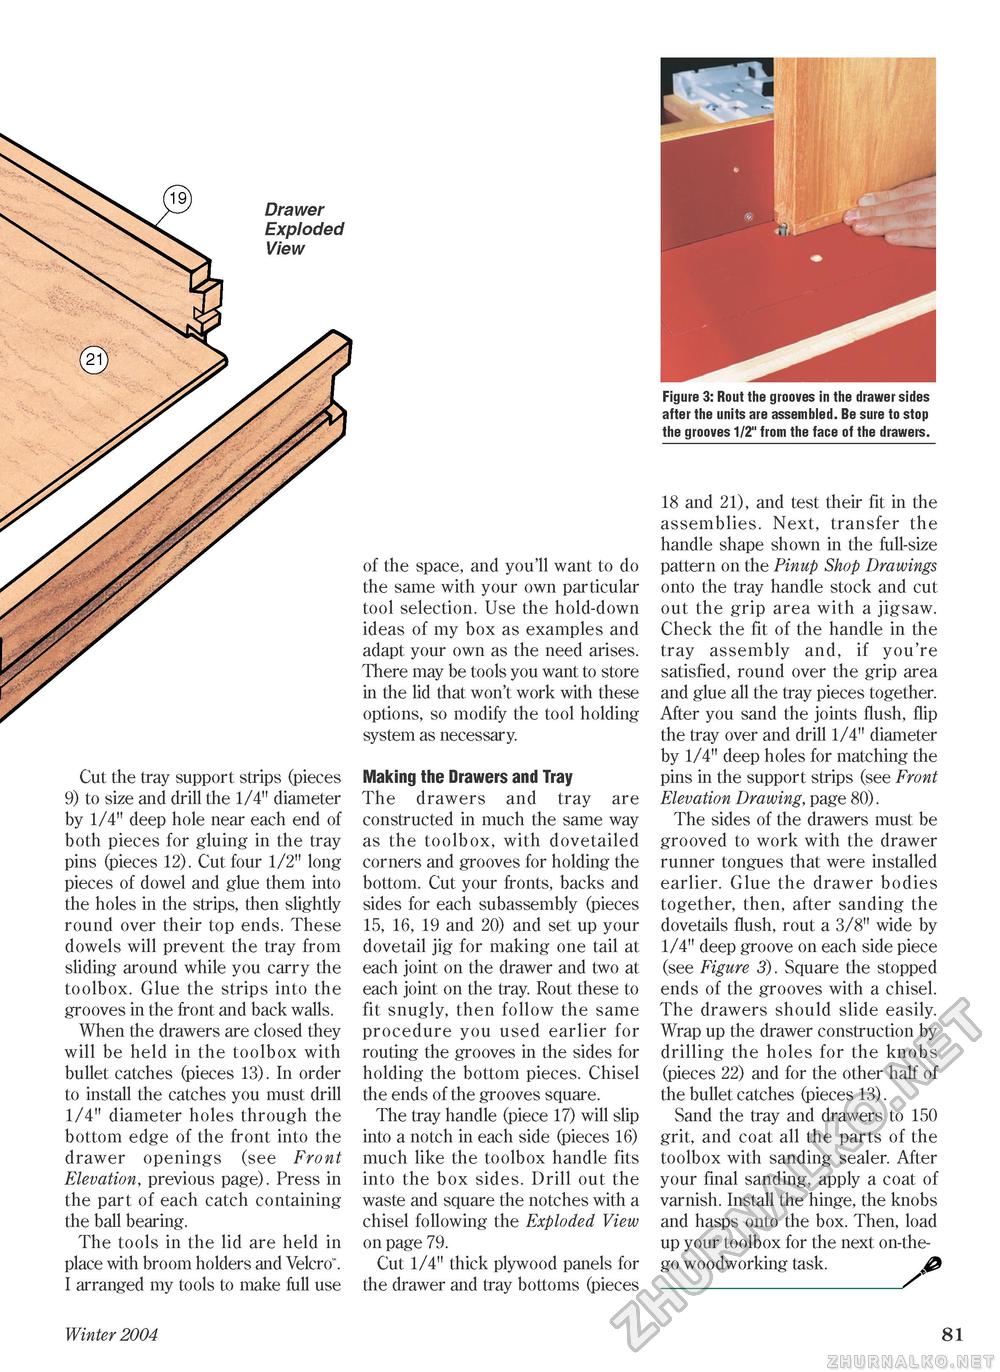
Drawer Exploded View Cut the tray support strips (pieces 9) to size and drill the 1/4" diameter by 1/4" deep hole near each end of both pieces for gluing in the tray pins (pieces 12). Cut four 1/2" long pieces of dowel and glue them into the holes in the strips, then slightly round over their top ends. These dowels will prevent the tray from sliding around while you carry the toolbox. Glue the strips into the grooves in the front and back walls. When the drawers are closed they will be held in the toolbox with bullet catches (pieces 13). In order to install the catches you must drill 1/4" diameter holes through the bottom edge of the front into the drawer openings (see Front Elevation, previous page). Press in the part of each catch containing the ball bearing. The tools in the lid are held in place with broom holders and Velcro". I arranged my tools to make full use of the space, and you'll want to do the same with your own particular tool selection. Use the hold-down ideas of my box as examples and adapt your own as the need arises. There may be tools you want to store in the lid that won't work with these options, so modify the tool holding system as necessary. Making the Drawers and Tray The drawers and tray are constructed in much the same way as the toolbox, with dovetailed corners and grooves for holding the bottom. Cut your fronts, backs and sides for each subassembly (pieces 15, 16, 19 and 20) and set up your dovetail jig for making one tail at each joint on the drawer and two at each joint on the tray. Rout these to fit snugly, then follow the same procedure you used earlier for routing the grooves in the sides for holding the bottom pieces. Chisel the ends of the grooves square. The tray handle (piece 17) will slip into a notch in each side (pieces 16) much like the toolbox handle fits into the box sides. Drill out the waste and square the notches with a chisel following the Exploded View on page 79. Cut 1/4" thick plywood panels for the drawer and tray bottoms (pieces Figure 3: Rout the grooves in the drawer sides after the units are assembled. Be sure to stop the grooves 1/2" from the face of the drawers. 18 and 21), and test their fit in the assemblies. Next, transfer the handle shape shown in the full-size pattern on the Pinup Shop Drawings onto the tray handle stock and cut out the grip area with a jigsaw. Check the fit of the handle in the tray assembly and, if you're satisfied, round over the grip area and glue all the tray pieces together. After you sand the joints flush, flip the tray over and drill 1/4" diameter by 1/4" deep holes for matching the pins in the support strips (see Front Elevation Drawing, page 80). The sides of the drawers must be grooved to work with the drawer runner tongues that were installed earlier. Glue the drawer bodies together, then, after sanding the dovetails flush, rout a 3/8" wide by 1/4" deep groove on each side piece (see Figure 3). Square the stopped ends of the grooves with a chisel. The drawers should slide easily. Wrap up the drawer construction by drilling the holes for the knobs (pieces 22) and for the other half of the bullet catches (pieces 13). Sand the tray and drawers to 150 grit, and coat all the parts of the toolbox with sanding sealer. After your final sanding, apply a coat of varnish. Install the hinge, the knobs and hasps onto the box. Then, load up your toolbox for the next on-the-go woodworking task._ Winter 2004 81 |


