Woodworker's Journal 2006-30-2, страница 29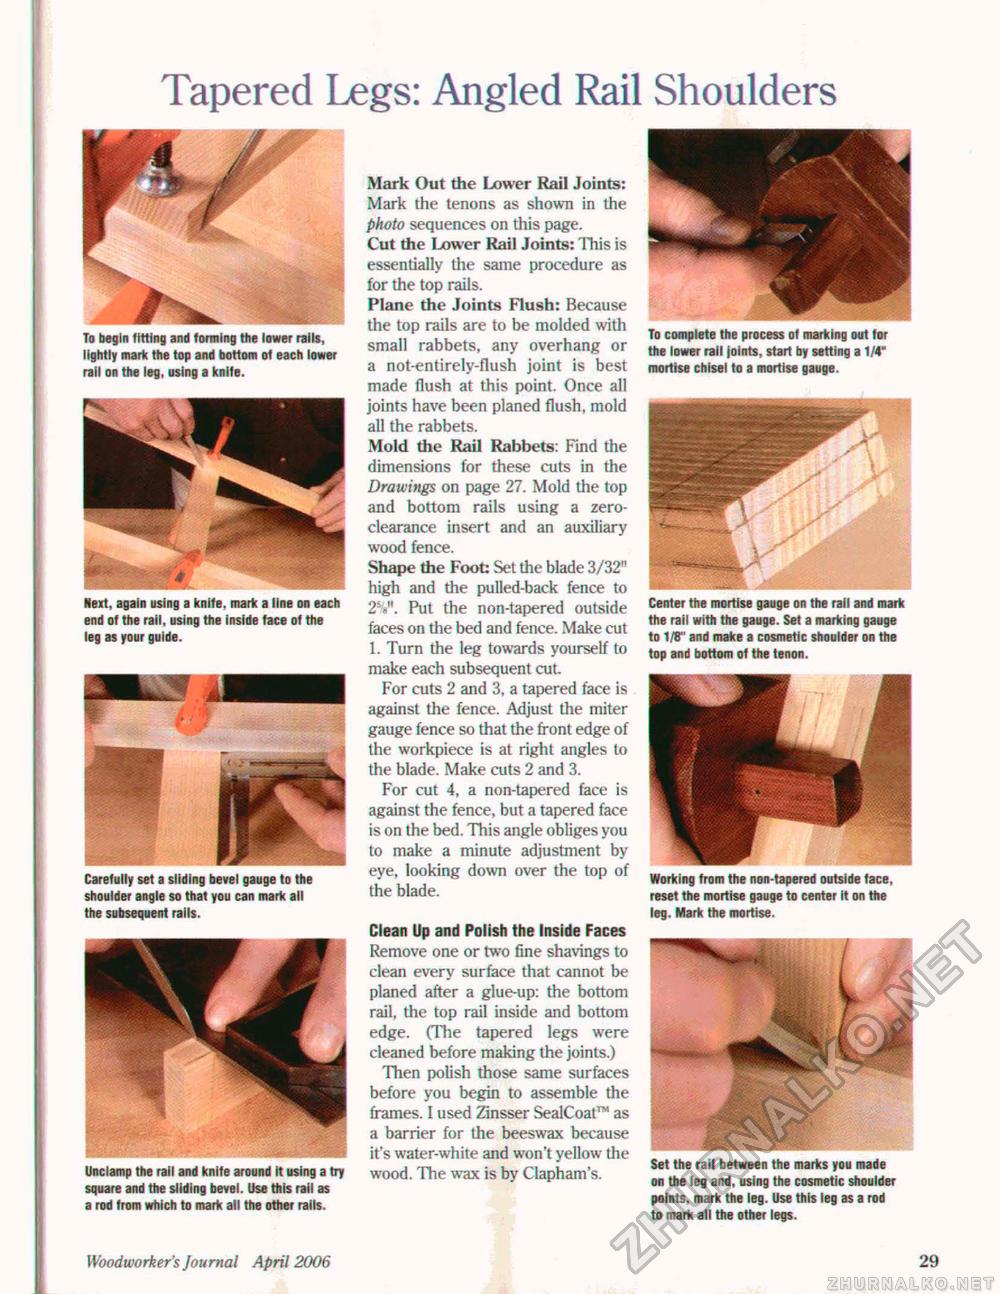
Tapered Legs: Angled Rail Shoulders To complete the process of marking out for the lower tall joints, start by setting a 1/4" mortise chisel to a mortise gauge. Center the mortise gauge on the rail and mark the rail with the gauge. Set a marking gauge to 1/8" and make a cosmetic shoulder on the top and bottom ot the tenon. Working from the non-tapered outside (ace, reset the mortise gauge to center it on the leg. Mark the mortise. Set the rail between the marks you made on the leg and, using the cosmetic shoulder points, mark the leg. Use this leg as a rod to mark all the other legs. Mark Out the Lower Rail Joints: Mark the tenons as shown in the photo sequences on this page. Cut the Lower Rail Joints: This is essentially the same procedure as for the top rails. Plane the Joints Flush: Because the top rails are to be molded with small rabbets, any overhang or a not-entirely-flush joint is best made flush at this point. Once all joints have been planed flush, mold all the rabbets. Mold the Rail Rabbets: Find the dimensions for these cuts in the Drawings on page 27. Mold the top and bottom rails using a zero-clearance insert and an auxiliary wood fence. Shape the Foot Set the blade 3/32" high and the pulled-back fence to 2V. Put the non-tapered outside faces on the bed and fence. Make cut 1. Turn the leg towards yourself to make each subsequent cut For cuts 2 and 3. a tapered face is against the fence. Adjust the miter gauge fence so that the front edge of the workpiece is at right angles to the blade. Make cuts 2 and 3. For cut 4, a non-tapered face is against the fence, but a tapered face is on the bed. This angle obliges you to make a minute adjustment by eye, looking down over the top of the blade. Clean Up and Polish the Inside Faces Remove one or two fine shavings to clean every surface that cannot be planed after a glue-up: the bottom rail, the top rail inside and bottom edge. (The tapered legs were cleaned before making the joints.) Then polish those same surfaces before you begin to assemble the frames. I used Zinsser SealCoat™ as a barrier for the beeswax because it's water-white and won't yellow the wood. The wax is by Clapham's. To begin fitting and forming the lower rails, lightly mark the top and bottom ot each lower rail on the leg, using a knife. Next, again using a knife, mark a line on each end of the rail, using the inside face of the leg as your guide. Carefully set a sliding bevel gauge to the shoulder angle so that you can mark all the subsequent rails, Unclamp the rail and knife around it using a try square and the sliding bevel. Use this rail as a rod from which to mark all the other rails. Woodworker's Journal April 2006 29 |


