Woodworker's Journal 2006-30-2, страница 35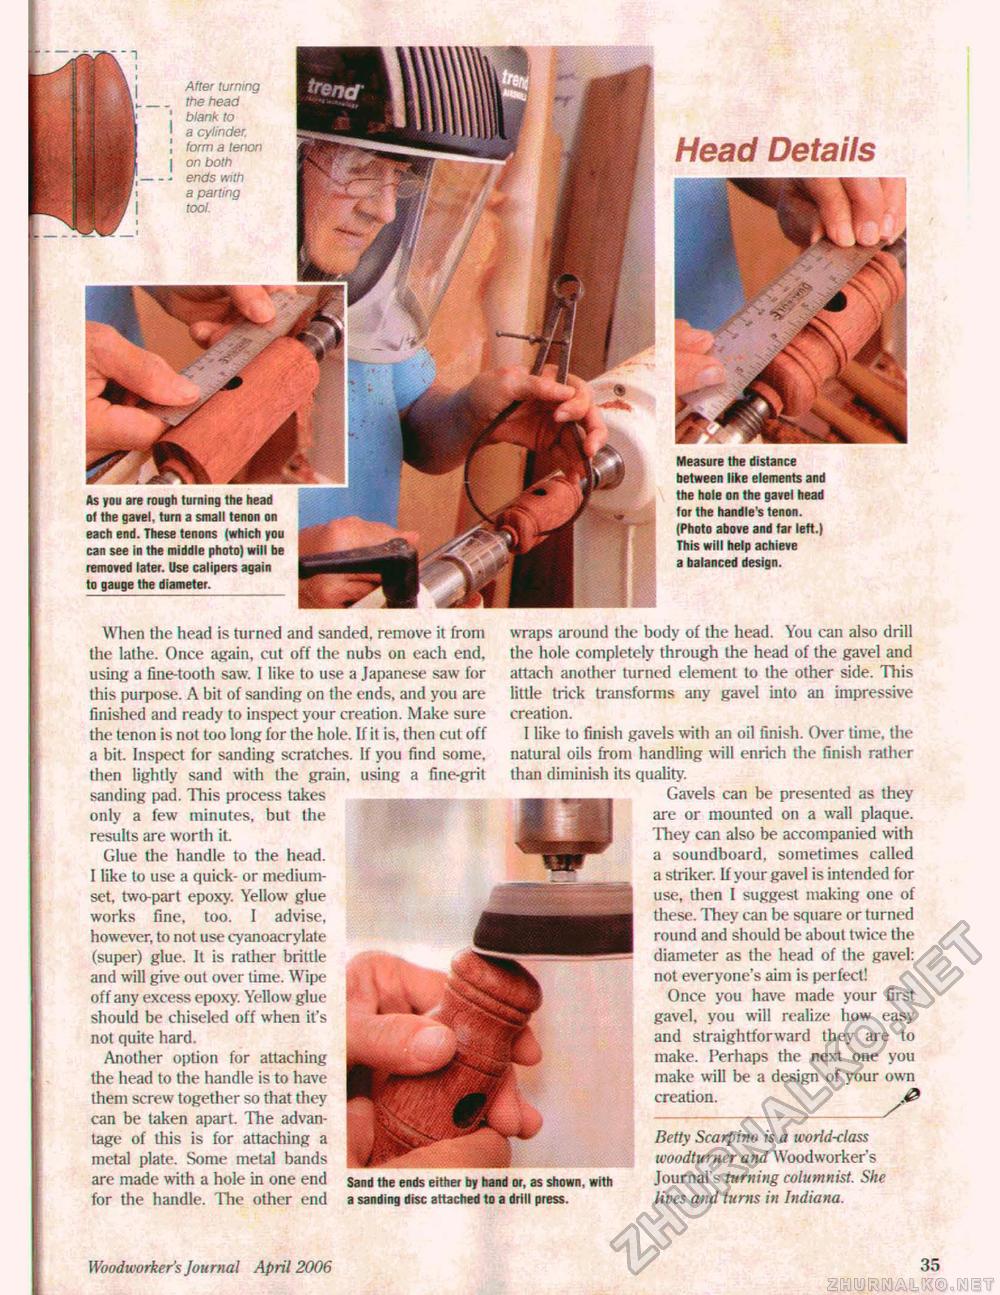
Head Details Woodworker's Journal April 2006 35 After turning the head blank to a cylinder, form a tenon on both ends with a parting tool Measure the distance between like elements and the hole on the gavel head lor the handle's tenon, (Photo above and far left,) This will help achieve a balanced design. When the head is turned and sanded, remove it from the lathe. Once again, cut off the nubs on each end, using a line-tooth saw, I like to use a Japanese saw for this purj>ose. A bit of sanding on the ends, and you are finished and ready to inspect your creation. Make sure the tenon is not too long for the hole. If it is, then cut off a bit. Inspect for sanding scratches. If you find some, then lightly sand with the grain, using a fine-grit sanding pad. This process takes only a few minutes, but the results are worth it. Glue the handle to the head. I like to use a quick- or medium-set, two-part epoxy. Yellow glue works fine, too. I advise, however, to not use cyanoacrylate (super) glue. It is rather brittle and will give out over time. Wipe off any excess epoxy. Yellow glue should be chiselcd off when it's not quite hard. Another option for attaching the head to the handle is to have them screw together so that they can be taken apart. The advantage of this is for attaching a metal plate. Some metal bands are made with a hole in one end sand the ends either by hand or, as shown, with for the handle. The other end a sanding disc attached to a drill press. wraps around the body of the head. You can also drill the hole completely through the head of the gavel and attach another turned element to ihe other side. This little trick transforms any gavel into an impressive creation. I like to finish gavels with an oil finish. Over time, the natural oils from handling will enrich the finish rather than diminish its quality. Gavels can be presented as they are or mounted on a wall plaque. They can also be accompanied with a soundboard, sometimes called a striker. If your gavel is intended for use, then I suggest making one of these. They can be square or turned round and should be about twice the diameter as the head of the gavel: not everyone's aim is perfect! Once you have made your first gavel, you will realize how easy and straightforward they are to make. Perhaps the next one you make will be a design of your own creation. _ Betty Scarpino is a world-class woodturner and Woodworker's Journal's turning columnist. She lives and turns in Indiana. As you are rough turning the head of the gavel, turn a small tenon on each end. These tenons (which you can see in the middle photo) will be removed later. Use calipers again to gauge the diameter. |


