Woodworker's Journal 2006-30-2, страница 34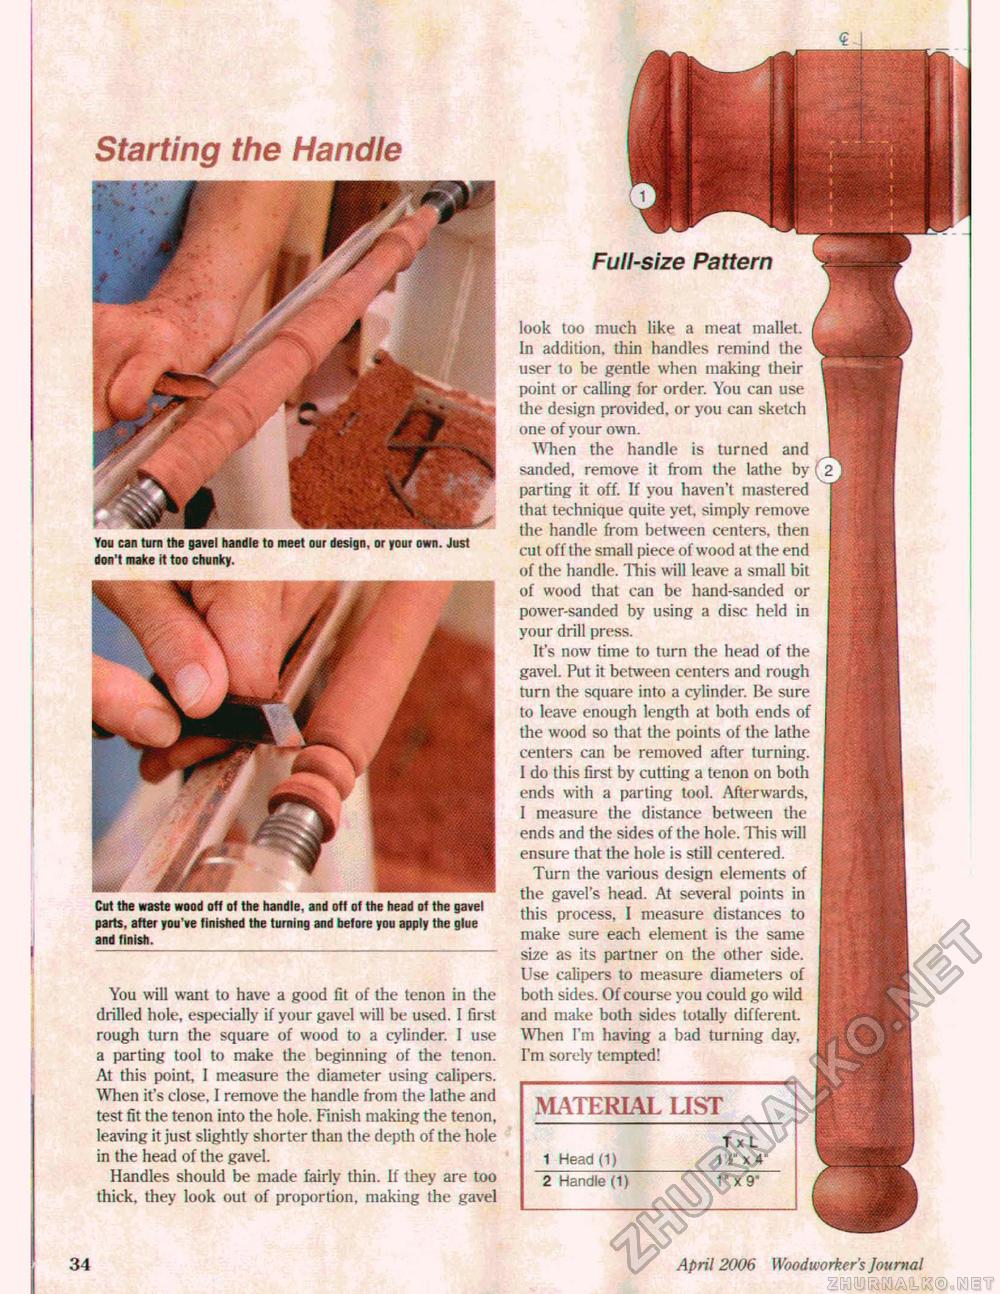
Starting the Handle You can turn the gave! handle to meet our design, or your own. Just don't make it too chunky. Cut the waste wood off of the handle, and oil of the head of the gavel parts, after you've finished the turning and before you apply the glue and finish. You will want to have a good fit of the tenon in the drilled hole, especially if your gavel will be used. I first rough turn the square of wood to a cylinder. I use a parting tool to make the beginning of the tenon. At this point, I measure the diameter using calipers. When it's close, I remove the handle from the lathe and test fit the tenon into the hole. Finish making the tenon, leaving it just slightly shorter than the depth of the hole in the head of the gavel. Handles should be made fairly thin. If they are too thick, they look out of proportion, making the gavel MATERIAL LIST Tx L 1 Head (1) VA" x 4" 2 Handle (1) 1" x 9" Full-size Pattern look too much like a meat mallet. In addition, thin handles remind the user to be gentle when making their point or calling for order. You can use the design provided, or you can sketch one of your own. When the handle is turned and sanded, remove it from the lathe by parting it off. If you haven'l mastered that technique quite yet, simply remove the handle from between centers, (hen cut off the small piece of wood at the end of the handle. This will leave a small of wood that can be hand-sanded power-sanded by using a disc held in your drill press. It's now time to turn the head of gavel. Put it between centers and rough turn the square into a cylinder. Be sure to leave enough length at both ends of the wood so that the points of the lathe centers can be removed after turning. 1 do this first by cutting a tenon on both ends with a parting tool. Afterwards, I measure the distance between the ends and the sides of the hole. This will ensure that the hole is still centered. Turn the various design elements of the gavel's head. At several points in this process, 1 measure distances to make sure each element is the same size as its partner on the other side. Use calipers to measure diameters of both sides. Of course you could go wild and make both sides totally different. When I'm having a bad turning day. I'm sorely tempted! 34 April 2006 Woodworker's Journal |


