Woodworker's Journal 2006-30-5, страница 33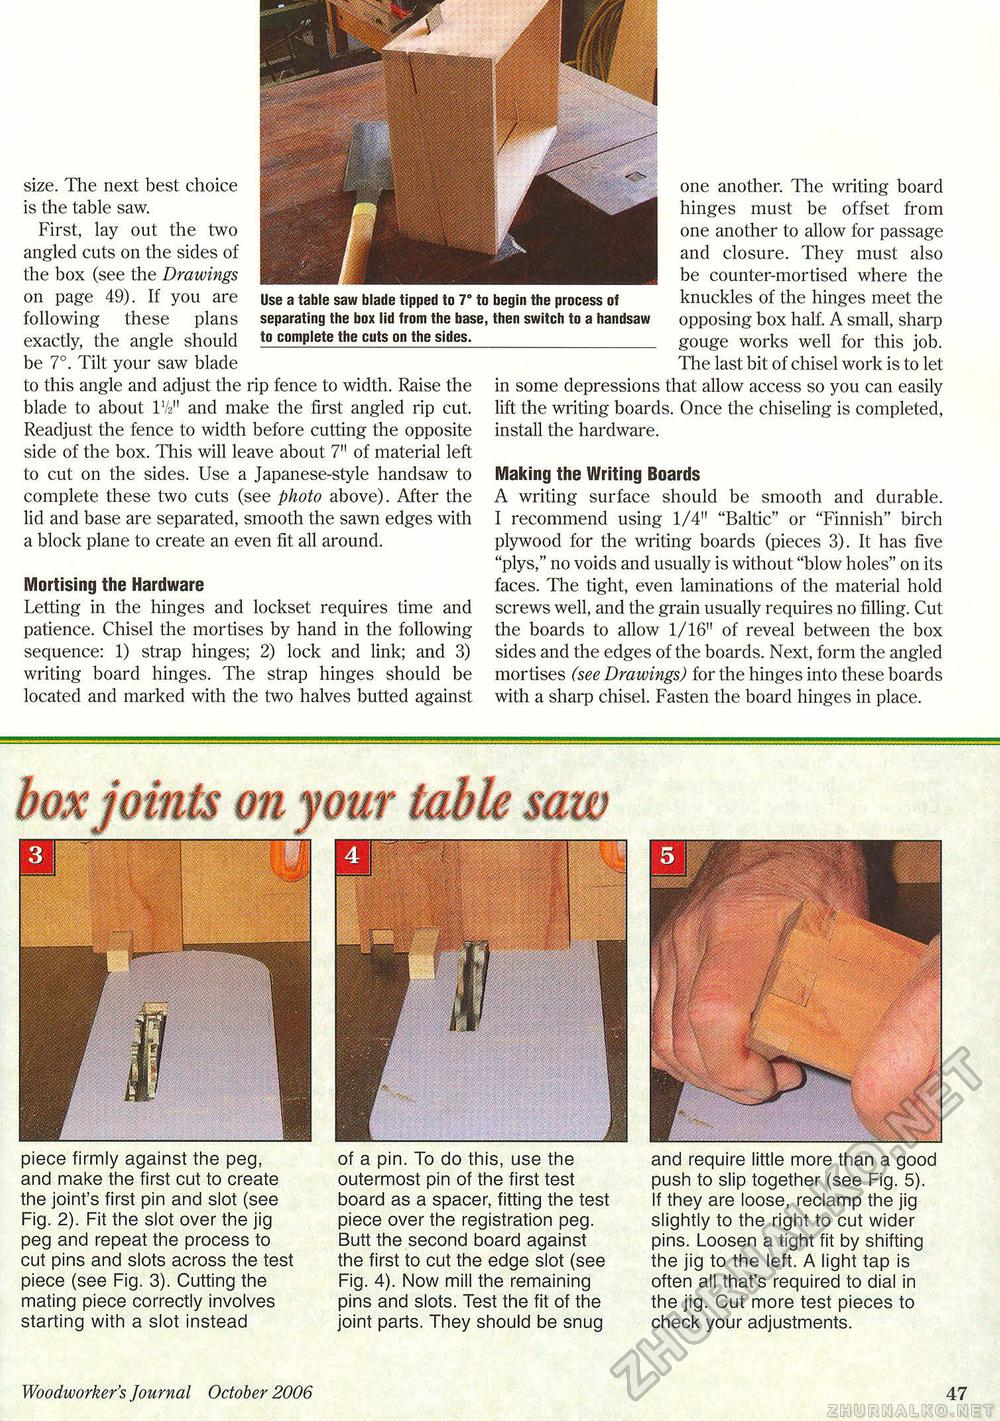
size. The next best choice is the table saw. First, lay out the two angled cuts on the sides of the box (see the Drawings on page 49). If you are following these plans exactly, the angle should be 7°. Tilt your saw blade to this angle and adjust the rip fence to width. Raise the blade to about IV21' and make the first angled rip cut. Readjust the fence to width before cutting the opposite side of the box. This will leave about 7" of material left to cut on the sides. Use a Japanese-style handsaw to complete these two cuts (see photo above). After the lid and base are separated, smooth the sawn edges with a block plane to create an even fit all around. Mortising the Hardware Letting in the hinges and lockset requires time and patience. Chisel the mortises by hand in the following sequence: 1) strap hinges; 2) lock and link; and 3) writing board hinges. The strap hinges should be located and marked with the two halves butted against one another. The writing board hinges must be offset from one another to allow for passage and closure. They must also be counter-mortised where the knuckles of the hinges meet the opposing box half. A small, sharp gouge works well for this job. The last bit of chisel work is to let in some depressions that allow access so you can easily lift the writing boards. Once the chiseling is completed, install the hardware. Making the Writing Boards A writing surface should be smooth and durable. I recommend using 1/4" "Baltic" or "Finnish" birch plywood for the writing boards (pieces 3). It has five "plys," no voids and usually is without "blow holes" on its faces. The tight, even laminations of the material hold screws well, and the grain usually requires no filling. Cut the boards to allow 1/16" of reveal between the box sides and the edges of the boards. Next, form the angled mortises (see Drawings) for the hinges into these boards with a sharp chisel. Fasten the board hinges in place. Use a table saw blade tipped to 7° to begin the process of separating the box lid from the base, then switch to a handsaw to complete the cuts on the sides. piece firmly against the peg, and make the first cut to create the joint's first pin and slot (see Fig. 2). Fit the slot over the jig peg and repeat the process to cut pins and slots across the test piece (see Fig. 3). Cutting the mating piece correctly involves starting with a slot instead of a pin. To do this, use the outermost pin of the first test board as a spacer, fitting the test piece over the registration peg. Butt the second board against the first to cut the edge slot (see Fig. 4). Now mill the remaining pins and slots. Test the fit of the joint parts. They should be snug and require little more than a good push to slip together (see Fig. 5). If they are loose, reclamp the jig slightly to the right to cut wider pins. Loosen a tight fit by shifting the jig to the left. A light tap is often all that's required to dial in the jig. Cut more test pieces to check your adjustments. Woodworker's Journal October 2006 47 |


