Woodworker's Journal 2006-30-5, страница 32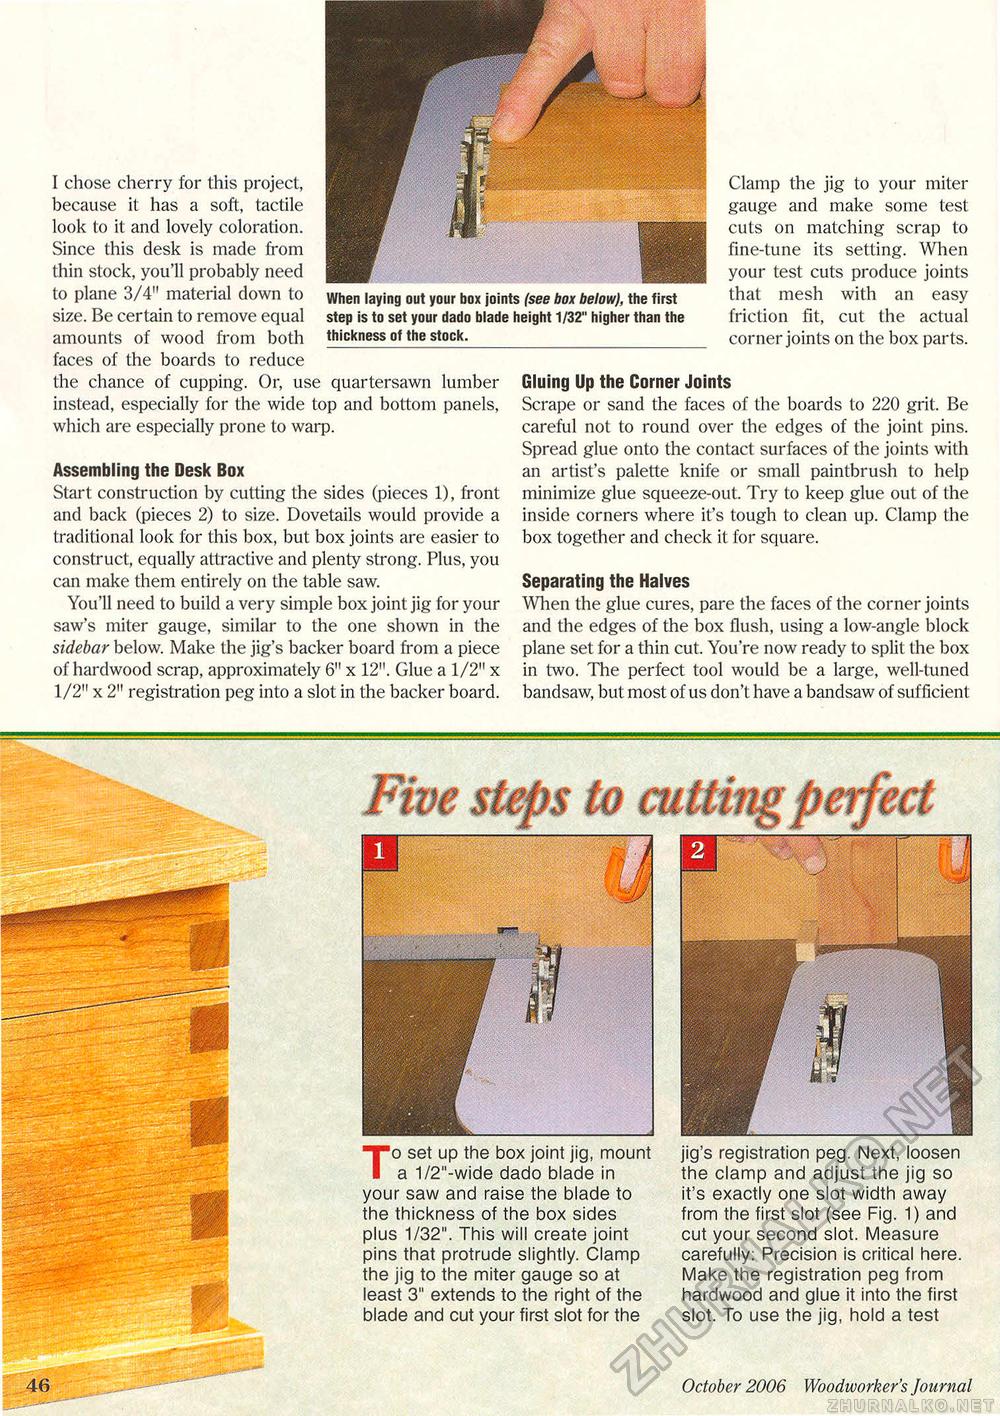
I chose cherry for this project, because it has a soft, tactile look to it and lovely coloration. Since this desk is made from thin stock, you'll probably need to plane 3/4" material clown to size. Be certain to remove equal amounts of wood from both _ faces of the boards to reduce the chance of cupping. Or, use quartersawn lumber instead, especially for the wide top and bottom panels, which are especially prone to warp. Assembling the Desk Box Start construction by cutting the sides (pieces 1), front and back (pieces 2) to size. Dovetails would provide a traditional look for this box, but box joints are easier to construct, equally attractive and plenty strong. Plus, you can make them entirely on the table saw. You'll need to build a very simple box joint jig for your saw's miter gauge, similar to the one shown in the sidebar below. Make the jig's backer board from a piece of hardwood scrap, approximately 6" x 12". Glue a 1/2" x 1/2" x 2" registration peg into a slot in the backer board. When laying out your box joints (see box below), the first step is to set your dado blade height 1/32" higher than the thickness of the stock. Clamp the jig to your miter gauge and make some test cuts on matching scrap to fine-tune its setting. When your test cuts produce joints that mesh with an easy friction fit, cut the actual corner joints on the box parts. Gluing Up the Corner Joints Scrape or sand the faces of the boards to 220 grit. Be careful not to round over the edges of the joint pins. Spread glue onto the contact surfaces of the joints with an artist's palette knife or small paintbrush to help minimize glue squeeze-out. Try to keep glue out of the inside corners where it's tough to clean up. Clamp the box together and check it for square. Separating the Halves When the glue cures, pare the faces of the corner joints and the edges of the box flush, using a low-angle block plane set for a thin cut. You're now ready to split the box in two. The perfect tool would be a large, well-tuned bandsaw, but most of us don't have a bandsaw of sufficient To set up the box joint jig, mount a 1/2"-wide dado blade in your saw and raise the blade to the thickness of the box sides plus 1/32". This will create joint pins that protrude slightly. Clamp the jig to the miter gauge so at least 3" extends to the right of the blade and cut your first slot for the jig's registration peg. Next, loosen the clamp and adjust the jig so it's exactly one slot width away from the first slot (see Fig. 1) and cut your second slot. Measure carefully: Precision is critical here. Make the registration peg from hardwood and glue it into the first slot. To use the jig, hold a test 32 October 2006 Woodivorker's Journal |


