Woodworker's Journal 2006-30-5, страница 29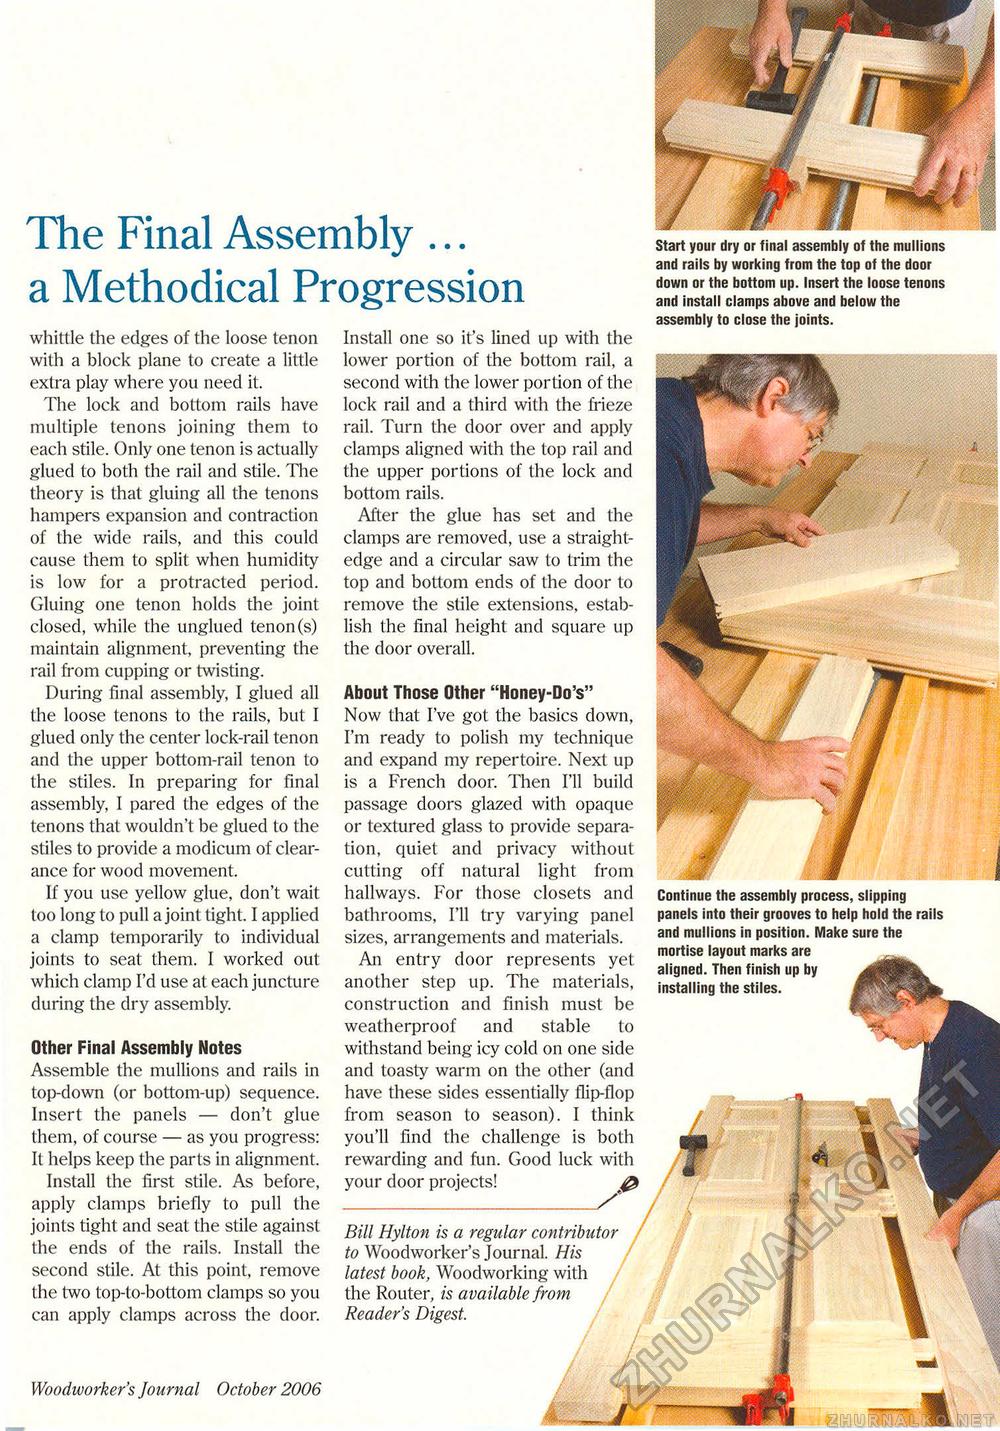
The Final Assembly ...a Methodical Progressionwhittle the edges of the loose tenon with a block plane to create a little extra play where you need it. The lock and bottom rails have multiple tenons joining them to each stile. Only one tenon is actually glued to both the rail and stile. The theory is that gluing all the tenons hampers expansion and contraction of the wide rails, and this could cause them to split when humidity is low for a protracted period. Gluing one tenon holds the joint closed, while the unglued tenon (s) maintain alignment, preventing the rail from cupping or twisting. During final assembly, I glued all the loose tenons to the rails, but I glued only the center lock-rail tenon and the upper bottom-rail tenon to the stiles. In preparing for final assembly, I pared the edges of the tenons that wouldn't be glued to the stiles to provide a modicum of clearance for wood movement. If you use yellow glue, don't wait too long to pull a joint tight. I applied a clamp temporarily to individual joints to seat them. I worked out which clamp I'd use at each juncture during the dry assembly. Install one so it's lined up with the lower portion of the bottom rail, a second with the lower portion of the lock rail and a third with the frieze rail. Turn the door over and apply clamps aligned with the top rail and the upper portions of the lock and bottom rails. After the glue has set and the clamps are removed, use a straightedge and a circular saw to trim the top and bottom ends of the door to remove the stile extensions, establish the final height and square up the door overall. About Those Other "Honey-Do's" Now that I've got the basics clown, I'm ready to polish my technique and expand my repertoire. Next up is a French door. Then I'll build passage doors glazed with opaque or textured glass to provide separation, quiet and privacy without cutting off natural light from hallways. For those closets and bathrooms, I'll try varying panel sizes, arrangements and materials. An entry door represents yet another step up. The materials, construction and finish must be weatherproof and stable to withstand being icy cold on one side and toasty warm on the other (and have these sides essentially flip-flop from season to season). I think you'll find the challenge is both rewarding and fun. Good luck with your door projects! Start your dry or final assembly of the mullions and rails by working from the top of the door down or the bottom up. Insert the loose tenons and install clamps above and below the assembly to close the joints. Continue the assembly process, slipping panels into their grooves to help hold the rails and mullions in position. Make sure the mortise layout marks are aligned. Then finish up by installing the stiles. Bill Hylton is a regular contributor to Woodworker's Journal. His latest book, Woodworking with the Router, is available from Reader's Digest. Other Final Assembly Notes Assemble the mullions and rails in top-down (or bottom-up) sequence. Insert the panels — don't glue them, of course — as you progress: It helps keep the parts in alignment. Install the first stile. As before, apply clamps briefly to pull the joints tight and seat the stile against the ends of the rails. Install the second stile. At this point, remove the two top-to-bottom clamps so you can apply clamps across the door. Woodworker's Journal October 2006 29 |


