Woodworker's Journal 2006-30-5, страница 27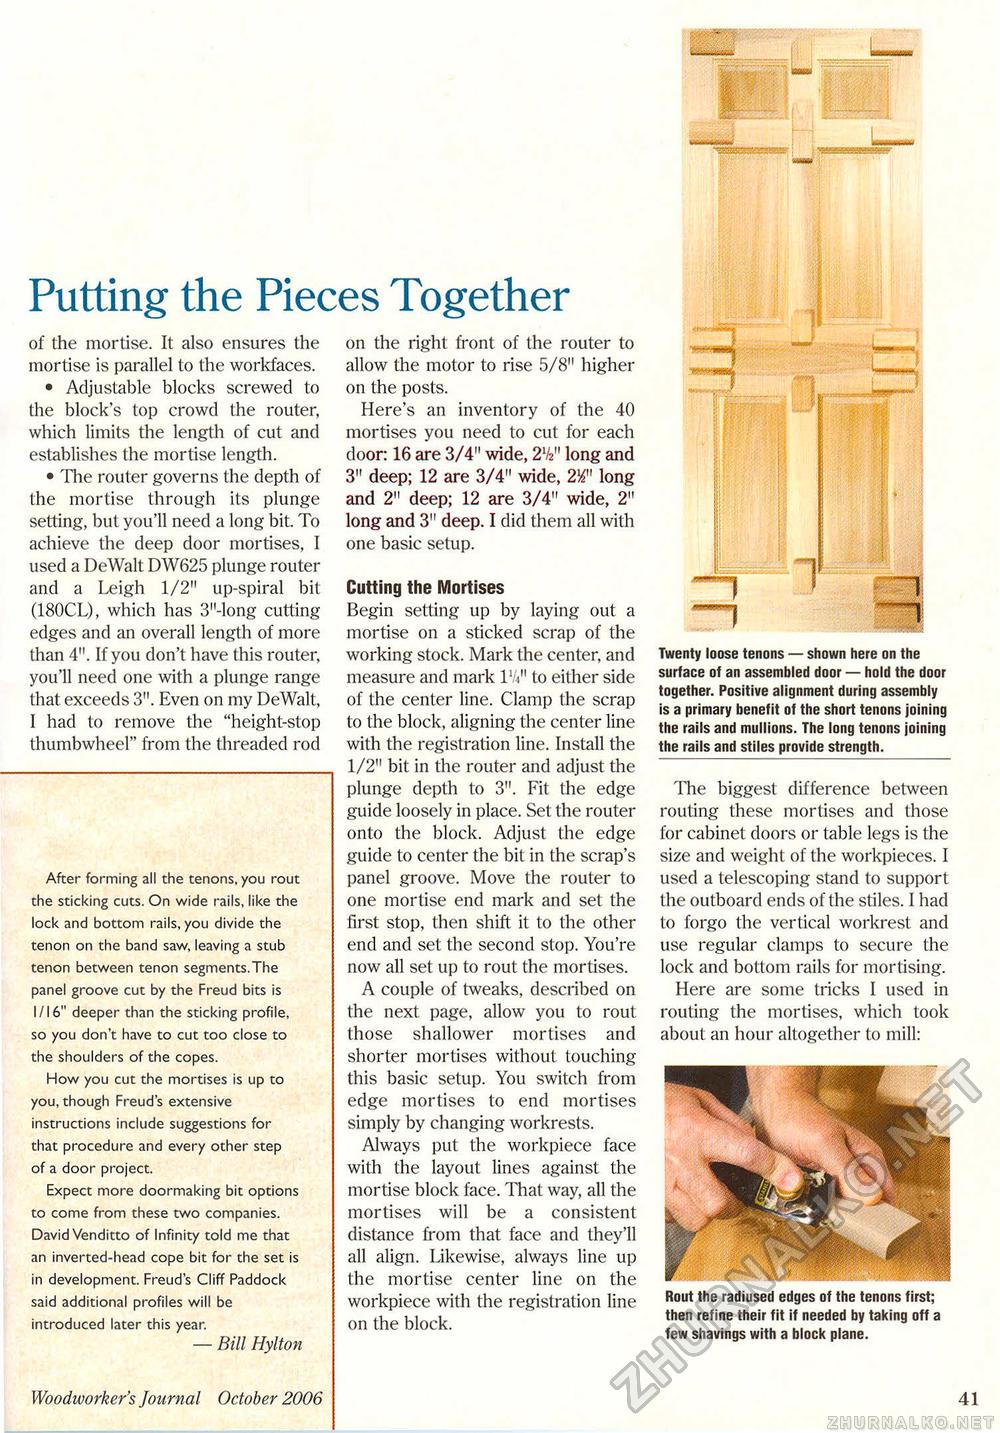
■jSt.- Putting the Pieces Togetherof the mortise. It also ensures the mortise is parallel to the workfaces. • Adjustable blocks screwed to the block's top crowd the router, which limits the length of cut and establishes the mortise length. • The router governs the depth of the mortise through its plunge setting, but you'll need a long bit. To achieve the deep door mortises, I used a DeWalt DW625 plunge router and a Leigh 1/2" up-spiral bit (180CL), which has 3"-long cutting edges and an overall length of more than 4". If you don't have this router, you'll need one with a plunge range that exceeds 3". Even on my DeWalt, I had to remove the "height-stop thumbwheel" from the threaded rod After forming all the tenons, you rout the sticking cuts. On wide rails, like the lock and bottom rails, you divide the tenon on the band saw, leaving a stub tenon between tenon segments.The panel groove cut by the Freud bits is 1/16" deeper than the sticking profile, so you don't have to cut too close to the shoulders of the copes. How you cut the mortises is up to you, though Freud's extensive instructions include suggestions for that procedure and every other step of a door project. Expect more doormaking bit options to come from these two companies. David Venditto of Infinity told me that an inverted-head cope bit for the set is in development. Freud's Cliff Paddock said additional profiles will be introduced later this year. — Bill Hylton on the right front of the router to allow the motor to rise 5/8" higher on the posts. Here's an inventory of the 40 mortises you need to cut for each door: 16 are 3/4" wide, 2lk" long and 3" deep; 12 are 3/4" wide, 2T long and 2" deep; 12 are 3/4" wide, 2" long and 3" deep. I did them all with one basic setup. Cutting the Mortises Begin setting up by laying out a mortise on a sticked scrap of the working stock. Mark the center, and measure and mark lV to either side of the center line. Clamp the scrap to the block, aligning the center line with the registration line. Install the 1/2" bit in the router and adjust the plunge depth to 3". Fit the edge guide loosely in place. Set the router onto the block. Adjust the edge guide to center the bit in the scrap's panel groove. Move the router to one mortise end mark and set the first stop, then shift it to the other end and set the second stop. You're now all set up to rout the mortises. A couple of tweaks, described on the next page, allow you to rout those shallower mortises and shorter mortises without touching this basic setup. You switch from edge mortises to end mortises simply by changing workrests. Always put the workpiece face with the layout lines against the mortise block face. That way, all the mortises will be a consistent distance from that face and they'll all align. Likewise, always line up the mortise center line on the workpiece with the registration line on the block. Twenty loose tenons — shown here on the surface of an assembled door — hold the door together. Positive alignment during assembly is a primary benefit of the short tenons joining the rails and mullions. The long tenons joining the rails and stiles provide strength. The biggest difference between routing these mortises and those for cabinet doors or table legs is the size and weight of the workpieces. I used a telescoping stand to support the outboard ends of the stiles. I had to forgo the vertical workrest and use regular clamps to secure the lock and bottom rails for mortising. Here are some tricks I used in routing the mortises, which took about an hour altogether to mill: Rout the radiused edges of the tenons first; then refine their fit if needed by taking off a few shavings with a block plane. Woodworker's Journal October 2006 41 |


