Woodworker's Journal 2006-30-5, страница 43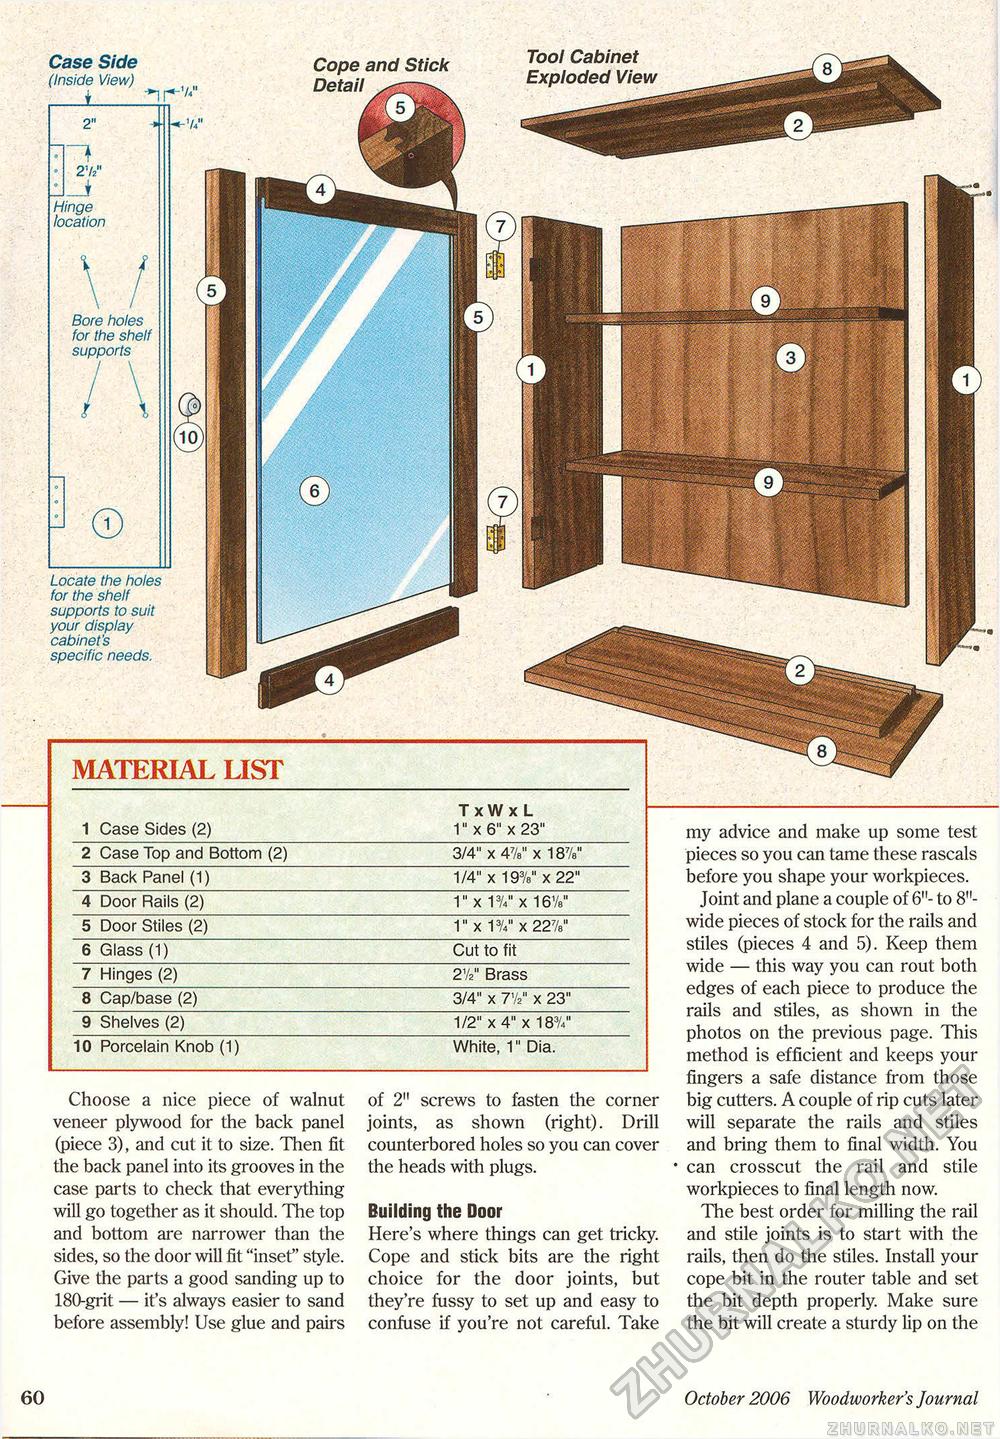
Tool Cabinet Exploded View Case Side (Inside View) Cope and Stick Detail ^ Hinge location Bore holes for the shelf supports Locate the holes for the shelf supports to suit your display cabinet's specific needs. MATERIAL LIST
Choose a nice piece of walnut veneer plywood for the back panel (piece 3), and cut it to size. Then fit the back panel into its grooves in the case parts to check that everything will go together as it should. The top and bottom are narrower than the sides, so the door will fit "inset" style. Give the parts a good sanding up to 180-grit — it's always easier to sand before assembly! Use glue and pairs of 2" screws to fasten the corner joints, as shown (right). Drill counterbored holes so you can cover the heads with plugs. Building the Door Here's where things can get tricky. Cope and stick bits are the right choice for the door joints, but they're fussy to set up and easy to confuse if you're not careful. Take my advice and make up some test pieces so you can tame these rascals before you shape your workpieces. Joint and plane a couple of 6"- to 8"-wide pieces of stock for the rails and stiles (pieces 4 and 5). Keep them wide — this way you can rout both edges of each piece to produce the rails and stiles, as shown in the photos on the previous page. This method is efficient and keeps your fingers a safe distance from those big cutters. A couple of rip cuts later will separate the rails and stiles and bring them to final width. You can crosscut the rail and stile workpieces to final length now. The best order for milling the rail and stile joints is to start with the rails, then do the stiles. Install your cope bit in the router table and set the bit depth properly. Make sure the bit will create a sturdy lip on the 60 October 2006 Woodivorker's Journal |


