Woodworker's Journal 2006-30-Winter, страница 31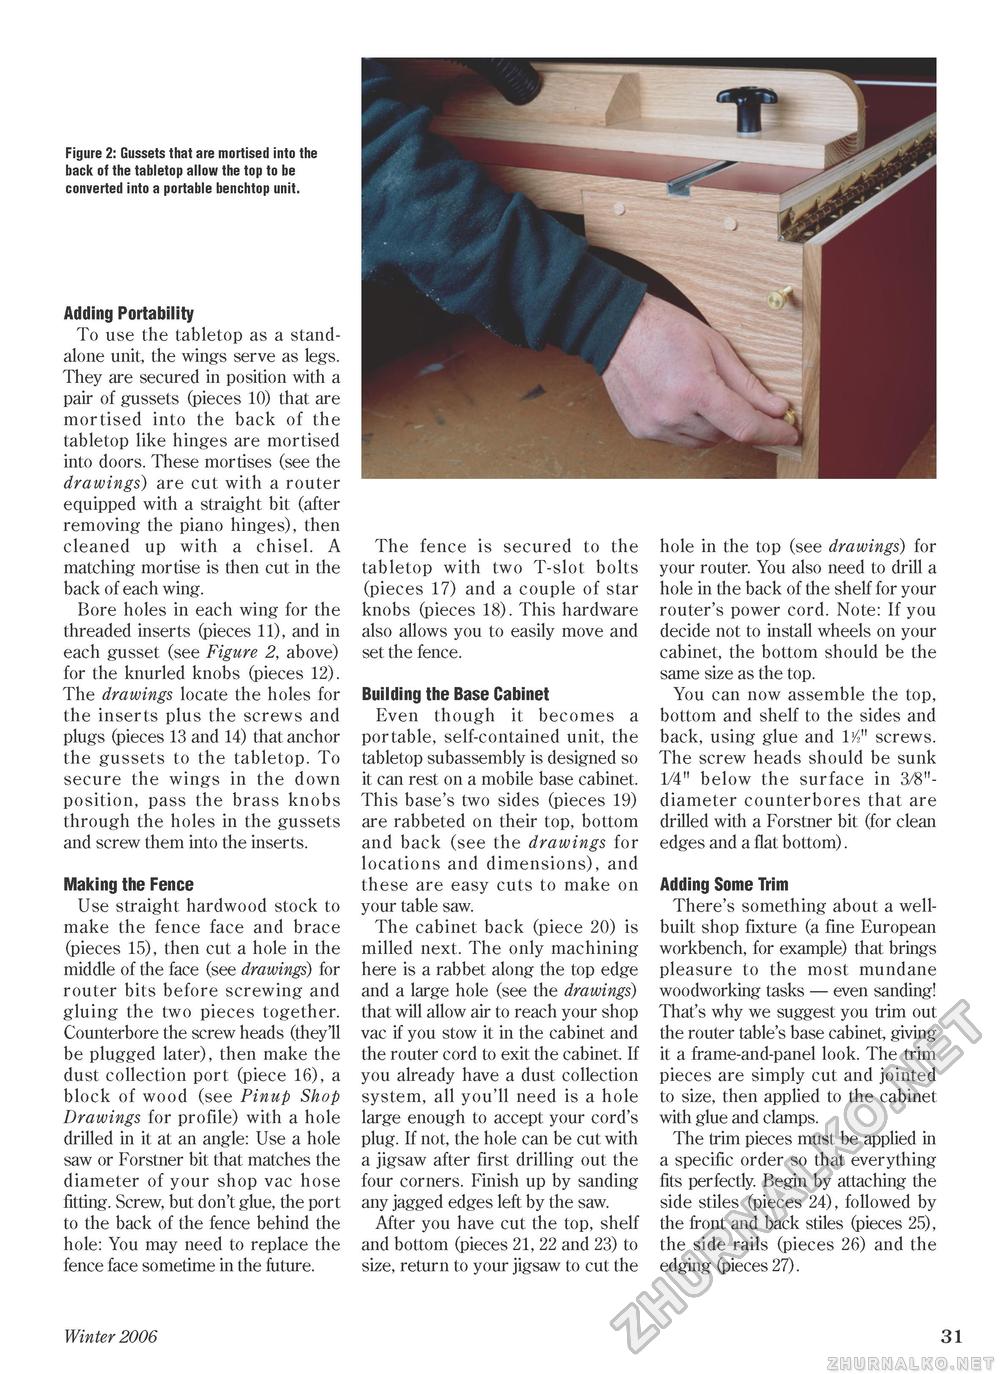
Figure 2: Gussets that are mortised into the back of the tabletop allow the top to be converted into a portable benchtop unit. Adding Portability To use the tabletop as a standalone unit, the wings serve as legs. They are secured in position with a pair of gussets (pieces 10) that are mortised into the back of the tabletop like hinges are mortised into doors. These mortises (see the drawings) are cut with a router equipped with a straight bit (after removing the piano hinges), then cleaned up with a chisel. A matching mortise is then cut in the back of each wing. Bore holes in each wing for the threaded inserts (pieces 11), and in each gusset (see Figure 2, above) for the knurled knobs (pieces 12). The drawings locate the holes for the inserts plus the screws and plugs (pieces 13 and 14) that anchor the gussets to the tabletop. To secure the wings in the down position, pass the brass knobs through the holes in the gussets and screw them into the inserts. Making the Fence Use straight hardwood stock to make the fence face and brace (pieces 15), then cut a hole in the middle of the face (see drawings) for router bits before screwing and gluing the two pieces together. Counterbore the screw heads (they'll be plugged later), then make the dust collection port (piece 16), a block of wood (see Pinup Shop Drawings for profile) with a hole drilled in it at an angle: Use a hole saw or Forstner bit that matches the diameter of your shop vac hose fitting. Screw, but don't glue, the port to the back of the fence behind the hole: You may need to replace the fence face sometime in the future. The fence is secured to the tabletop with two T-slot bolts (pieces 17) and a couple of star knobs (pieces 18). This hardware also allows you to easily move and set the fence. Building the Base Cabinet Even though it becomes a portable, self-contained unit, the tabletop subassembly is designed so it can rest on a mobile base cabinet. This base's two sides (pieces 19) are rabbeted on their top, bottom and back (see the drawings for locations and dimensions), and these are easy cuts to make on your table saw. The cabinet back (piece 20) is milled next. The only machining here is a rabbet along the top edge and a large hole (see the drawings) that will allow air to reach your shop vac if you stow it in the cabinet and the router cord to exit the cabinet. If you already have a dust collection system, all you'll need is a hole large enough to accept your cord's plug. If not, the hole can be cut with a jigsaw after first drilling out the four corners. Finish up by sanding any jagged edges left by the saw. After you have cut the top, shelf and bottom (pieces 21, 22 and 23) to size, return to your jigsaw to cut the hole in the top (see drawings) for your router. You also need to drill a hole in the back of the shelf for your router's power cord. Note: If you decide not to install wheels on your cabinet, the bottom should be the same size as the top. You can now assemble the top, bottom and shelf to the sides and back, using glue and 1/2" screws. The screw heads should be sunk 1/4" below the surface in 3/8"-diameter counterbores that are drilled with a Forstner bit (for clean edges and a flat bottom). Adding Some Trim There's something about a well-built shop fixture (a fine European workbench, for example) that brings pleasure to the most mundane woodworking tasks — even sanding! That's why we suggest you trim out the router table's base cabinet, giving it a frame-and-panel look. The trim pieces are simply cut and jointed to size, then applied to the cabinet with glue and clamps. The trim pieces must be applied in a specific order so that everything fits perfectly. Begin by attaching the side stiles (pieces 24), followed by the front and back stiles (pieces 25), the side rails (pieces 26) and the edging (pieces 27). Winter 2006 31 |


