Woodworker's Journal 2006-30-Winter, страница 34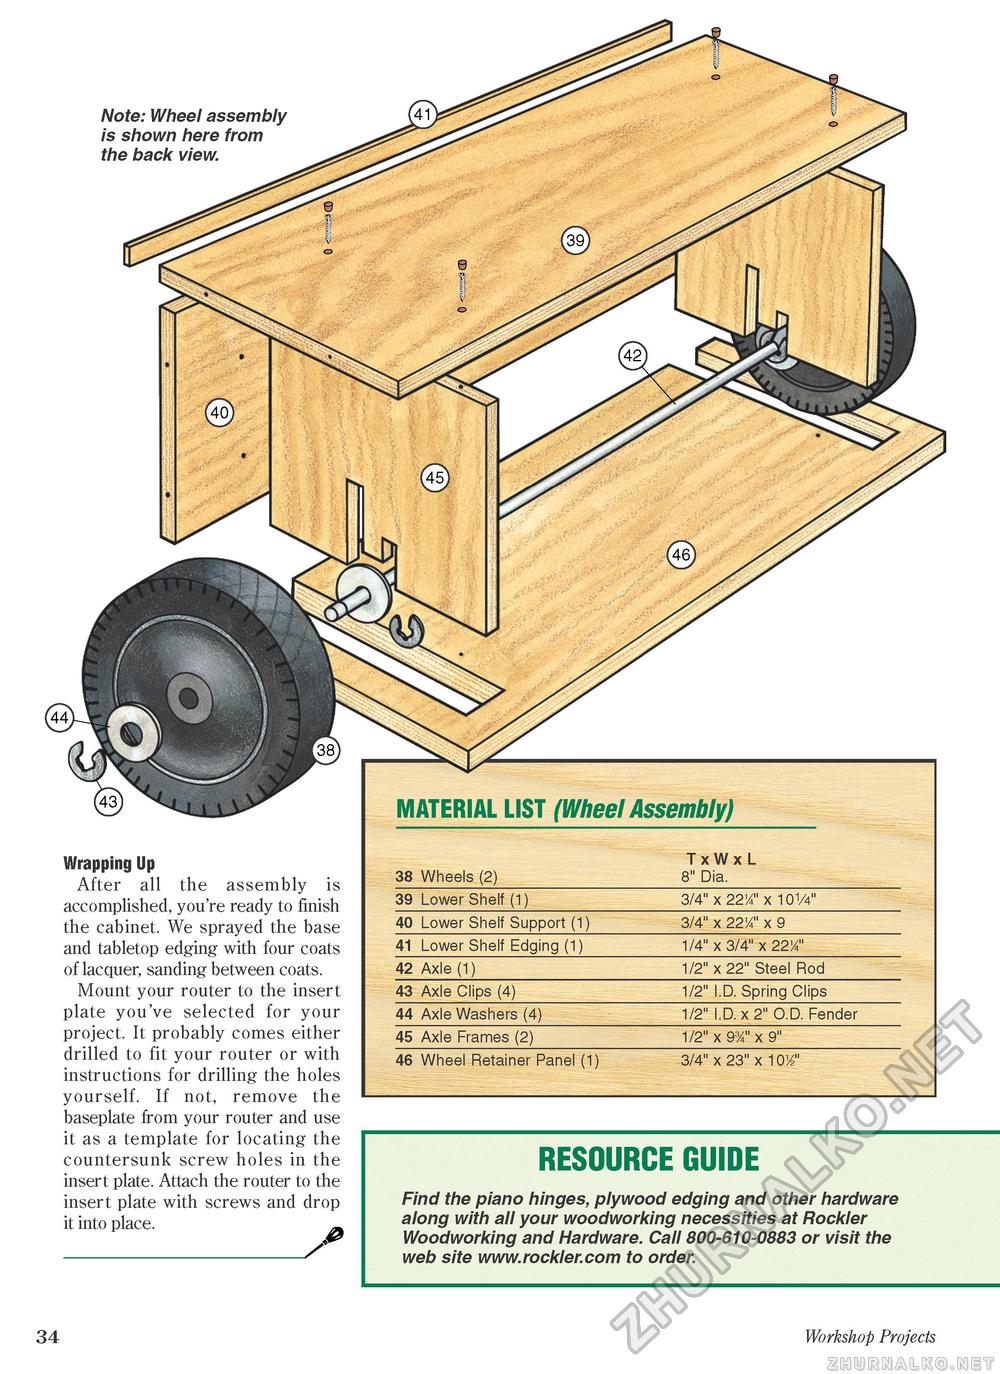
Note: Wheel assembly is shown here from the back view. Wrapping Up After all the assembly is accomplished, you're ready to finish the cabinet. We sprayed the base and tabletop edging with four coats of lacquer, sanding between coats. Mount your router to the insert plate you've selected for your project. It probably comes either drilled to fit your router or with instructions for drilling the holes yourself. If not, remove the baseplate from your router and use it as a template for locating the countersunk screw holes in the insert plate. Attach the router to the insert plate with screws and drop it into place. _ _/ MATERIAL LIST (Wheel Assembly) 38 Wheels (2) T x W x L 8" Dia. 38 Wheels (2) T x W x L 8" Dia.
RESOURCE GUIDE Find the piano hinges, plywood edging and other hardware along with all your woodworking necessities at Rockler Woodworking and Hardware. Call 800-610-0883 or visit the web site www.rockler.com to order. 34 Workshop Projects |


