Woodworker's Journal 2006-30-Winter, страница 59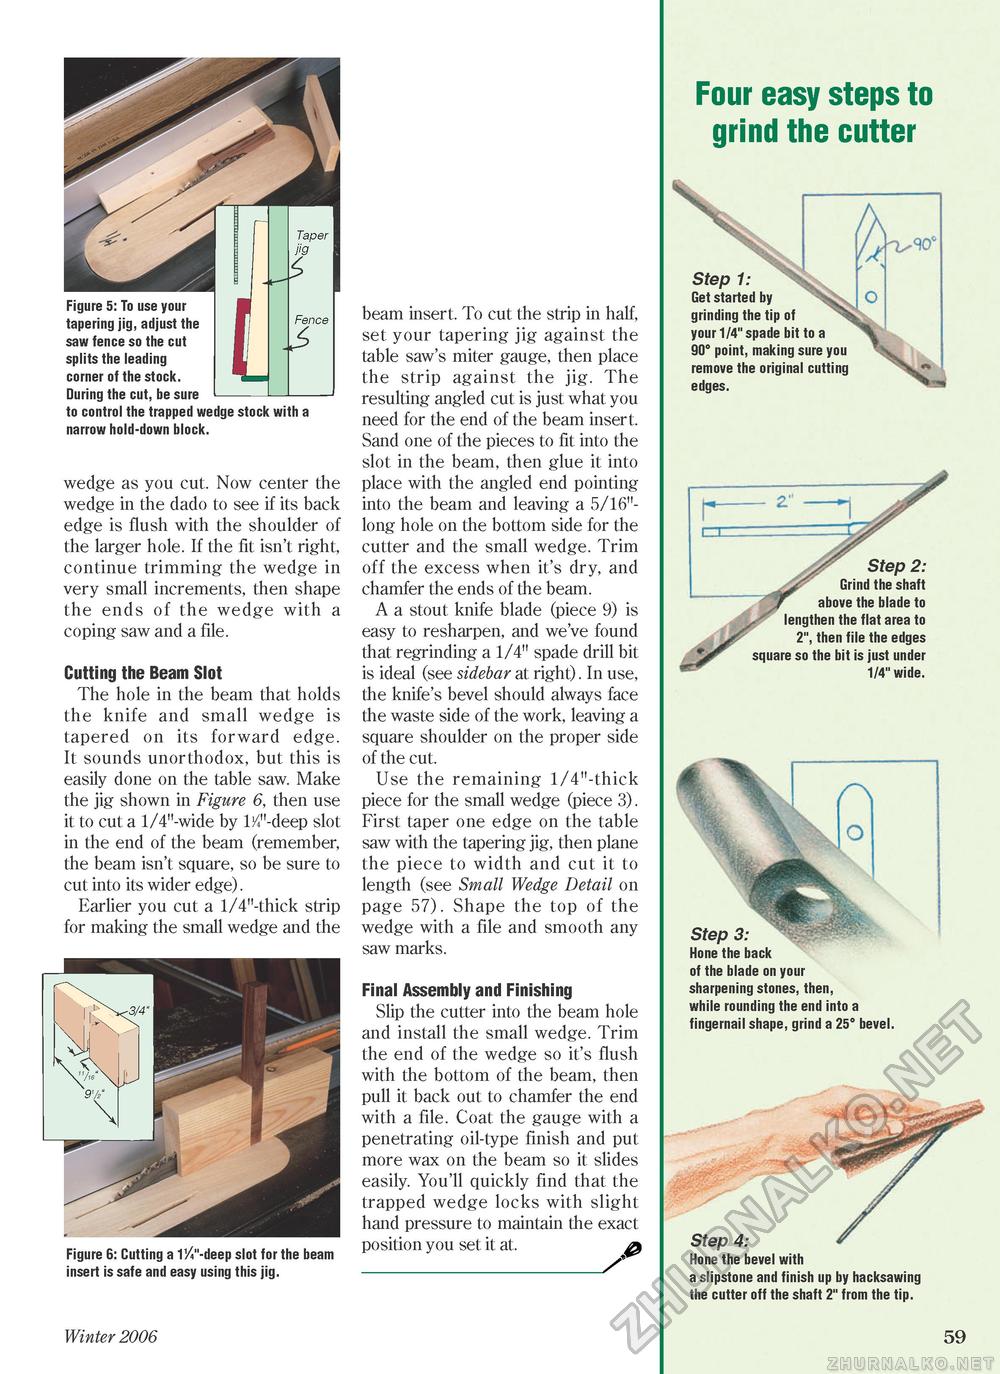
Fence J> Figure 5: To use your tapering jig, adjust the saw fence so the cut splits the leading corner of the stock. During the cut, be sure to control the trapped wedge stock with a narrow hold-down block. wedge as you cut. Now center the wedge in the dado to see if its back edge is flush with the shoulder of the larger hole. If the fit isn't right, continue trimming the wedge in very small increments, then shape the ends of the wedge with a coping saw and a file. Cutting the Beam Slot The hole in the beam that holds the knife and small wedge is tapered on its forward edge. It sounds unorthodox, but this is easily done on the table saw. Make the jig shown in Figure 6, then use it to cut a 1/4"-wide by W-deep slot in the end of the beam (remember, the beam isn't square, so be sure to cut into its wider edge). Earlier you cut a 1/4"-thick strip for making the small wedge and the Figure 6: Cutting a V/V-deep slot for the beam insert is safe and easy using this jig. beam insert. To cut the strip in half, set your tapering jig against the table saw's miter gauge, then place the strip against the jig. The resulting angled cut is just what you need for the end of the beam insert. Sand one of the pieces to fit into the slot in the beam, then glue it into place with the angled end pointing into the beam and leaving a 5/16"-long hole on the bottom side for the cutter and the small wedge. Trim off the excess when it's dry, and chamfer the ends of the beam. A a stout knife blade (piece 9) is easy to resharpen, and we've found that regrinding a 1/4" spade drill bit is ideal (see sidebar at right). In use, the knife's bevel should always face the waste side of the work, leaving a square shoulder on the proper side of the cut. Use the remaining 1/4"-thick piece for the small wedge (piece 3). First taper one edge on the table saw with the tapering jig, then plane the piece to width and cut it to length (see Small Wedge Detail on page 57). Shape the top of the wedge with a file and smooth any saw marks. Final Assembly and Finishing Slip the cutter into the beam hole and install the small wedge. Trim the end of the wedge so it's flush with the bottom of the beam, then pull it back out to chamfer the end with a file. Coat the gauge with a penetrating oil-type finish and put more wax on the beam so it slides easily. You'll quickly find that the trapped wedge locks with slight hand pressure to maintain the exact position you set it at. _ Four easy steps to grind the cutter V Vs. Step 1: Get started by grinding the tip of your 1/4" spade bit to a 90° point, making sure you remove the original cutting edges. Step 2: Grind the shaft above the blade to lengthen the flat area to 2", then file the edges square so the bit is just under 1/4" wide. 4\ o Step 3: ^pp?^^ Hone the back of the blade on your sharpening stones, then, while rounding the end into a fingernail shape, grind a 25° bevel. Step 4: Hone the bevel with a slipstone and finish up by hacksawing the cutter off the shaft 2" from the tip. Winter 2006 59 |


