Woodworker's Journal 2006-30-Winter, страница 56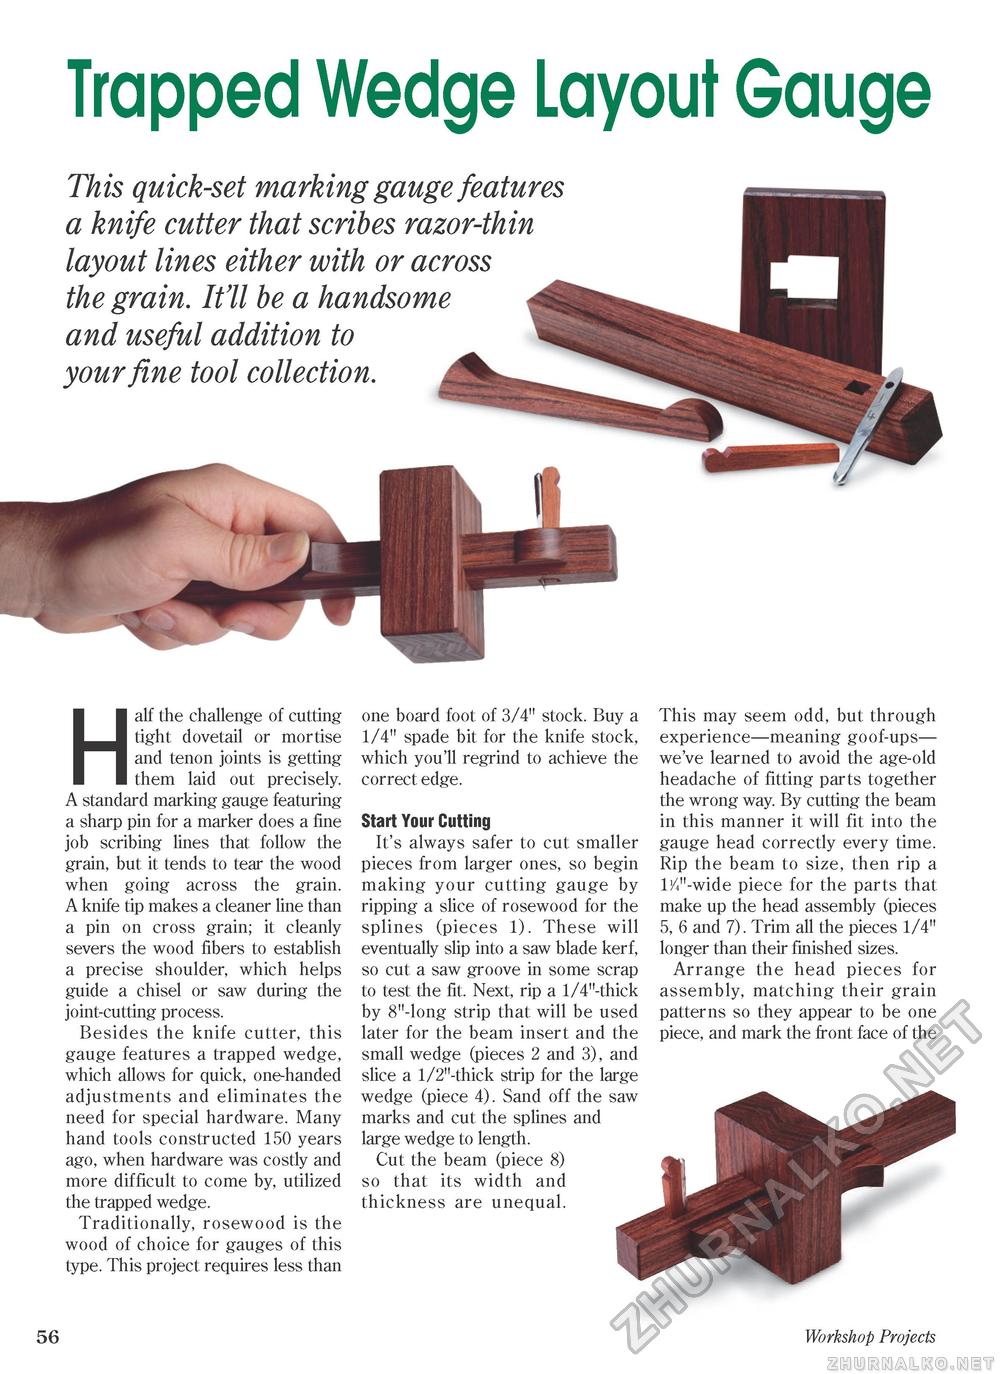
Trapped Wedge Layout Gauge This quick-set marking gauge features a knife cutter that scribes razor-thin layout lines either with or across the grain. It'll be a handsome and useful addition to your fine tool collection. Half the challenge of cutting tight dovetail or mortise and tenon joints is getting them laid out precisely. A standard marking gauge featuring a sharp pin for a marker does a fine job scribing lines that follow the grain, but it tends to tear the wood when going across the grain. A knife tip makes a cleaner line than a pin on cross grain; it cleanly severs the wood fibers to establish a precise shoulder, which helps guide a chisel or saw during the joint-cutting process. Besides the knife cutter, this gauge features a trapped wedge, which allows for quick, one-handed adjustments and eliminates the need for special hardware. Many hand tools constructed 150 years ago, when hardware was costly and more difficult to come by, utilized the trapped wedge. Traditionally, rosewood is the wood of choice for gauges of this type. This project requires less than one board foot of 3/4" stock. Buy a 1/4" spade bit for the knife stock, which you'll regrind to achieve the correct edge. Start Your Cutting It's always safer to cut smaller pieces from larger ones, so begin making your cutting gauge by ripping a slice of rosewood for the splines (pieces 1). These will eventually slip into a saw blade kerf, so cut a saw groove in some scrap to test the fit. Next, rip a 1/4"-thick by 8"-long strip that will be used later for the beam insert and the small wedge (pieces 2 and 3), and slice a 1/2"-thick strip for the large wedge (piece 4). Sand off the saw marks and cut the splines and large wedge to length. Cut the beam (piece 8) so that its width and thickness are unequal. This may seem odd, but through experience—meaning goof-ups— we've learned to avoid the age-old headache of fitting parts together the wrong way. By cutting the beam in this manner it will fit into the gauge head correctly every time. Rip the beam to size, then rip a W'-wide piece for the parts that make up the head assembly (pieces 5, 6 and 7). Trim all the pieces 1/4" longer than their finished sizes. Arrange the head pieces for assembly, matching their grain patterns so they appear to be one piece, and mark the front face of the 56 Workshop Projects |


