Woodworker's Journal 2008-32-1, страница 28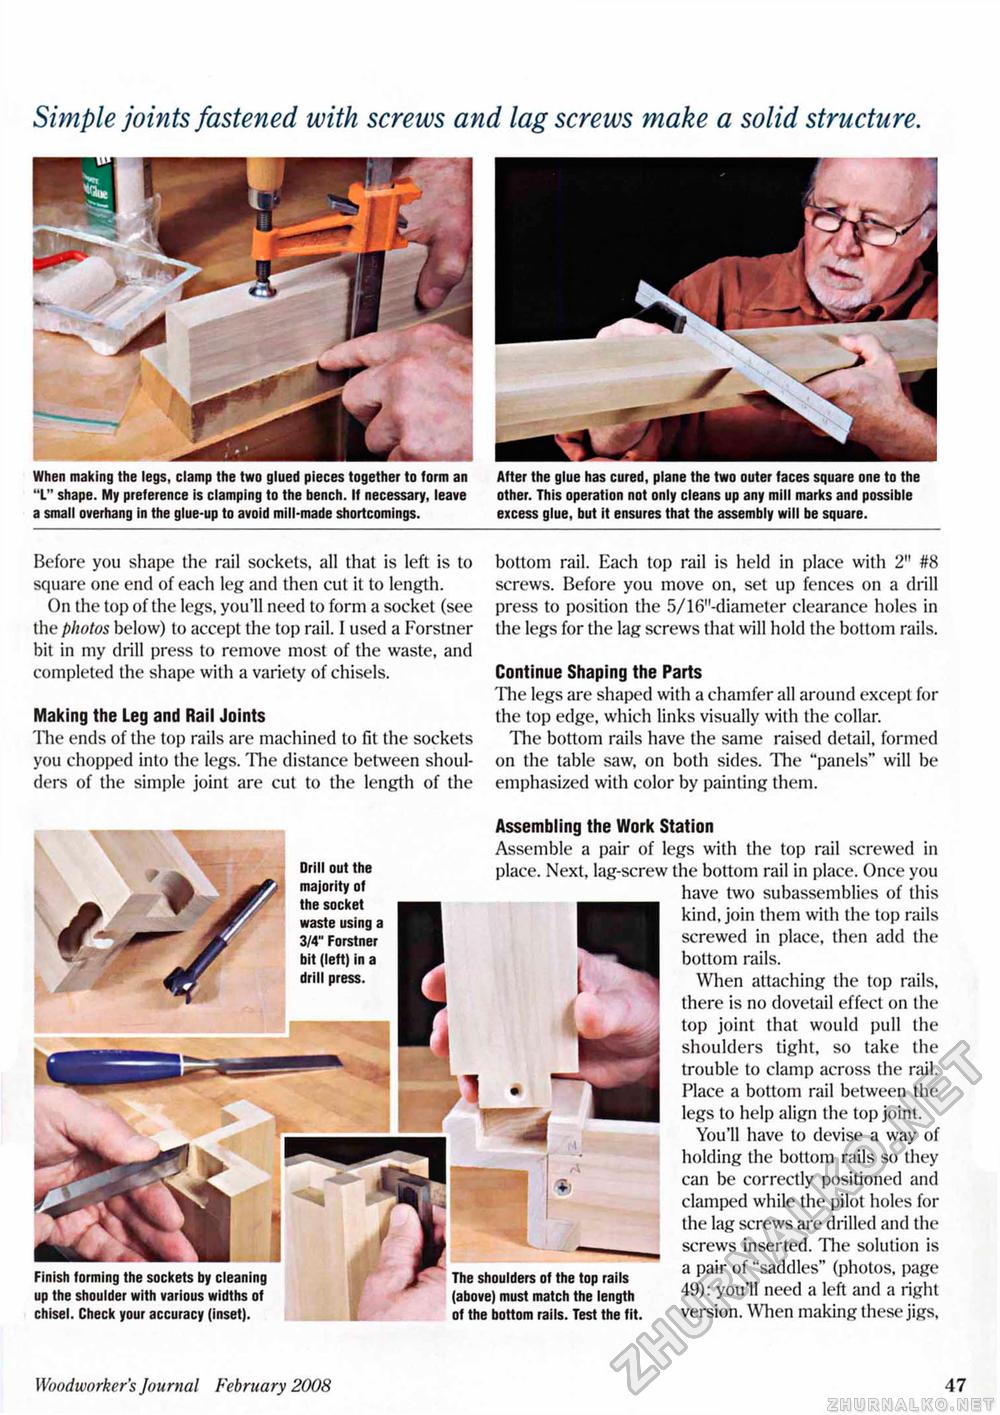
Simple joints fastened with screws and lag screws make a solid structure. When making the legs, clamp the two glued pieces together to form an "L" shape. My preference is clamping to the bench. If necessary, leave a small overhang in the glue-up to avoid mill-made shortcomings. Before you shape the rail sockets, all that is left is to square one end of each leg and then cut it to length. On the top of the legs, you'll need to form a socket (see the photos below) to accept the top rail. I used a Forstner bit in my drill press to remove most of the waste, and completed the shape with a variety of chisels. Making the Leg and Rail Joints 'Hie ends of the top rails are machined to fit the sockets you chopped into the legs. The distance between shoulders of the simple joint are cut to the length of the After the glue has cured, plane the two outer faces square one to the other. This operation not only cleans up any mill marks and possible excess glue, but it ensures that the assembly will be square. bottom rail. Each top rail is held in place with 2" #8 screws. Before you move on, set up fences on a drill press to position the 5/16"-diameter clearance holes in the legs for the lag screws that will hold the bottom rails. Continue Shaping the Parts The legs are shaped with a chamfer all around except for the top edge, which links visually with the collar. The bottom rails have the same raised detail, formed on the table saw, on both sides. The "panels" will be emphasized with color by painting them. Drill out the majority of the socket waste using a 3/4" Forstner bit (left) in a drill press. Finish forming the sockets by cleaning up the shoulder with various widths of chisel. Check your accuracy (inset). Assembling the Work Station Assemble a pair of legs with the top rail screwed in place. Next, lag-screw the bottom rail in place. Once you have two subassemblies of this kind, join them with the top rails screwed in place, then add the bottom rails. When attaching the top rails, there is no dovetail effect on the top joint that would pull the shoulders tight, so take the trouble to clamp across the rail. Place a bottom rail between the legs to help align the top joint. You'll have to devise a way of holding the bottom rails so they can be correctly positioned and clamped while the pilot holes for the lag screws are drilled and the screws inserted. The solution is . .. ... . .. a pair of "saddles" (photos, page The shoulders of the top rails * ,„ . . ; , . , (above) must match the length 49>: y°u 11 need a left and a nSht of the bottom rails. Test the fit. version. When making these jigs, M Q Woodworker's Journal February 2008 47 |


