Woodworker's Journal 2008-32-2, страница 55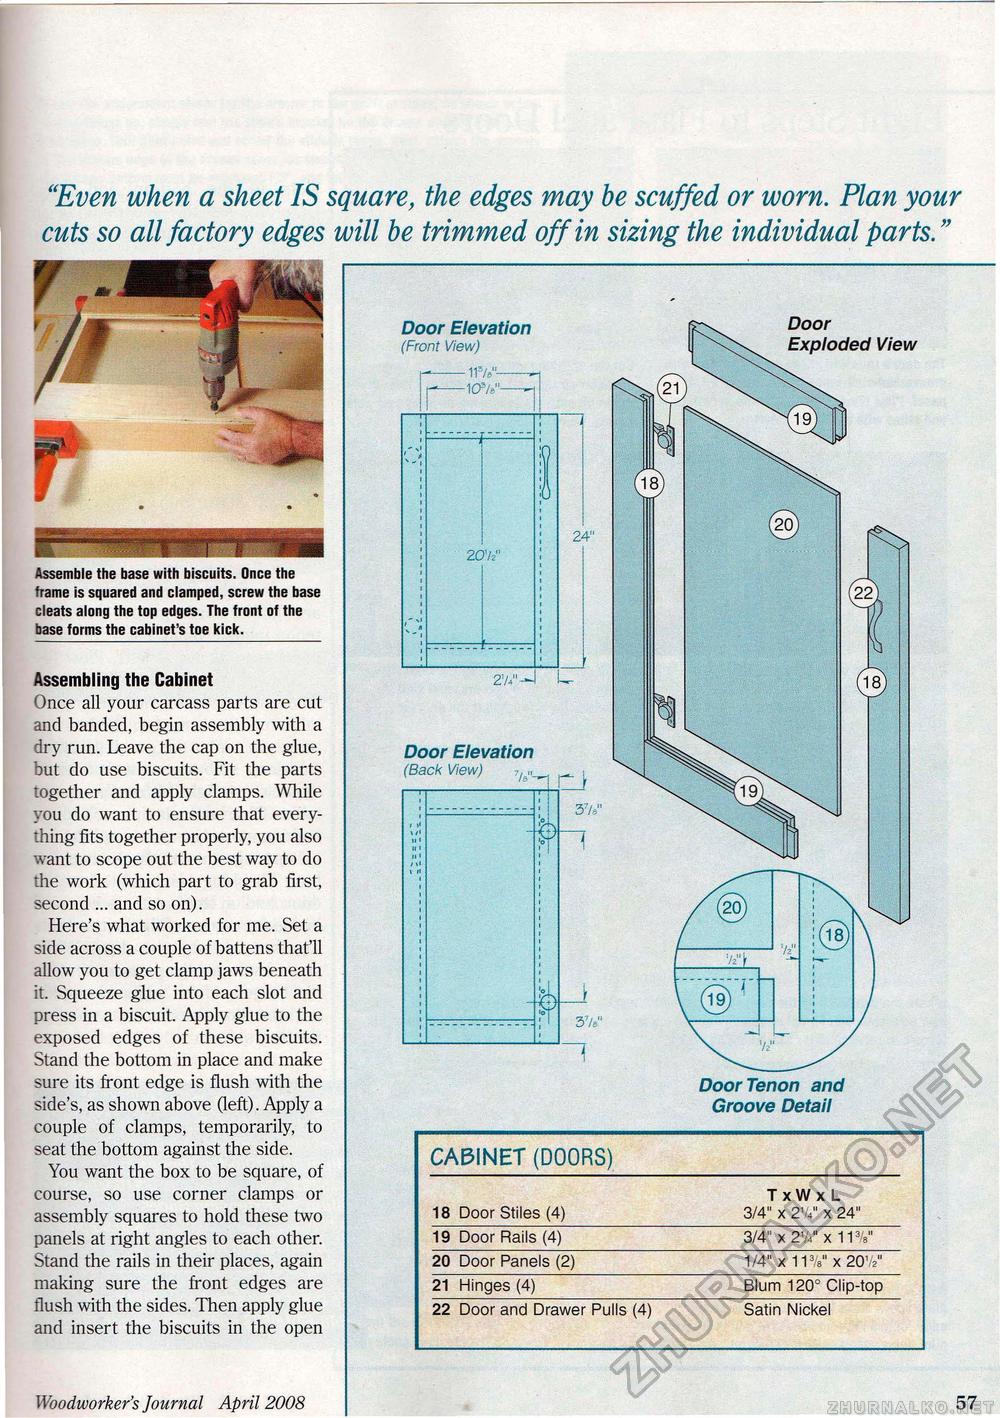
"Even when a sheet IS square, the edges may be scuffed or worn. Plan your cuts so all factory edges will be trimmed off in sizing the individual parts." Assemble the base with biscuits. Once the frame is squared and clamped, screw the base cleats along the top edges. The front of the base forms the cabinet's toe kick. Assembling the Cabinet Once all your carcass parts are cut and banded, begin assembly with a dry run. Leave the cap on the glue, but do use biscuits. Fit the parts together and apply clamps. While you do want to ensure that everything fits together properly, you also want to scope out the best way to do the work (which part to grab first, second ... and so on). Here's what worked for me. Set a side across a couple of battens that'll allow you to get clamp jaws beneath it. Squeeze glue into each slot and press in a biscuit. Apply glue to the exposed edges of these biscuits. Stand the bottom in place and make sure its front edge is flush with the side's, as shown above (left). Apply a couple of clamps, temporarily, to seat the bottom against the side. You want the box to be square, of course, so use corner clamps or assembly squares to hold these two panels at right angles to each other. Stand the rails in their places, again making sure the front edges are flush with the sides. Then apply glue and insert the biscuits in the open
Door Elevation (Front View) i--1 fh"--i --1 --i Door Elevation (Back View) Door Exploded View Door Tenon and Groove Detail Woodworker's Journal April 2008 57 |
||||||||||||


