Woodworker's Journal 2008-32-2, страница 53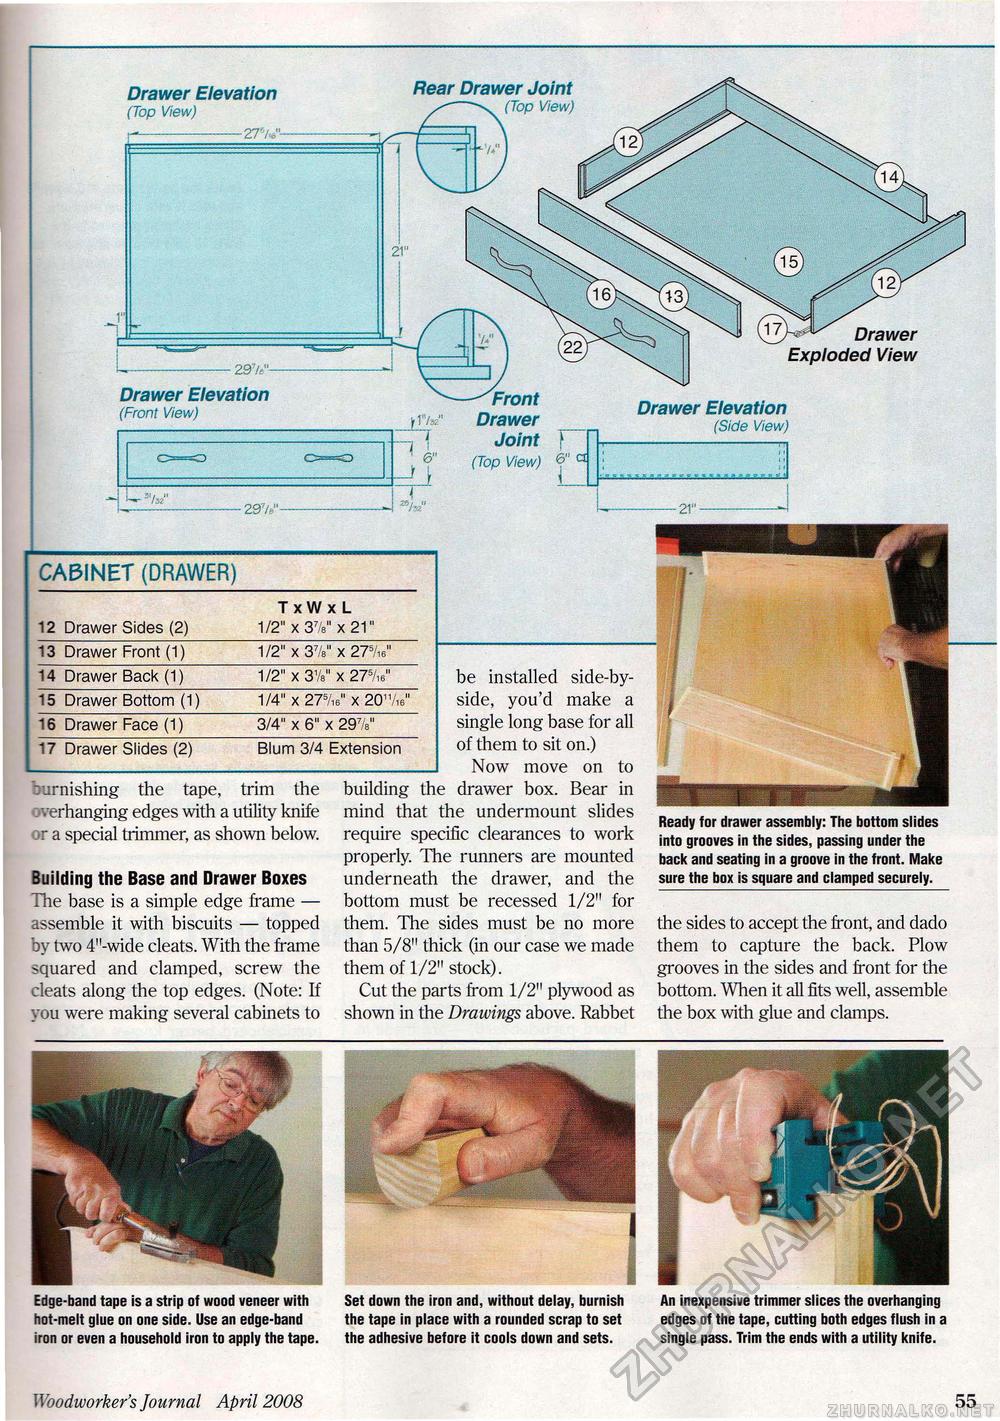
Tarnishing the tape, trim the : verhanging edges with a utility knife >r a special trimmer, as shown below. Building the Base and Drawer Boxes The base is a simple edge frame — assemble it with biscuits — topped by two 4"-wide cleats. With the frame squared and clamped, screw the cleats along the top edges. (Note: If you were making several cabinets to be installed side-by-side, you'd make a single long base for all of them to sit on.) Now move on to building the drawer box. Bear in mind that the undermount slides require specific clearances to work properly. The runners are mounted underneath the drawer, and the bottom must be recessed 1/2" for them. The sides must be no more than 5/8" thick (in our case we made them of 1/2" stock). Cut the parts from 1/2" plywood as shown in the Drawings above. Rabbet Ready for drawer assembly: The bottom slides into grooves in the sides, passing under the back and seating in a groove in the front. Make sure the box is square and clamped securely. the sides to accept the front, and dado them to capture the back. Plow grooves in the sides and front for the bottom. When it all fits well, assemble the box with glue and clamps. Set down the iron and, without delay, burnish the tape in place with a rounded scrap to set the adhesive before it cools down and sets. An inexpensive trimmer slices the overhanging edges of the tape, cutting both edges flush in a single pass. Trim the ends with a utility knife. Drawer Elevation (Top View) Rear Drawer Joint s. (Top View) Drawer Exploded View o=o Drawer Elevation (Front View) Front Drawer Joint (Top View) Drawer Elevation (Side View) Woodworker's Journal April 2008 55 |
||||||||||||||


