Woodworker's Journal 2008-32-2, страница 52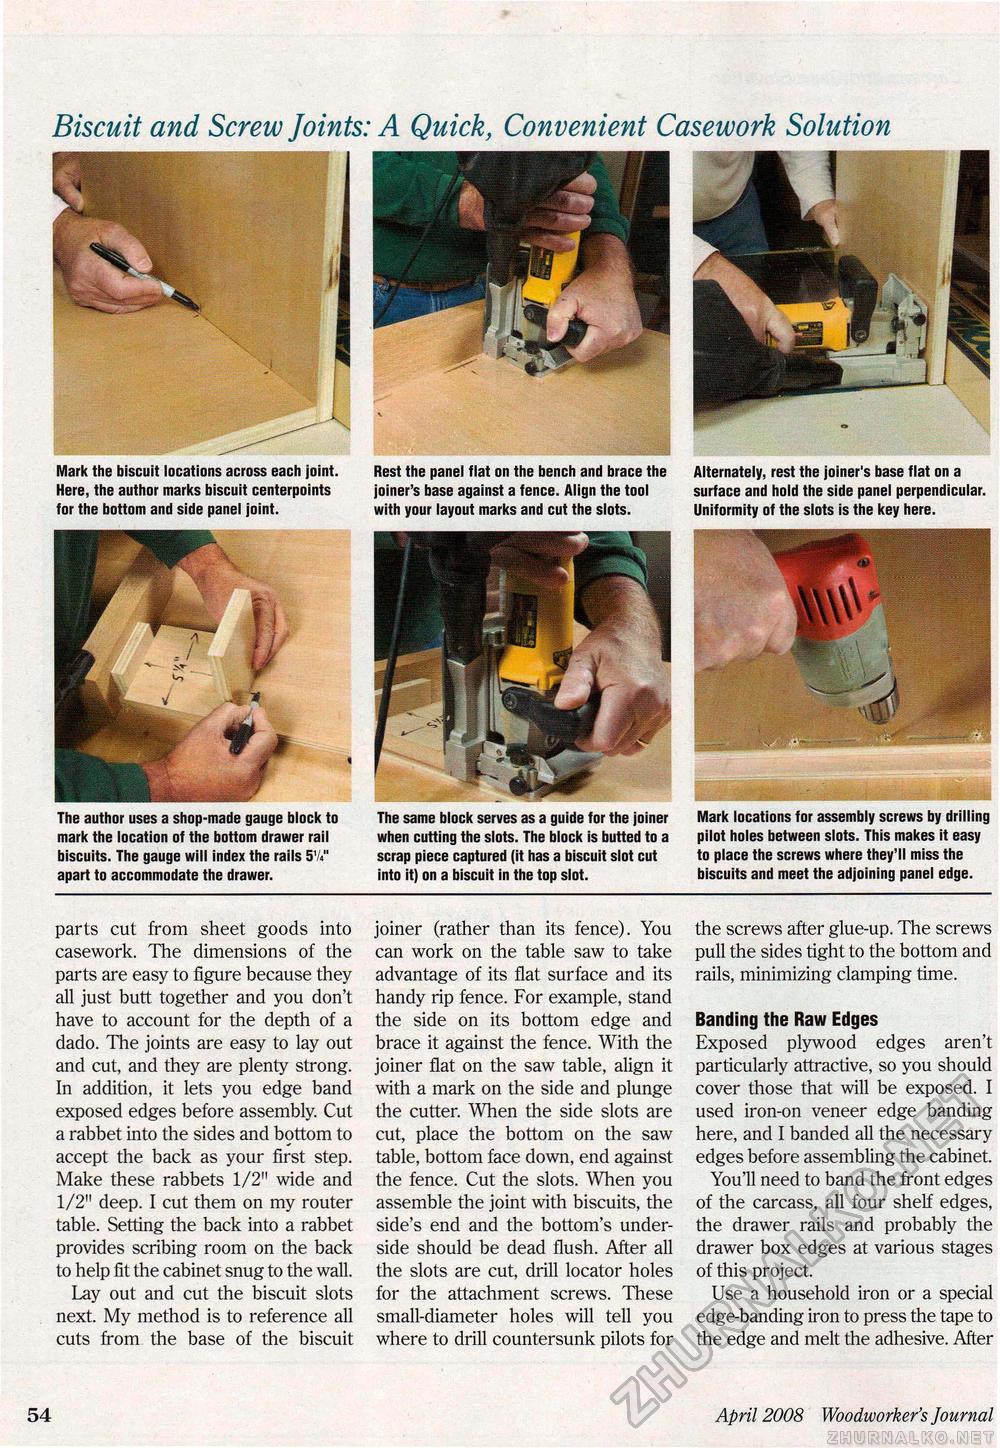
Biscuit and Screw Joints: A Quick, Convenient Casework Solution Mark the biscuit locations across each joint. Here, the author marks biscuit centerpoints for the bottom and side panel joint. The author uses a shop-made gauge block to mark the location of the bottom drawer rail biscuits. The gauge will index the rails 5V«" apart to accommodate the drawer. parts cut from sheet goods into casework. The dimensions of the parts are easy to figure because they all just butt together and you don't have to account for the depth of a dado. The joints are easy to lay out and cut, and they are plenty strong. In addition, it lets you edge band exposed edges before assembly. Cut a rabbet into the sides and b9ttom to accept the back as your first step. Make these rabbets 1/2" wide and 1/2" deep. I cut them on my router table. Setting the back into a rabbet provides scribing room on the back to help fit the cabinet snug to the wall. Lay out and cut the biscuit slots next. My method is to reference all cuts from the base of the biscuit Rest the panel flat on the bench and brace the joiner's base against a fence. Align the tool with your layout marks and cut the slots. The same block serves as a guide for the joiner when cutting the slots. The block is butted to a scrap piece captured (it has a biscuit slot cut into it) on a biscuit in the top slot. joiner (rather than its fence). You can work on the table saw to take advantage of its flat surface and its handy rip fence. For example, stand the side on its bottom edge and brace it against the fence. With the joiner flat on the saw table, align it with a mark on the side and plunge the cutter. When the side slots are cut, place the bottom on the saw table, bottom face down, end against the fence. Cut the slots. When you assemble the joint with biscuits, the side's end and the bottom's underside should be dead flush. After all the slots are cut, drill locator holes for the attachment screws. These small-diameter holes will tell you where to drill countersunk pilots for Alternately, rest the joiner's base flat on a surface and hold the side panel perpendicular. Uniformity of the slots is the key here. Mark locations for assembly screws by drilling pilot holes between slots. This makes it easy to place the screws where they'll miss the biscuits and meet the adjoining panel edge. the screws after glue-up. The screws pull the sides tight to the bottom and rails, minimizing clamping time. Banding the Raw Edges Exposed plywood edges aren't particularly attractive, so you should cover those that will be exposed. I used iron-on veneer edge banding here, and I banded all the necessary edges before assembling the cabinet. You'll need to band the front edges of the carcass, all four shelf edges, the drawer rails and probably the drawer box edges at various stages of this project. Use a household iron or a special edge-banding iron to press the tape to the edge and melt the adhesive. After 54 April 2008 Woodworker's Journal |


