Woodworker's Journal 2008-32-3, страница 35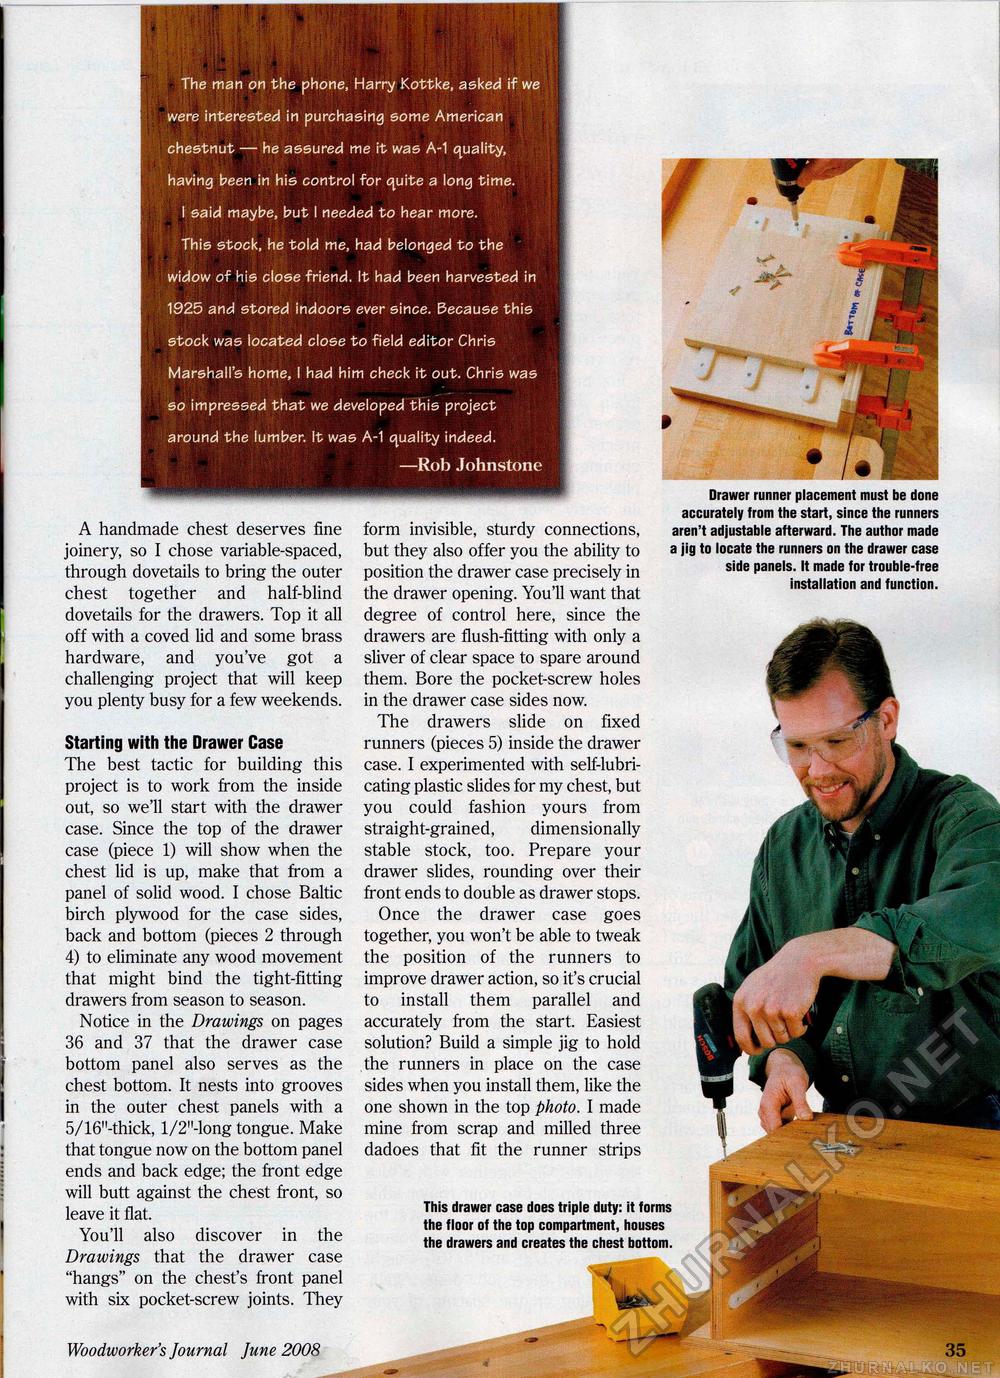
The man on the phone, Harry Kottke, asked if we were interested in purchasing some American chestnut — he assured me it was A-1 quality, having been in his control for quite a long time. I said maybe, but I needed to hear more. This stock, he told me, had belonged to the widow of his close friend. It had been harvested in 1925 and stored indoors ever since. Because this stock was located close to field editor Chris Marshall's home, I had him check it out. Chris was so impressed that we developed this project around the lumber, it was A-1 quality indeed. —Rob Johnstone i A handmade chest deserves fine joinery, so I chose variable-spaced, through dovetails to bring the outer chest together and half-blind dovetails for the drawers. Top it all off with a coved lid and some brass hardware, and you've got a challenging project that will keep you plenty busy for a few weekends. Starting with the Drawer Case The best tactic for building this project is to work from the inside out, so we'll start with the drawer case. Since the top of the drawer case (piece 1) will show when the chest lid is up, make that from a panel of solid wood. I chose Baltic birch plywood for the case sides, back and bottom (pieces 2 through 4) to eliminate any wood movement that might bind the tight-fitting drawers from season to season. Notice in the Drawings on pages 36 and 37 that the drawer case bottom panel also serves as the chest bottom. It nests into grooves in the outer chest panels with a 5/16"-thick, l/2"-long tongue. Make that tongue now on the bottom panel ends and back edge; the front edge will butt against the chest front, so leave it flat. You'll also discover in the Drawings that the drawer case "hangs" on the chest's front panel with six pocket-screw joints. They Woodworker's Journal June 2008 35 form invisible, sturdy connections, but they also offer you the ability to position the drawer case precisely in the drawer opening. You'll want that degree of control here, since the drawers are flush-fitting with only a sliver of clear space to spare around them. Bore the pocket-screw holes in the drawer case sides now. The drawers slide on fixed runners (pieces 5) inside the drawer case. I experimented with self-lubricating plastic slides for my chest, but you could fashion yours from straight-grained, dimensionally stable stock, too. Prepare your drawer slides, rounding over their front ends to double as drawer stops. Once the drawer case goes together, you won't be able to tweak the position of the runners to improve drawer action, so it's crucial to install them parallel and accurately from the start. Easiest solution? Build a simple jig to hold the runners in place on the case sides when you install them, like the one shown in the top photo. I made mine from scrap and milled three dadoes that fit the runner strips Drawer runner placement must be done accurately from the start, since the runners aren't adjustable afterward. The author made a jig to locate the runners on the drawer case side panels. It made for trouble-free installation and function. This drawer case does triple duty: it forms the floor of the top compartment, houses the drawers and creates the chest bottom. |


