Woodworker's Journal 2008-32-3, страница 36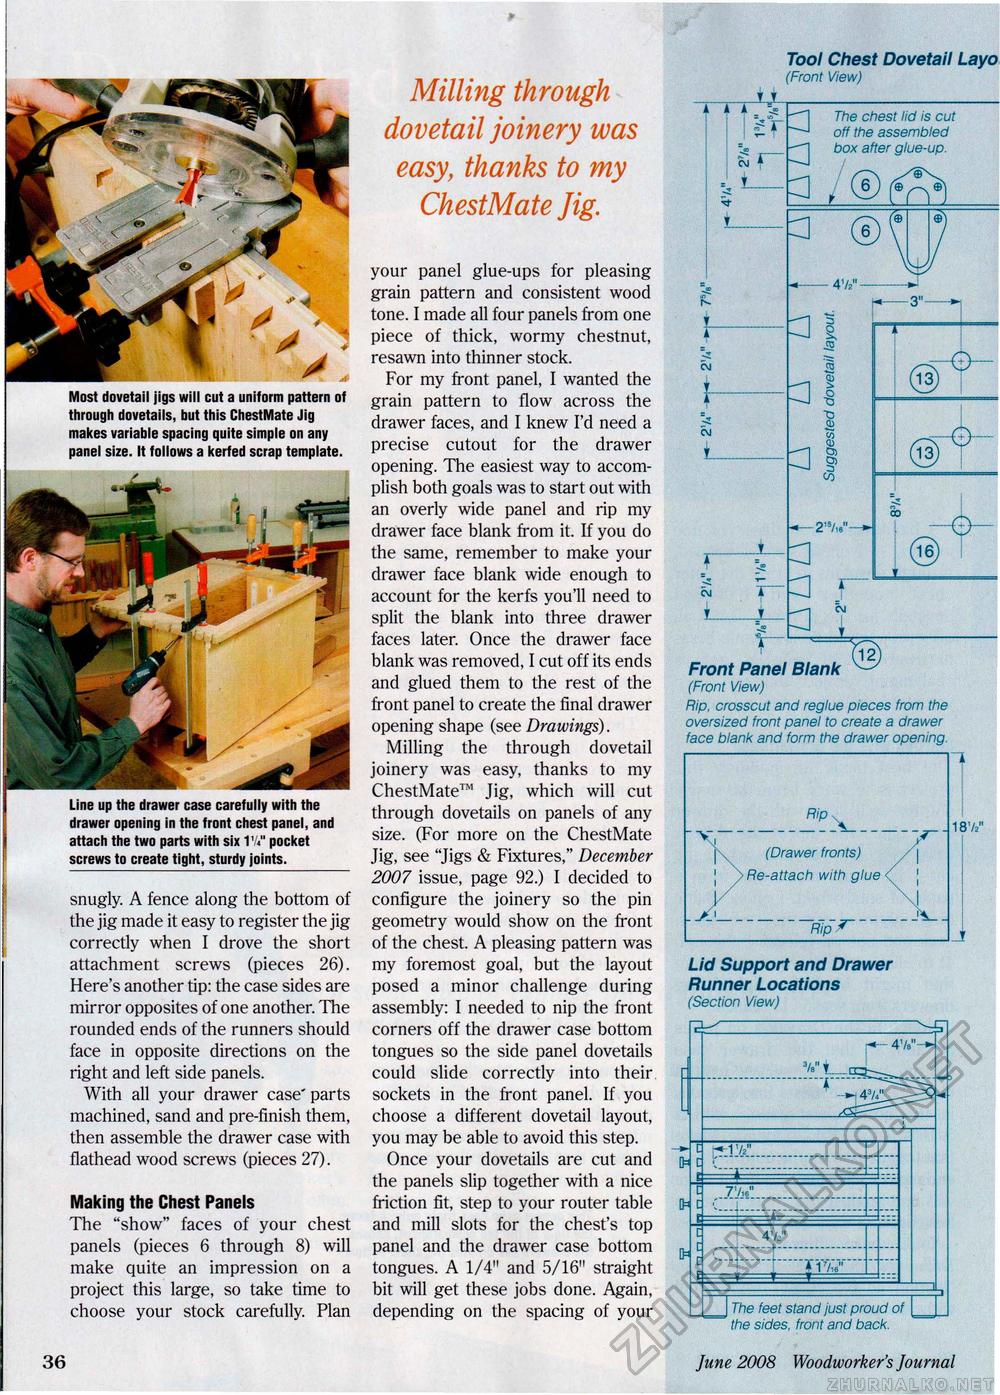
Most dovetail jigs will cut a uniform pattern of through dovetails, but this ChestMate Jig makes variable spacing quite simple on any panel size. It follows a kerfed scrap template. Line up the drawer case carefully with the drawer opening in the front chest panel, and attach the two parts with six 1V«" pocket screws to create tight, sturdy joints. snugly. A fence along the bottom of the jig made it easy to register the jig correctly when I drove the short attachment screws (pieces 26). Here's another tip: the case sides are mirror opposites of one another. The rounded ends of the runners should face in opposite directions on the right and left side panels. With all your drawer case' parts machined, sand and pre-finish them, then assemble the drawer case with flathead wood screws (pieces 27). Making the Chest Panels The "show" faces of your chest panels (pieces 6 through 8) will make quite an impression on a project this large, so take time to choose your stock carefully. Plan Milling through dovetail joinery was easy, thanks to my ChestMate Jig. your panel glue-ups for pleasing grain pattern and consistent wood tone. I made all four panels from one piece of thick, wormy chestnut, resawn into thinner stock. For my front panel, I wanted the grain pattern to flow across the drawer faces, and I knew I'd need a precise cutout for the drawer opening. The easiest way to accomplish both goals was to start out with an overly wide panel and rip my drawer face blank from it. If you do the same, remember to make your drawer face blank wide enough to account for the kerfs you'll need to split the blank into three drawer faces later. Once the drawer face blank was removed, I cut off its ends and glued them to the rest of the front panel to create the final drawer opening shape (see Drawings). Milling the through dovetail joinery was easy, thanks to my ChestMate™ Jig, which will cut through dovetails on panels of any size. (For more on the ChestMate Jig, see "Jigs & Fixtures," December 2007 issue, page 92.) I decided to configure the joinery so the pin geometry would show on the front of the chest. A pleasing pattern was my foremost goal, but the layout posed a minor challenge during assembly: I needed to nip the front corners off the drawer case bottom tongues so the side panel dovetails could slide correctly into their sockets in the front panel. If you choose a different dovetail layout, you may be able to avoid this step. Once your dovetails are cut and the panels slip together with a nice friction fit, step to your router table and mill slots for the chest's top panel and the drawer case bottom tongues. A 1/4" and 5/16" straight bit will get these jobs done. Again, depending on the spacing of your Tool Chest Dovetail Layo (Front View) Jul 3 d 3 ®
The chest lid is cut off the assembled box after glue-up. ■ 4 7»"- 3"- C] C] t <5 § € "p S « © 2? §> 2 1»/«n- C] 3 ® A T Front Panel Blank (Front View) Rip. crosscut and reglue pieces from the oversized front panel to create a drawer face blank and form the drawer opening. (Drawer fronts) Re-attach with glue < Rip jT' \l 187/ Lid Support and Drawer Runner Locations (Section View) PzlV.. '—r— 77,6" 41/j" TlV'" 36 The feet stand just proud of I the sides, front and back. June 2008 Woodworker's Journal |
||||||||||||||||||||


