Woodworker's Journal 2008-32-4, страница 18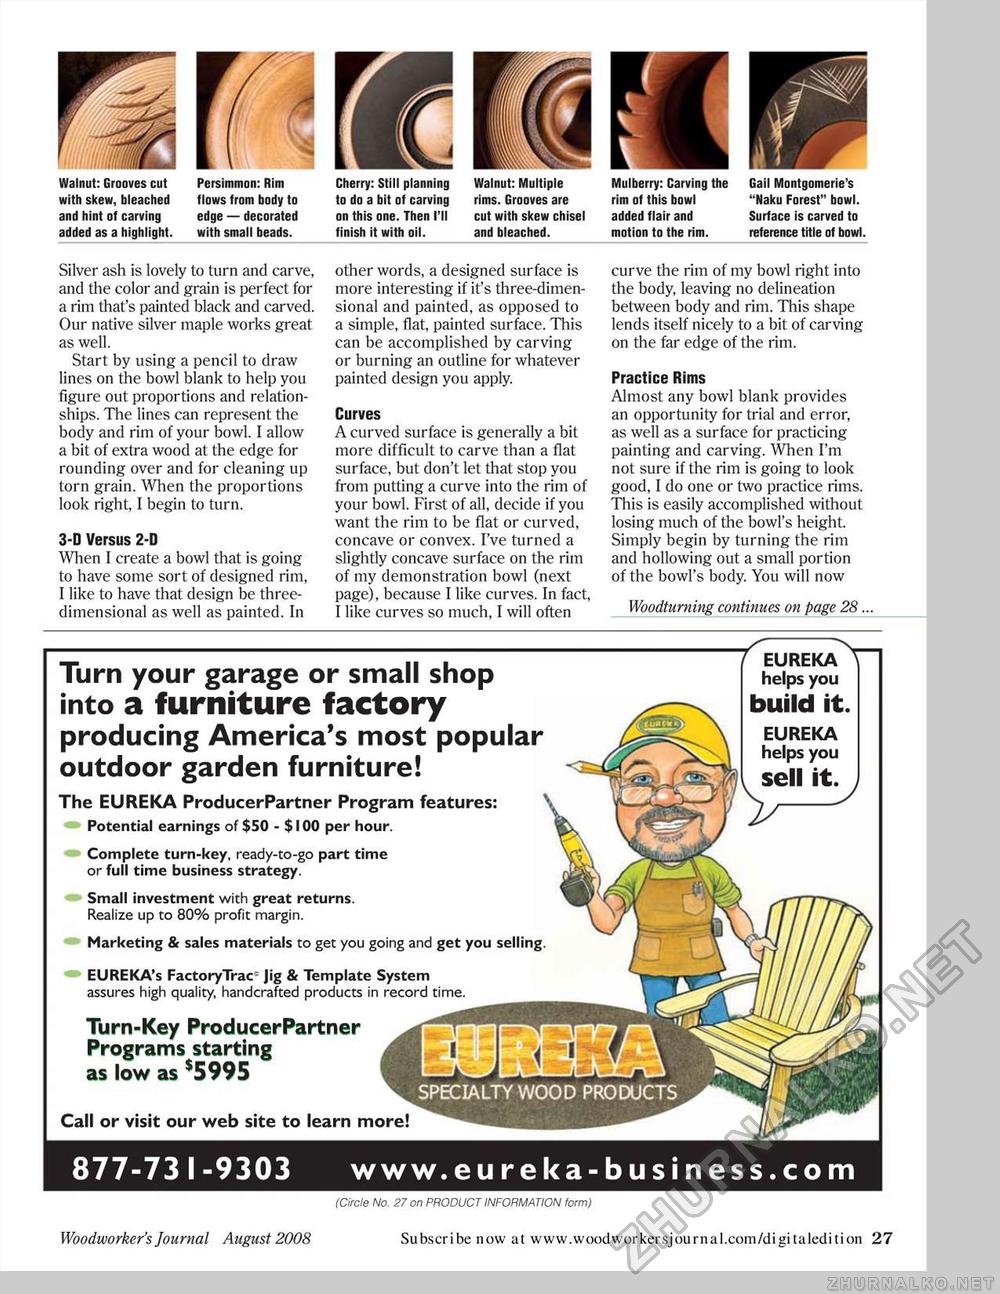
Walnut: Grooves cut with skew, bleached and hint of carving added as a highlight. Persimmon: Rim flows from body to edge — decorated with small beads. Cherry: Still planning to do a bit of carving on this one. Then I'll finish it with oil. Walnut: Multiple rims. Grooves are cut with skew chisel and bleached. Mulberry: Carving the rim of this bowl added flair and motion to the rim. Gail Montgomerie's "Naku Forest" bowl. Surface is carved to reference title of bowl. Silver ash is lovely to turn and carve, and the color and grain is perfect for a rim that's painted black and carved. Our native silver maple works great as well. Start by using a pencil to draw lines on the bowl blank to help you figure out proportions and relationships. The lines can represent the body and rim of your bowl. I allow a bit of extra wood at the edge for rounding over and for cleaning up torn grain. When the proportions look right, I begin to turn. 3-D Versus 2-D When I create a bowl that is going to have some sort of designed rim, I like to have that design be three-dimensional as well as painted. In other words, a designed surface is more interesting if it's three-dimensional and painted, as opposed to a simple, flat, painted surface. This can be accomplished by carving or burning an outline for whatever painted design you apply. Curves A curved surface is generally a bit more difficult to carve than a flat surface, but don't let that stop you from putting a curve into the rim of your bowl. First of all, decide if you want the rim to be flat or curved, concave or convex. I've turned a slightly concave surface on the rim of my demonstration bowl (next page), because I like curves. In fact, I like curves so much, I will often curve the rim of my bowl right into the body, leaving no delineation between body and rim. This shape lends itself nicely to a bit of carving on the far edge of the rim. Practice Rims Almost any bowl blank provides an opportunity for trial and error, as well as a surface for practicing painting and carving. When I'm not sure if the rim is going to look good, I do one or two practice rims. This is easily accomplished without losing much of the bowl's height. Simply begin by turning the rim and hollowing out a small portion of the bowl's body. You will now Woodturning continues on page 28... Turn your garage or small shop into a furniture factory producing America's most popular outdoor garden furniture! The EUREKA ProducerPartner Program features: Potential earnings of $50 - $100 per hour. Complete turn-key, ready-to-go part time or full time business strategy. Small investment with great returns. Realize up to 80% profit margin. Marketing & sales materials to get you going and get you selling EUREKA's Factory Trac- Jig & Template System assures high quality, handcrafted products in record time. Turn-Key ProducerPartner Programs starting as low as $5995 Call or visit our web site to learn more: 7 EUREKA helps you build it. EUREKA helps you sell it. V 877-731-9303 www.eureka-business.com (Circle No. 27 on PRODUCT INFORMATION form) Woodworker's Journal August 2008 Subscribe now at www.woodworkersjournal.com/digitaledition 27 |


