Woodworker's Journal 2008-32-6, страница 49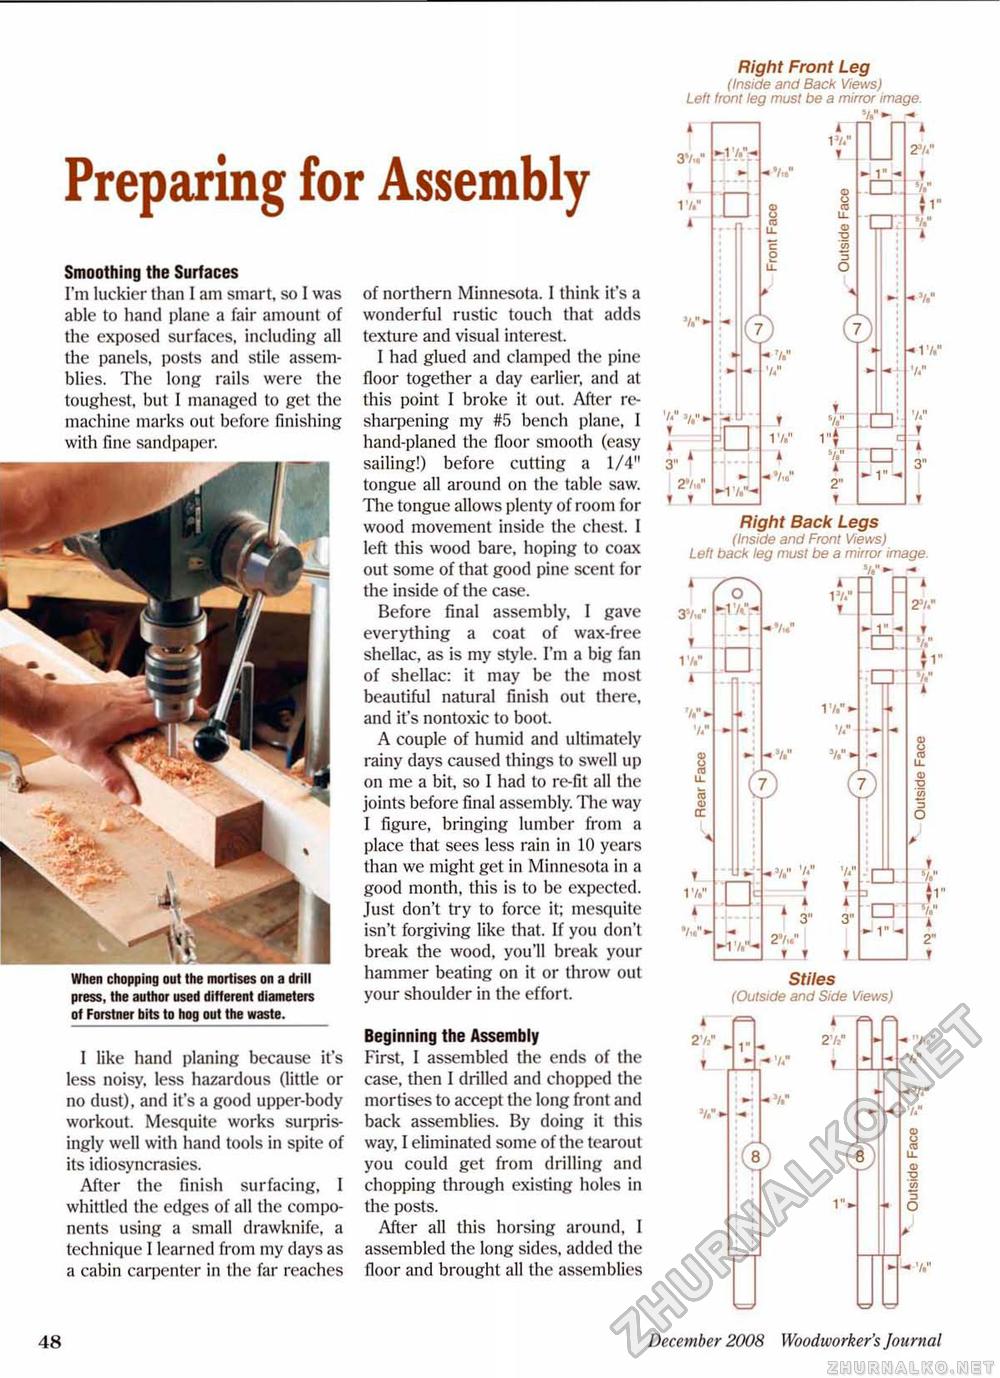
Preparing for Assembly Smoothing the Surfaces I'm luckier than I am smart, so I was able to hand plane a fair amount of the exposed surfaces, including all the panels, posts and stile assemblies. The long rails were the toughest, but I managed to get the machine marks out before finishing with fine sandpaper. When chapping out the mortises on a drill press, the aothor used different diameters ot Forstner bits to hog out the waste. I like hand planing because it's less noisy, less hazardous (little or no dust), and it's a good upper-body workout. Mesquite works surprisingly well with hand tools in spite of its idiosyncrasies. After the finish surfacing, I whittled the edges of all the components using a small drawknife, a technique I learned from my days as a cabin carpenter in the far reaches Right Front Leg (Inside and Bach Views) Lett front leg must be a mirror image - 3Vw" T 17." 4— of northern Minnesota. I think it's a wonderful rustic touch that adds texture and visual interest. I had glued and clamped the pine floor together a day earlier, and at this point I broke it out. After re-sharpening my #5 bench plane, I hand-planed the floor smooth (easy sailing!) before cutting a 1/4" tongue all around on the table saw. The tongue allows plenty of room for wood movement inside the chest. 1 left this wood bare, hoping to coax out some of that good pine scent for the inside of the case. Before final assembly, I gave everything a coat of wax-free shellac, as is my style. I'm a big fan of shellac: it may be the most beautiful natural finish out there, and it's nontoxic to boot, A couple of humid and ultimately rainy days caused things to swell up on me a bit, so I had to re-fit all the joints before final assembly. The way 1 figure, bringing lumber from a place that sees less rain in 10 years than we might gel in Minnesota in a good month, this is to be expected. Just don't try to force it; mesquite isn't forgiving like that. If you don't break the wood, you'll break your hammer beating on it or throw out your shoulder in the effort. Beginning the Assembly First, I assembled the ends of the case, then I drilled and chopped the mortises to accept the long front and back assemblies. By doing it this way, 1 eliminated some of the tearoul you could get from drilling and chopping through existing holes in the posts. After all this horsing around, I assembled the long sides, added the floor and brought all the assemblies V 3" J 27.1* T T □ 4 VW feci © © a « 7." 7<" T 1V ¥ nl T V i 2" t -1" - 1 27." _J V jf1" V • 7.° ■ 17." 7<* 7." T 3" Right Back Legs (Inside and Front Views) Left back leg must be a mirror image V- - 37>." T _ 17/ I 7.% re CD o: y T 17." n i 17." T V 17."~ V." V. -O. © © Q -17."-" . V 7." <u" _T i 2%" _i_T r -□J J □ *J ■)" U l 27." T V }v V A T 7." 7," i 2" . j i 27," Stiles (Outside and Side Views) i 1" 27:" -7." i® 1". •* "At* V - - 7." December 2008 Woodworker's Journal |


