Woodworker's Journal fall-2008, страница 25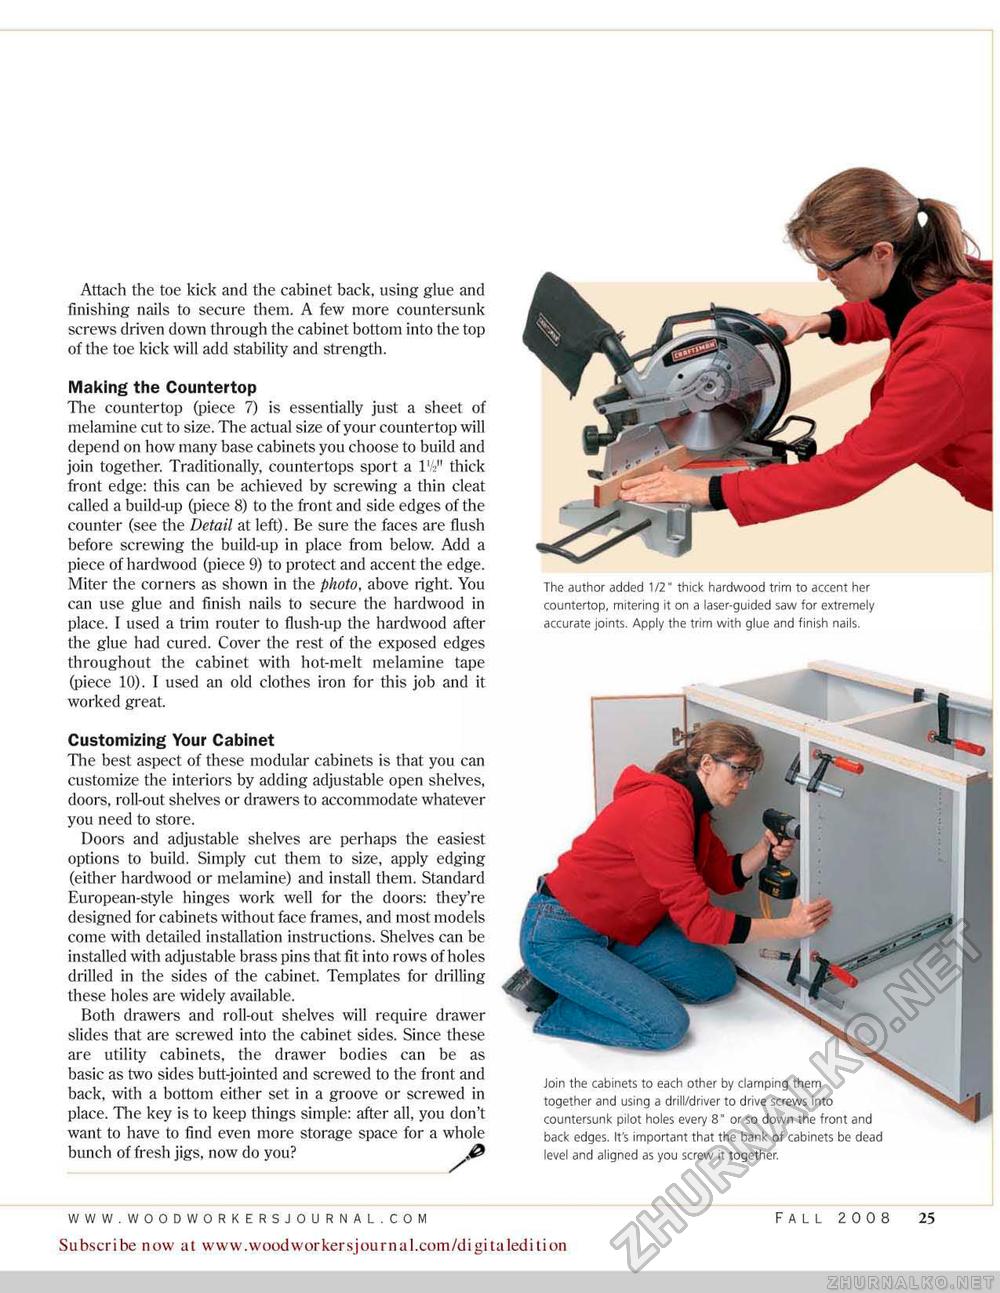
Attach the toe kick and the cabinet back, using glue and finishing nails to secure them. A few more countersunk screws driven down through the cabinet bottom into the top of the toe kick will add stability and strength. Making the Countertop The countertop (piece 7) is essentially just a sheet of melamine cut to size. The actual size of your countertop will depend on how many base cabinets you choose to build and join together. Traditionally, countertops sport a l'V thick front edge: this can be achieved by screwing a thin cleat called a build-up (piece 8} to the front and side edges of the counter (see the Detail at left). Be sure the faces are flush before screwing the build-up in place from below. Add a piece of hardwood (piece 9) to protect and accent the edge. Miter the corners as shown in the photo, above right. You can use glue and finish nails to secure the hardwood in place. I used a trim router to flush-up the hardwood after the glue had cured. Cover the rest of the exposed edges throughout the cabinet with hot-melt melamine tape (piece 10). I used an old clothes iron for this job and it worked great. Customizing Your Cabinet The best aspect of these modular cabinets is that you can customize the interiors by adding adjustable open shelves, doors, roll-out shelves or drawers to accommodate whatever you need to store. Doors and adjustable shelves are perhaps the easiest options to build. Simply cut them to size, apply edging (either hardwood or melamine) and install them. Standard European-style hinges work well for the doors: they're designed for cabinets without face frames, and most models come with detailed installation instructions. Shelves can he installed with adjustable brass pins that fit into rows of holes drilled in the sides of the cabinet. Templates for drilling these holes are widely available. Both drawers and roll-out shelves will require drawer slides that are screwed into the cabinet sides. Since these are utility cabinets, the drawer bodies can be as basic as two sides butt-jointed and screwed to the front and back, with a bottom either set in a groove or screwed in place. The key is to keep things simple: after all, you don't want to have to find even more storage space for a whole bunch of fresh jigs, now do you? & The author added 1/2" thick hardwood trim to accent her countertop, mitering it on a laser-guided saw for extremely accurate joints. Apply the trim with glue and finish nails. Join the cabinets to each other by damping them together and using a drill/driver to drive screws into countersunk pilot holes every 8" or so down the front and back edges. It's important that the bank of cabinets be dead level and aligned as you screw it together. Subscribe now at www.woodwoirkersjournal.com/digitaledition FALL 2008 25 |


