Woodworker's Journal fall-2008, страница 30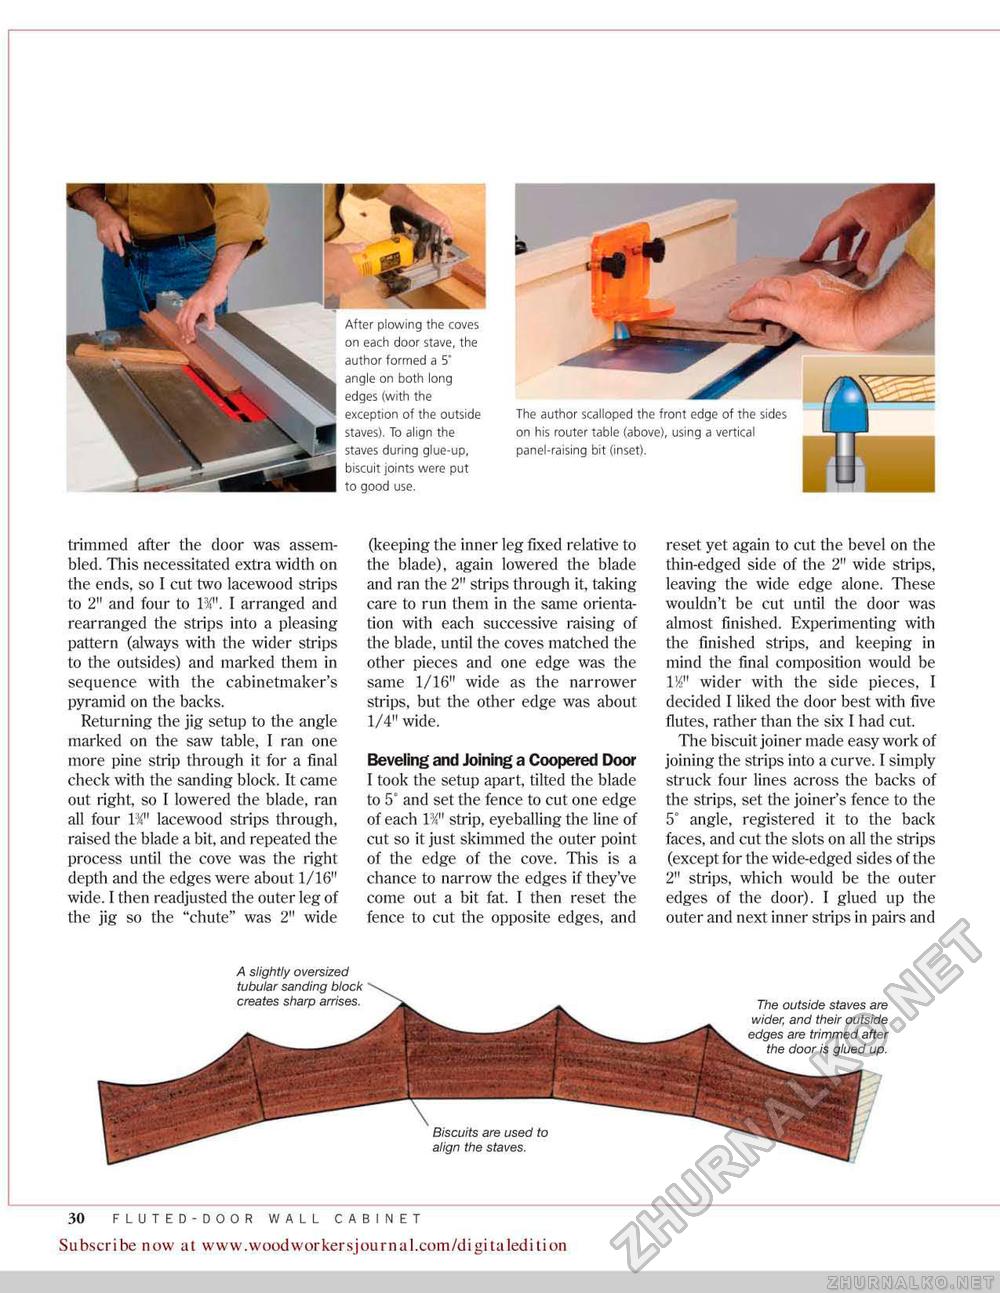
After plowing the coves on each door stave, the author formed a 5" angle on both long edges (with the exception of the outside staves). To align the staves during glue-upr biscuit joints were put to good use. The author scalloped the front edge of the sides on his router table (above), using a vertical panel-raising bit (inset). trimmed after the door was assembled. This necessitated extra width on the ends, so I cat two lacewood strips to 2" and four to IV. I arranged and rearranged the strips into a pleasing pattern (always with the wider strips to the outsides) and marked them in sequence with the cabinetmaker's pyramid on the backs. Returning the jig setup to the angle marked on the saw table, I ran one more pine strip through it for a final check with the sanding block. It came out right, so I lowered the blade, ran all four lacewood strips through, raised the blade a bit, and repeated the process until the cove was the right depth and the edges were about 1/16-' wide. I then readjusted the outer leg of the jig so the "chute" was 2" wide (keeping the inner leg fixed relative to the blade), again lowered the blade and ran the 2" strips through it, taking care to run them in the same orientation with each successive raising of the blade, until the coves matched the other pieces and one edge was the same 1/16" wide as the narrower strips, but the other edge was about 1/4" wide. Beveling and Joining a Coopered Door I took the setup apart, tilted the blade to 5° and set the fence to cut one edge of each W1 strip, eye balling the line of cut so it just skimmed the outer point of the edge of the cove. This is a chance to narrow the edges if they've come out a bit fat. I then reset the fence to cut the opposite edges, and reset yet again to cut the bevel on the thin-edged side of the 2" wide strips, leaving the wide edge alone. These wouldn't be cut until the door was almost finished. Experimenting with the finished strips, and keeping in mind the final composition would be 1W wider with the side pieces, I decided I liked the door best with five flutes, rather than the six I had cut. The biscuit joiner made easy work of joining the strips into a curve. I simply struck four lines across the backs of the strips, set the joiner's fence to the 5° angle, registered it to the back faces, and cut the slots on all the strips (except for the wide-edged sides of the 2" strips, which would he the outer edges of the door). I glued up the outer and next inner strips in pairs and A slightly oversized tubular sanding block creates sharp arrises. The outside staves are wider, and their outside edges are trimmed after the door is glued up. 30 EASY-TO-BUILD STORAGE CABINETS Subscribe now at www.wpodworkersjournal.com/digitaledition |


