Woodworker's Journal fall-2008, страница 67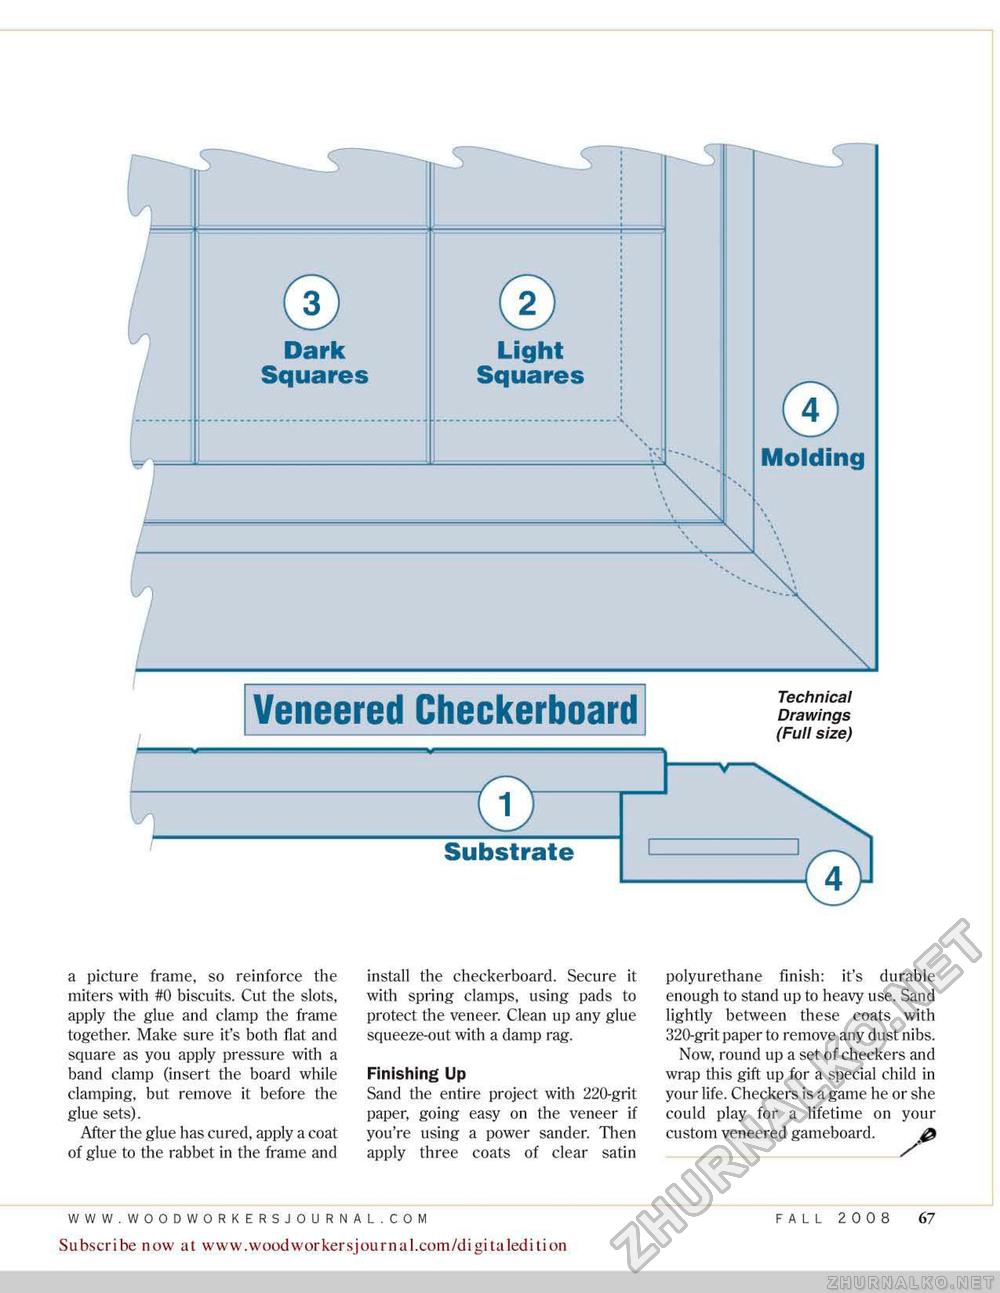
Veneered Checkerboard Technical Drawings (Full size) © Dark Squares Substrate © Light Squares © Molding a picture frame, so reinforce the miters with #0 biscuits. Cut the slots, apply the glue and clamp the frame together. Make sure it's both flat and square as you apply pressure with a band clamp (insert the board while clamping, but remove it before the glue sets). After the glue has cured, apply a coat of glue to the rabbet in the frame and install the checkerboard. Secure it with spring clamps, using pads to protect the veneer. Clean up any glue squeeze-out with a damp rag. Finishing Up Sand the entire project with 220-grit paper, going easy on the veneer if you're using a power sander. Then apply three coats of clear satin polyurethane finish: it's durable enough to stand up to heavy use. Sand lightly between these coats with 32U-grit paper to remove any dust nibs. Now, round up a set of checkers and wrap this gift up for a special child in your life. Checkers is a game he or she could play for a lifetime on your custom veneered gameboard. Subscribe now at www.woodwoirkersjournal.com/digitaledition FALL 2008 67 |


