Woodworker's Journal fall-2008, страница 64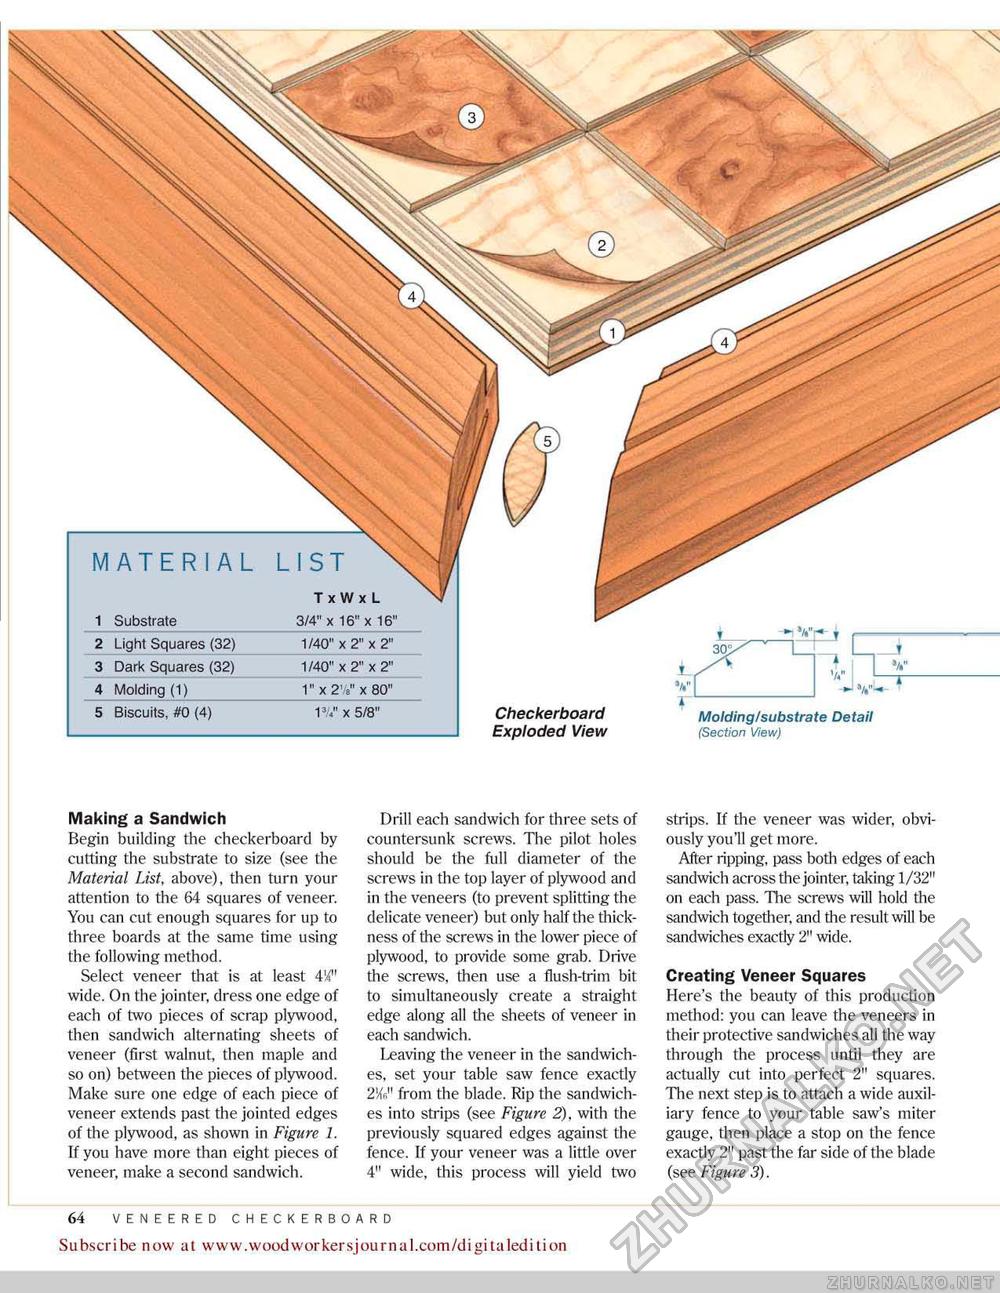
Checkerboard Exploded View Molding/substrate Detail (Section View) 2 Light Squares (32) 1/40" x 2" x 2" 3 Dark Squares <32) 1/40" x 2" x 2" 4 Molding (1) _1" x 21/s" x 80" 5 Biscuits, #0 (4) K" x 5/8" Tx Wx L 1 Substrate 3/4" x 16" x 16" Making a Sandwich Begin building The checkerboard by cutting the substrate to size (see the Material List, above), then turn your attention to the (54 squares of veneer. You can cut enough squares for up to three boards at the same time using the following method. Select veneer that is at least 4!4" wide. On the jointer, dress one edge of each of two pieces of scrap plywood, then sandwich alternating sheets of veneer (first walnut, then maple and so on) between the pieces of plywood. Make sure one edge of each piece of veneer extends past The jointed edges of the plywood, as shown in Figure L If you have more Than eight pieces of veneer, make a second sandwich. Drill each sandwich for three sets of countersunk screws. The pilot holes should be the full diameter of the screws in the top layer of plywood and in the veneers (to prevent splitting the delicate veneer) but only half the thickness of die screws in the lower piece of plywood, to provide some grab. Drive the screws, then use a flush-trim bit to simultaneously create a straight edge along all the sheets of veneer in each sandwich. Leaving the veneer in the sandwiches, set your table saw fence exactly 2Kb" from the blade. Rip the sandwiches into strips (see Figure 2), with the previously squared edges against the fence. If your veneer was a little over 4" wide, this process will yield two strips. If the veneer was wider, obviously you'll get more. After ripping, pass both edges of each sandwich across the jointer, taking 1/32" on each pass. The screws will hold the sandwich together, and the result will be sandwiches exactly 2" wide. Creating Veneer Squares Here's the beauty of this production method: you can leave the veneers in their protective sandwiches all the way through the process until they are actually cut into perfect 2" squares. The next step is to attach a wide auxiliary fence to your table saw's miter gauge, then place a stop on the fence exactly 2" past the far side of the blade (see Figure 3). 64 ARtS & CrAFtS STYLE SiDE TABLE Subscribe now at www.woodworkersjournal.com/digitaledition |


