Woodworker's Journal fall-2008, страница 73
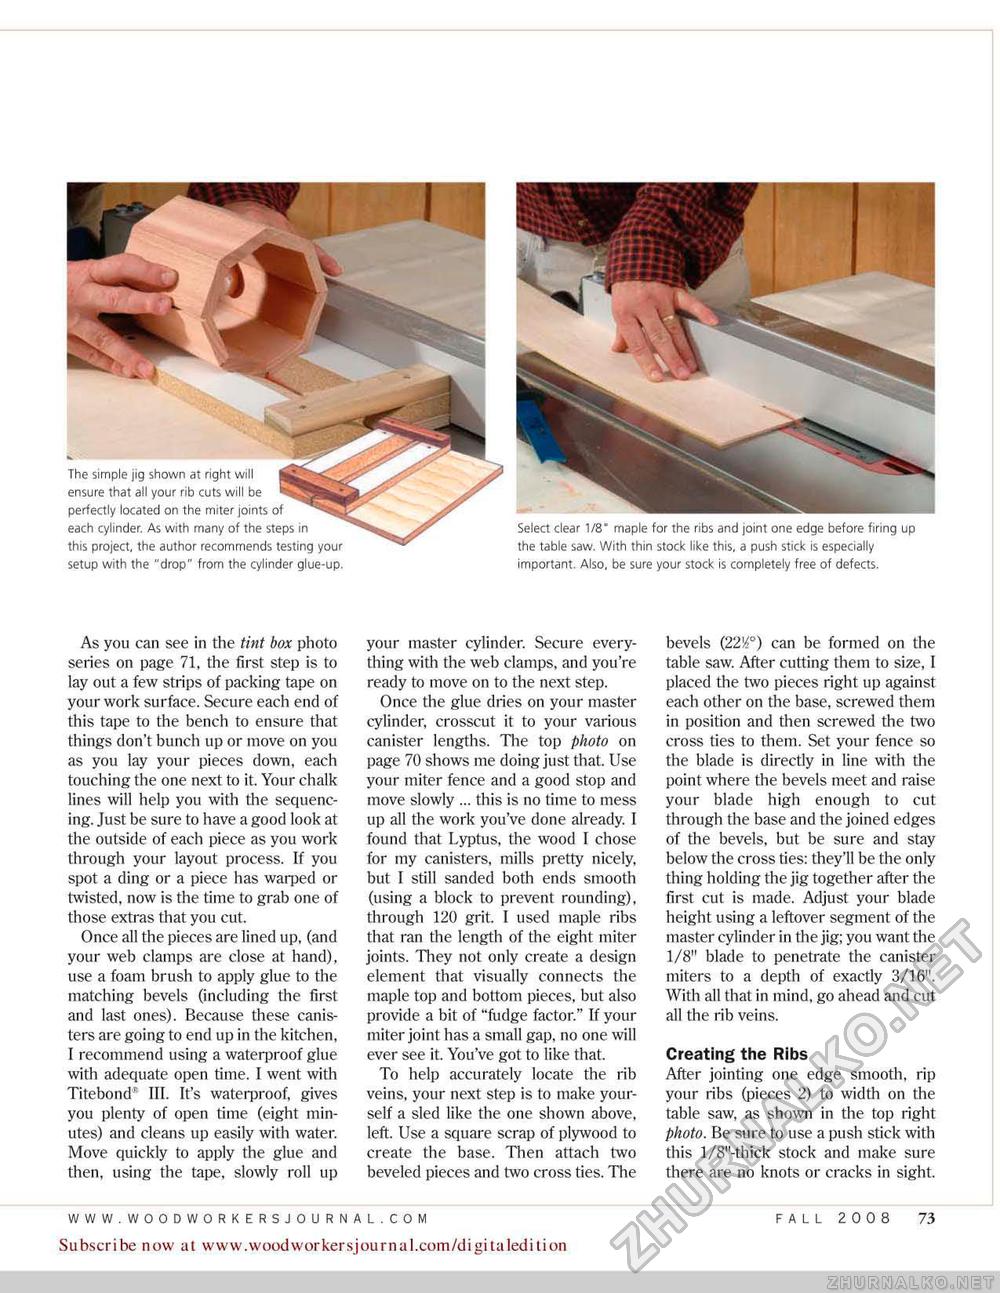
The simple jig shown at right Wilt ensure that all your rib cuts will be perfectly located on the rn;ter joints of each cylinder. As with many of the steps in this project the author recommends testing your setup with the "drop" from the cylinder glue-up. Select clear 1/8" maple for the ribs and joint one edge before firing up the table saw. With thin stock like this, a push stick is especially important. Also, be sure your stock is completely free of defects. As you can see in the tint box photo series on page 71, the first step is to lay out a few strips of packing tape on your work surface. Secure each end of this tape to the bench to ensure that things don't bunch up or move on you as you lay your pieces down, each touching the one next to it. Your chalk lines will help you with the sequencing. just be sure to have a good look at the outside of each piece as you work through your layout process. If you spot a ding or a piece has warped or twisted, now is the time to grab one of (hose extras that you cut. Once all the pieces are lined up, (and your web clamps are close at hand), use a foam brush to apply glue to the matching bevels {including the first and last ones). Because these canisters are going to end up in the kitchen, I recommend using a waterproof glue with adequate open time. I went with TiteboiuP III. It's waterproof, gives you plenty of open time (eight minutes) and cleans tip easily with water. Move quickly to apply the glue and then, using the tape, slowly roll up your master cylinder. Secure everything with the web clamps, and you're ready to move on to the next step. Once the glue dries on your master cylinder, crosscut it to your various canister lengths. The top photo on page 70 shows me doing just that. Use your miter fence and a good stop and move slowly ... this is no time to mess up all the work you've done already I found that Lyptus, the wood I chose tor my canisters, mills pretty nicely, but I still sanded both ends smooth (using a block to prevent rounding), through 120 grit. I used maple ribs that ran the length of the eight miter joints. They not only create a design element that visually connects the maple top and bottom pieces, but also provide a bit of "fudge factor." If your miter joint has a small gap, no one will ever see it. You've got to like that. To help accurately locate the rib veins, your next step is to make yourself a sled like the one shown above, left. Use a square scrap of plywood to create the base. Then attach two beveled pieces and two cross ties. The bevels (22l4°) can be formed on the table saw. After cutting them to size, I placed the two pieces right up against each other on the base, screwed them in position and then screwed the two cross ties to them. Set your fence so the blade is directly in line with the point where the bevels meet and raise your blade high enough to cut through the base and the joined edges of the bevels, but be sure and stay below the cross ties: they'll be the only thing holding the jig together after the first cut is made. Adjust your blade height using a leftover segment of the master cylinder in the jig; you want the 1/8" blade to penetrate the canister miters to a depth of exactly 3/16". With all that in mind, go ahead and cut all the rib veins. Creating the Ribs After jointing one edge smooth, rip your ribs (pieces 2) to width on the table saw, as shown in the top right photo. Be sure to use a push stick with this l/8"-thick stock and make sure there are no knots or cracks in sight. Subscribe now at www.woodwoirkersjournal.com/digitaledition FALL 2008 73 |


