Woodworker's Journal fall-2010, страница 28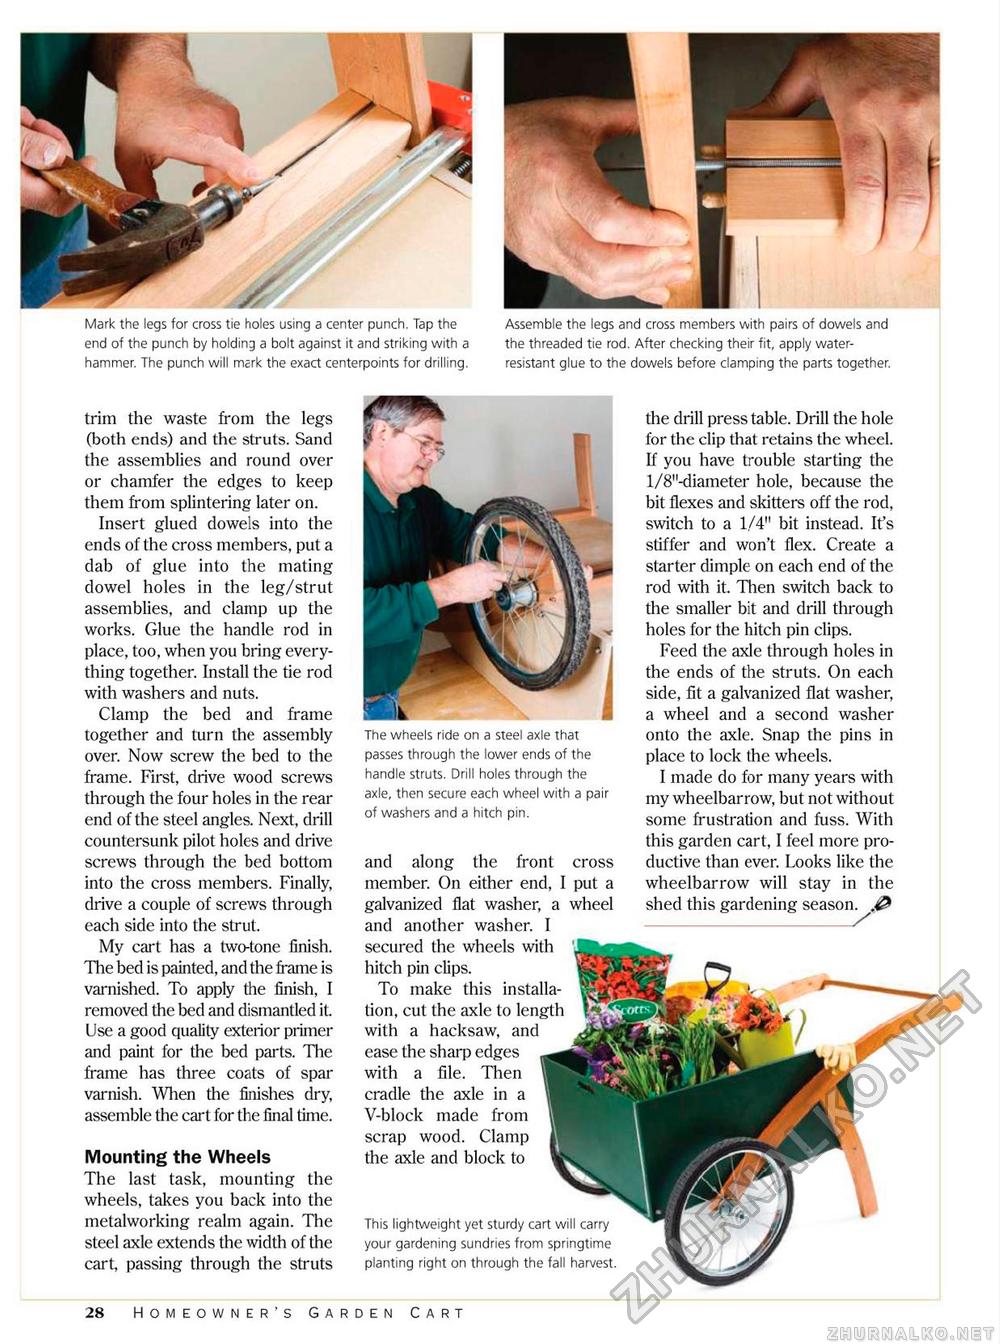
end of the punch by holding a bolt against it and striking with a hammer. The punch will mark the exact centerpoints for drilling. trim the waste from the legs (both ends) and the struts. Sand the assemblies and round over or chamfer the edges to keep them from splintering later on. Insert glued dowels into the ends of the cross members, put a dab of glue into the mating dowel holes in the leg/strut assemblies, and clamp up the works. Glue the handle rod in place, too, when you bring everything together. Install the tie rod with washers and nuts. Clamp the bed and frame together and turn the assembly over. Now screw the bed to the frame. First, drive wood screws through the four holes in the rear end of the steel angles. Next, drill countersunk pilot holes and drive screws through the bed bottom into the cross members. Finally, drive a couple of screws through each side into the strut. My cart has a two-tone finish. The bed is painted, and the frame is varnished. To apply the finish, I removed the bed and dismantled it. Use a good quality exterior primer and paint for the bed parts. The frame has three coats of spar varnish. When the finishes dry, assemble the cart for the final time. Mounting the Wheels The last task, mounting the wheels, takes you back into the metalworking realm again. The steel axle extends the width of the cart, passing through the struts 28 Homeowner's Garden Cart Assemble the legs and cross members with pairs of dowels and the threaded tie rod. After checking their fit, apply water-resistant glue to the dowels before clamping the parts together. This lightweight yet sturdy cart will carry your gardening sundries from springtime planting right on through the fall harvest. the drill press table. Drill the hole for the clip that retains the wheel. If you have trouble starting the l/8"-diameter hole, because the bit flexes and skitters off the rod, switch to a 1/4" bit instead. It's stiffer and won't flex. Create a starter dimple on each end of the rod with it. Then switch back to the smaller bit and drill through holes for the hitch pin clips. Feed the axle through holes in the ends of the struts. On each side, fit a galvanized flat washer, a wheel and a second washer onto the axle. Snap the pins in place to lock the wheels. I made do for many years with my wheelbarrow, but not without some frustration and fuss. With this garden cart, I feel more productive than ever. Looks like the wheelbarrow will stay in the shed this gardening season. The wheels ride on a steel axle that passes through the lower ends of the handle struts. Drill holes through the axle, then secure each wheel with a pair of washers and a hitch pin. and along the front cross member. On either end, I put a galvanized flat washer, a wheel and another washer. I secured the wheels with hitch pin clips. To make this installation, cut the axle to length with a hacksaw, and ease the sharp edges with a file. Then cradle the axle in a V-block made from scrap wood. Clamp the axle and block to |


