Woodworker's Journal fall-2010, страница 30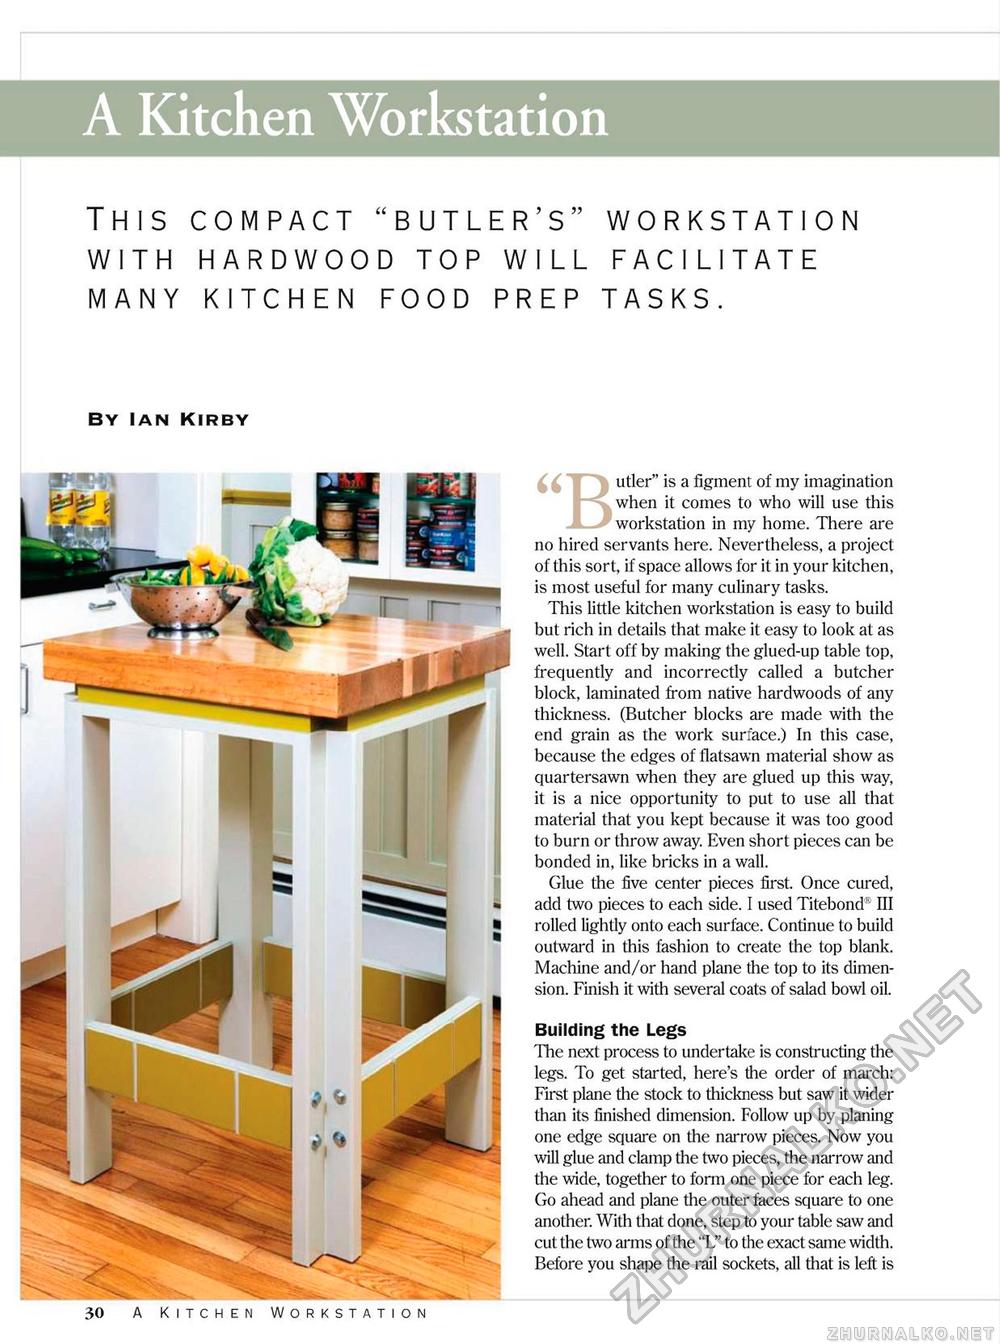
A Kitchen Workstation This compact "butler's" workstation with hardwood top will facilitate many kitchen food prep tasks. By Ian Kirby utler" is a figment of my imagination when it comes to who will use this workstation in my home. There are no hired servants here. Nevertheless, a project of this sort, if space allows for it in your kitchen, is most useful for many culinary tasks. This little kitchen workstation is easy to build but rich in details that make it easy to look at as well. Start off by making the glued-up table top, frequently and incorrectly called a butcher block, laminated from native hardwoods of any thickness. (Butcher blocks are made with the end grain as the work surface.) In this case, because the edges of flatsawn material show as quartersawn when they are glued up this way, it is a nice opportunity to put to use all that material that you kept because it was too good to burn or throw away. Even short pieces can be bonded in, like bricks in a wall. Glue the five center pieces first. Once cured, add two pieces to each side. I used Titebond® III rolled lightly onto each surface. Continue to build outward in this fashion to create the top blank. Machine and/or hand plane the top to its dimension. Finish it with several coats of salad bowl oil. Building the Legs ITie next process to undertake is constructing the legs. To get started, here's the order of march: First plane the stock to thickness but saw it wider than its finished dimension. Follow up by planing one edge square on the narrow pieces. Now you will glue and clamp the two pieces, the narrow and the wide, together to form one piece for each leg. Go ahead and plane the outer faces square to one another. With that done, step to your table saw and cut the two arms of the "L" to the exact same width. Before you shape the rail sockets, all that is left is |


