Woodworker's Journal Summer-2008, страница 63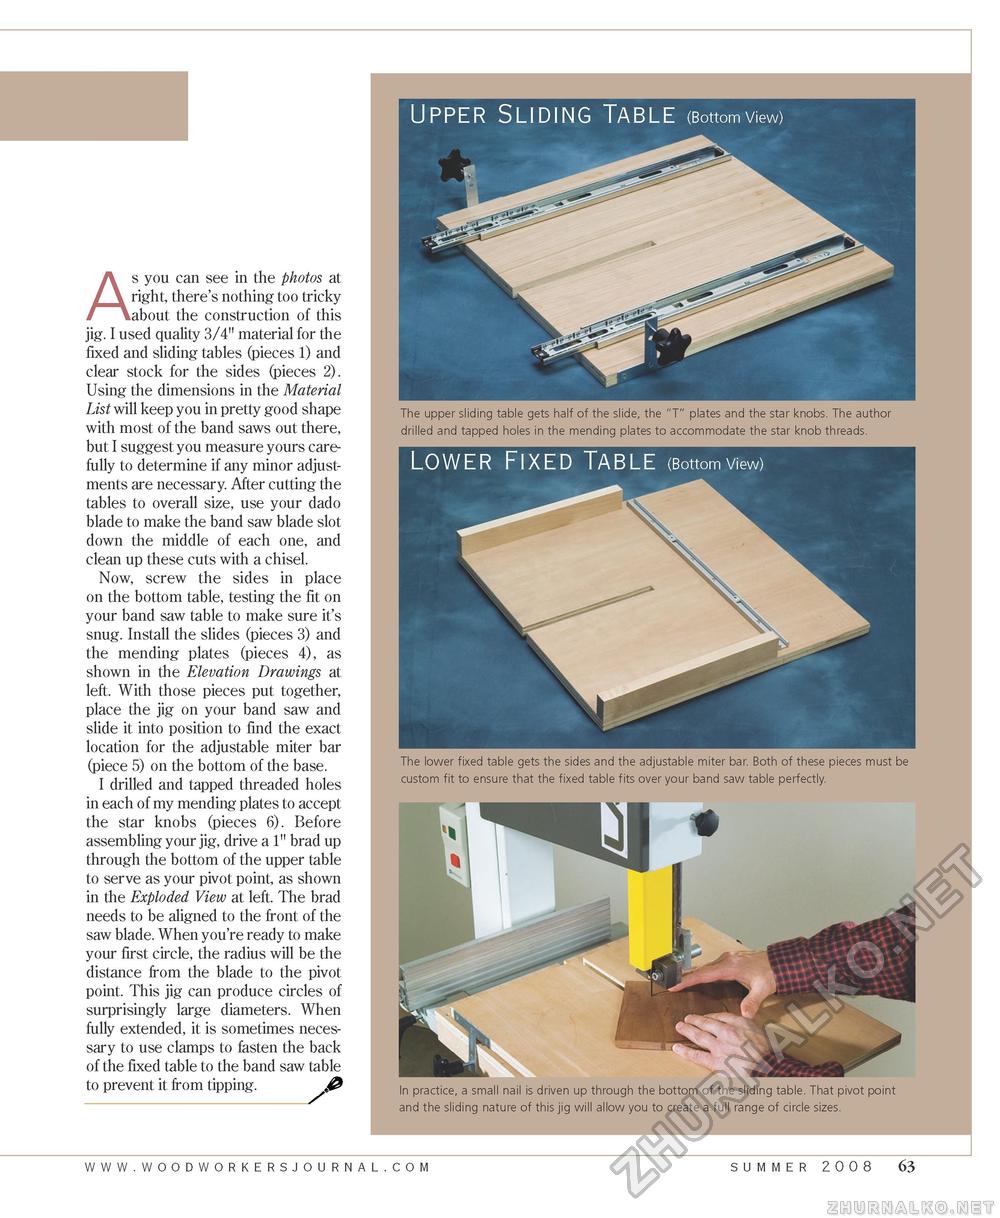
As you can see in the photos at right, there's nothing too tricky about the construction of this jig. I used quality 3/4" material for the fixed and sliding tables (pieces 1) and clear stock for the sides (pieces 2). Using the dimensions in the Material List will keep you in pretty good shape with most of the band saws out there, but I suggest you measure yours carefully to determine if any minor adjustments are necessary. After cutting the tables to overall size, use your dado blade to make the band saw blade slot down the middle of each one, and clean up these cuts with a chisel. Now, screw the sides in place on the bottom table, testing the fit on your band saw table to make sure it's snug. Install the slides (pieces 3) and the mending plates (pieces 4), as shown in the Elevation Drawings at left. With those pieces put together, place the jig on your band saw and slide it into position to find the exact location for the adjustable miter bar (piece 5) on the bottom of the base. I drilled and tapped threaded holes in each of my mending plates to accept the star knobs (pieces 6). Before assembling your jig, drive a 1" brad up through the bottom of the upper table to serve as your pivot point, as shown in the Exploded View at left. The brad needs to be aligned to the front of the saw blade. When you're ready to make your first circle, the radius will be the distance from the blade to the pivot point. This jig can produce circles of surprisingly large diameters. When fully extended, it is sometimes necessary to use clamps to fasten the back of the fixed table to the band saw table to prevent it from tipping. £ The upper sliding table gets half of the slide, the "T" plates and the star knobs. The author drilled and tapped holes in the mending plates to accommodate the star knob threads. www.woodworkersjourna l . c o m summer 2008 63 |


