Woodworker's Journal Summer-2008, страница 65
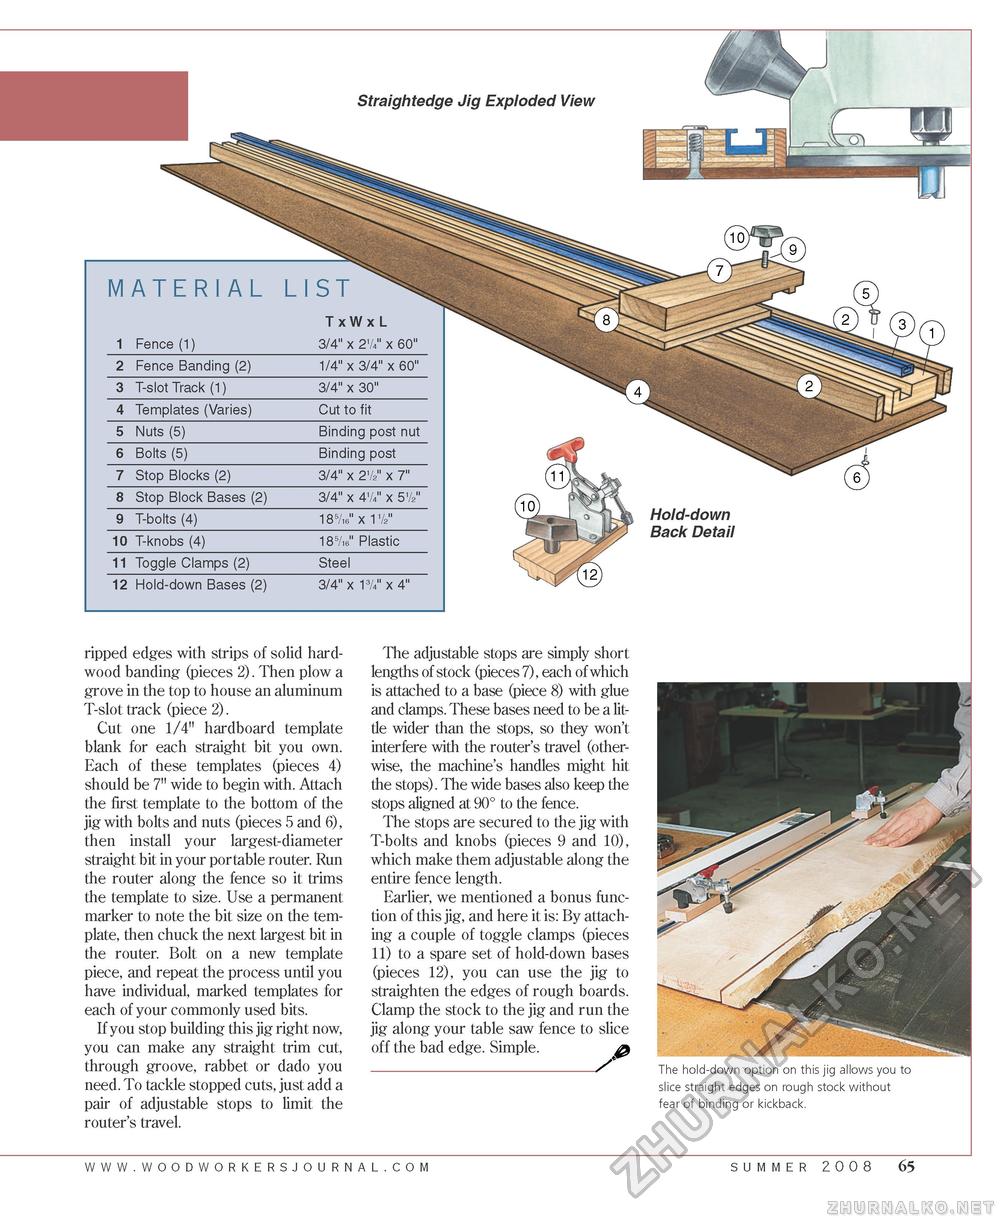
Straightedge Jig Exploded View
Hold-down Back Detail ripped edges with strips of solid hardwood banding (pieces 2). Then plow a grove in the top to house an aluminum T-slot track (piece 2). Cut one 1/4" hardboard template blank for each straight bit you own. Each of these templates (pieces 4) should be 7" wide to begin with. Attach the first template to the bottom of the jig with bolts and nuts (pieces 5 and 6), then install your largest-diameter straight bit in your portable router. Run the router along the fence so it trims the template to size. Use a permanent marker to note the bit size on the template, then chuck the next largest bit in the router. Bolt on a new template piece, and repeat the process until you have individual, marked templates for each of your commonly used bits. If you stop building this jig right now, you can make any straight trim cut, through groove, rabbet or dado you need. To tackle stopped cuts, just add a pair of adjustable stops to limit the router's travel. The adjustable stops are simply short lengths of stock (pieces 7), each of which is attached to a base (piece 8) with glue and clamps. These bases need to be a little wider than the stops, so they won't interfere with the router's travel (otherwise, the machine's handles might hit the stops). The wide bases also keep the stops aligned at 90° to the fence. The stops are secured to the jig with T-bolts and knobs (pieces 9 and 10), which make them adjustable along the entire fence length. Earlier, we mentioned a bonus function of this jig, and here it is: By attaching a couple of toggle clamps (pieces 11) to a spare set of hold-down bases (pieces 12), you can use the jig to straighten the edges of rough boards. Clamp the stock to the jig and run the jig along your table saw fence to slice off the bad edge. Simple. The hold-down option on this jig allows you to slice straight edges on rough stock without fear of binding or kickback. www.woodworkersjourna l . c o m summer 2008 65 |


