Woodworker's Journal winter-2009, страница 14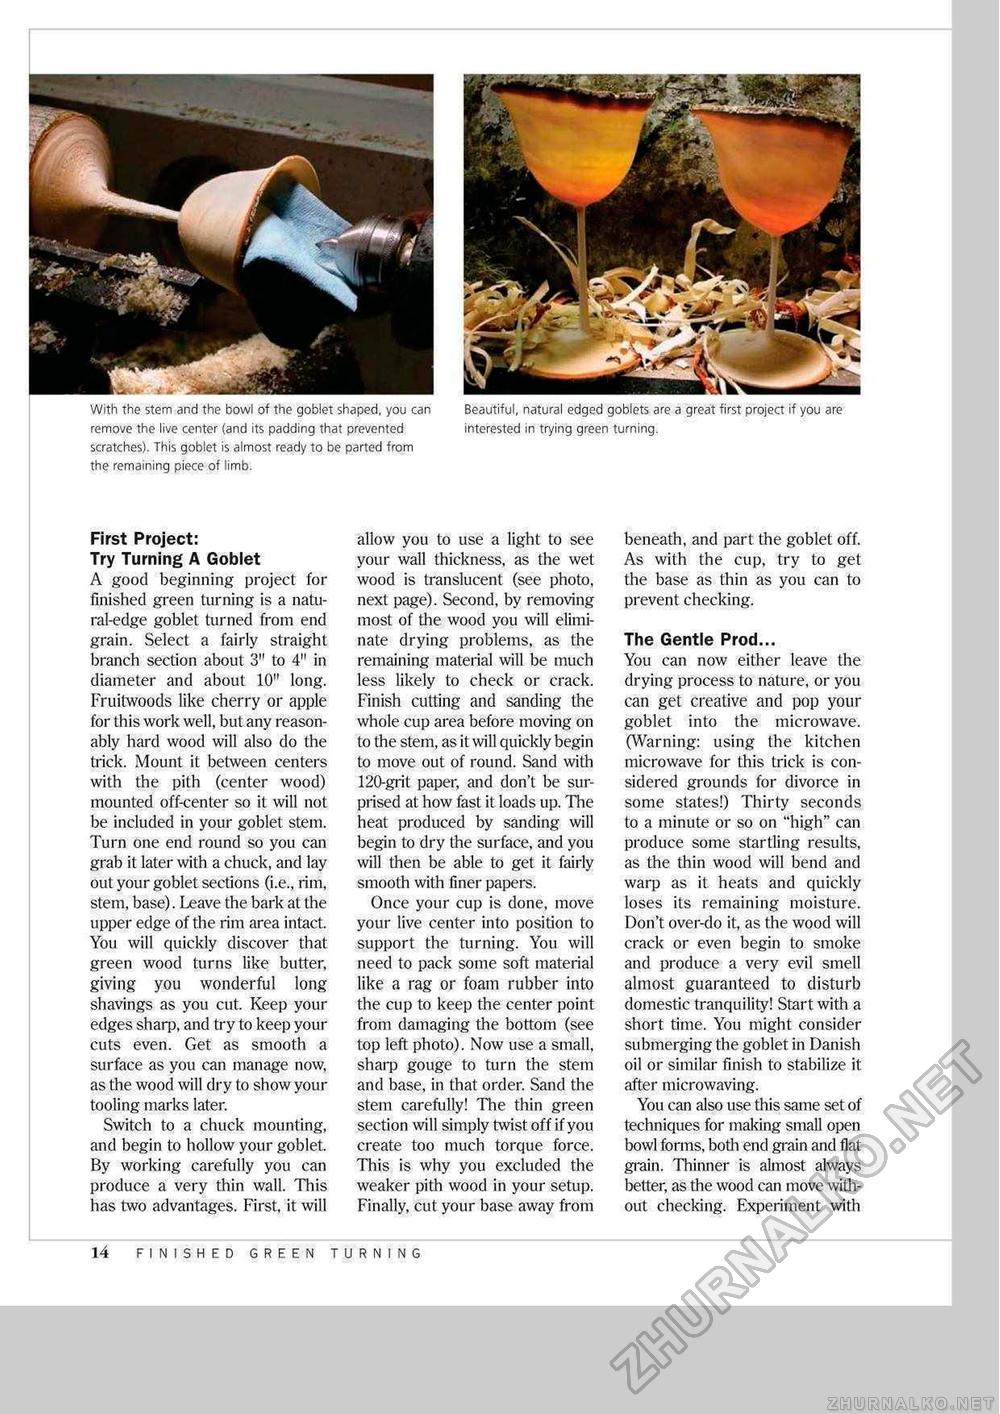
With the stem and the bowl of the goblet shaped, you can remove the live center (and its padding that prevented scratches). This goblet is almost ready to be parted from the remaining piece of limb. Beautiful, natural edged goblets are a great first project if you are interested in trying green turning. First Project: Try Turning A Goblet A good beginning project for finished green turning is a natu-ral-edge goblet turned from end grain. Select a fairly straight branch section about 3" to 4" in diameter and about 10" long. Fruitwoods like cherry or apple for this work well, but any reasonably hard wood will also do the trick. Mount it between centers with the pith (center wood) mounted off-center so it will not be included in your goblet stem. Turn one end round so you can grab it later with a chuck, and lay out your goblet sections (i.e., rim, stem, base). Leave the bark at the upper edge of the rim area intact. You will quickly discover that green wood turns like butter, giving you wonderful long shavings as you cut. Keep your edges sharp, and try to keep your cuts even. Get as smooth a surface as you can manage now, as the wood will dry to show your tooling marks later. Switch to a chuck mounting, and begin to hollow your goblet. By working carefully you can produce a very thin wall. This has two advantages. First, it will allow you to use a light to see your wall thickness, as the wet wood is translucent (see photo, next page). Second, by removing most of the wood you will eliminate drying problems, as the remaining material will be much less likely to check or crack. Finish cutting and sanding the whole cup area before moving on to the stem, as it will quickly begin to move out of round. Sand with 120-grit paper, and don't be surprised at how fast it loads up. The heat produced by sanding will begin to dry the surface, and you will then be able to get it fairly smooth with finer papers. Once your cup is done, move your live center into position to support the turning. You will need to pack some soft material like a rag or foam rubber into the cup to keep the center point from damaging the bottom (see top left photo). Now use a small, sharp gouge to turn the stem and base, in that order. Sand the stem carefully! The thin green section will simply twist off if you create too much torque force. This is why you excluded the weaker pith wood in your setup. Finally, cut your base away from beneath, and part the goblet off. As with the cup, try to get the base as thin as you can to prevent checking. The Gentle Prod... You can now either leave the drying process to nature, or you can get creative and pop your goblet into the microwave. (Warning: using the kitchen microwave for this trick is considered grounds for divorce in some states!) Thirty seconds to a minute or so on "high" can produce some startling results, as the thin wood will bend and warp as it heats and quickly loses its remaining moisture. Don't over-do it, as the wood will crack or even begin to smoke and produce a very evil smell almost guaranteed to disturb domestic tranquility! Start with a short time. You might consider submerging the goblet in Danish oil or similar finish to stabilize it after microwaving. You can also use this same set of techniques for making small open bowl forms, both end grain and flat grain. Thinner is almost always better, as the wood can move without checking. Experiment with 14 finished green turning |


